
Fine-Tuning Your Miter Gauge
Workshop Modifications to Your Miter Gauge
You want to make high quality projects but there are a few hidden traps that can impact your table saw cuts. And the worst part is, most woodworkers, even the experienced ones, don’t even think about them.
I noticed that sometimes my cuts were off, despite taking time to properly set up my miter gauge. I dissected all the nuances of using a miter gauge in order to figure out what is most likely causing the issue. This resulted in me making two major changes to my miter gauge: I switched from using a sacrificial fence to an end block, and I changed how I use a stop block.
*As an Amazon Associate I earn from qualifying purchases.
What is a Sacrificial Fence
We want to prevent tearout when cutting boards at the table saw. Tearout can occur when you cut a board across the grain. As the blade exits the board, the wood fibers on the back edge can splinter or chip away. Unfortunately, it can ruin the workpiece entirely if the tearout is bad enough.
It helps to use a good quality blade that has a lot of teeth. Though, many experienced woodworkers will use a sacrificial fence as well. Most miter gauges have slots that allow you to connect a piece of MDF. The MDF sticks past the miter gauge and backs against the workpiece, in turn, reducing the chances of tearout during cuts.

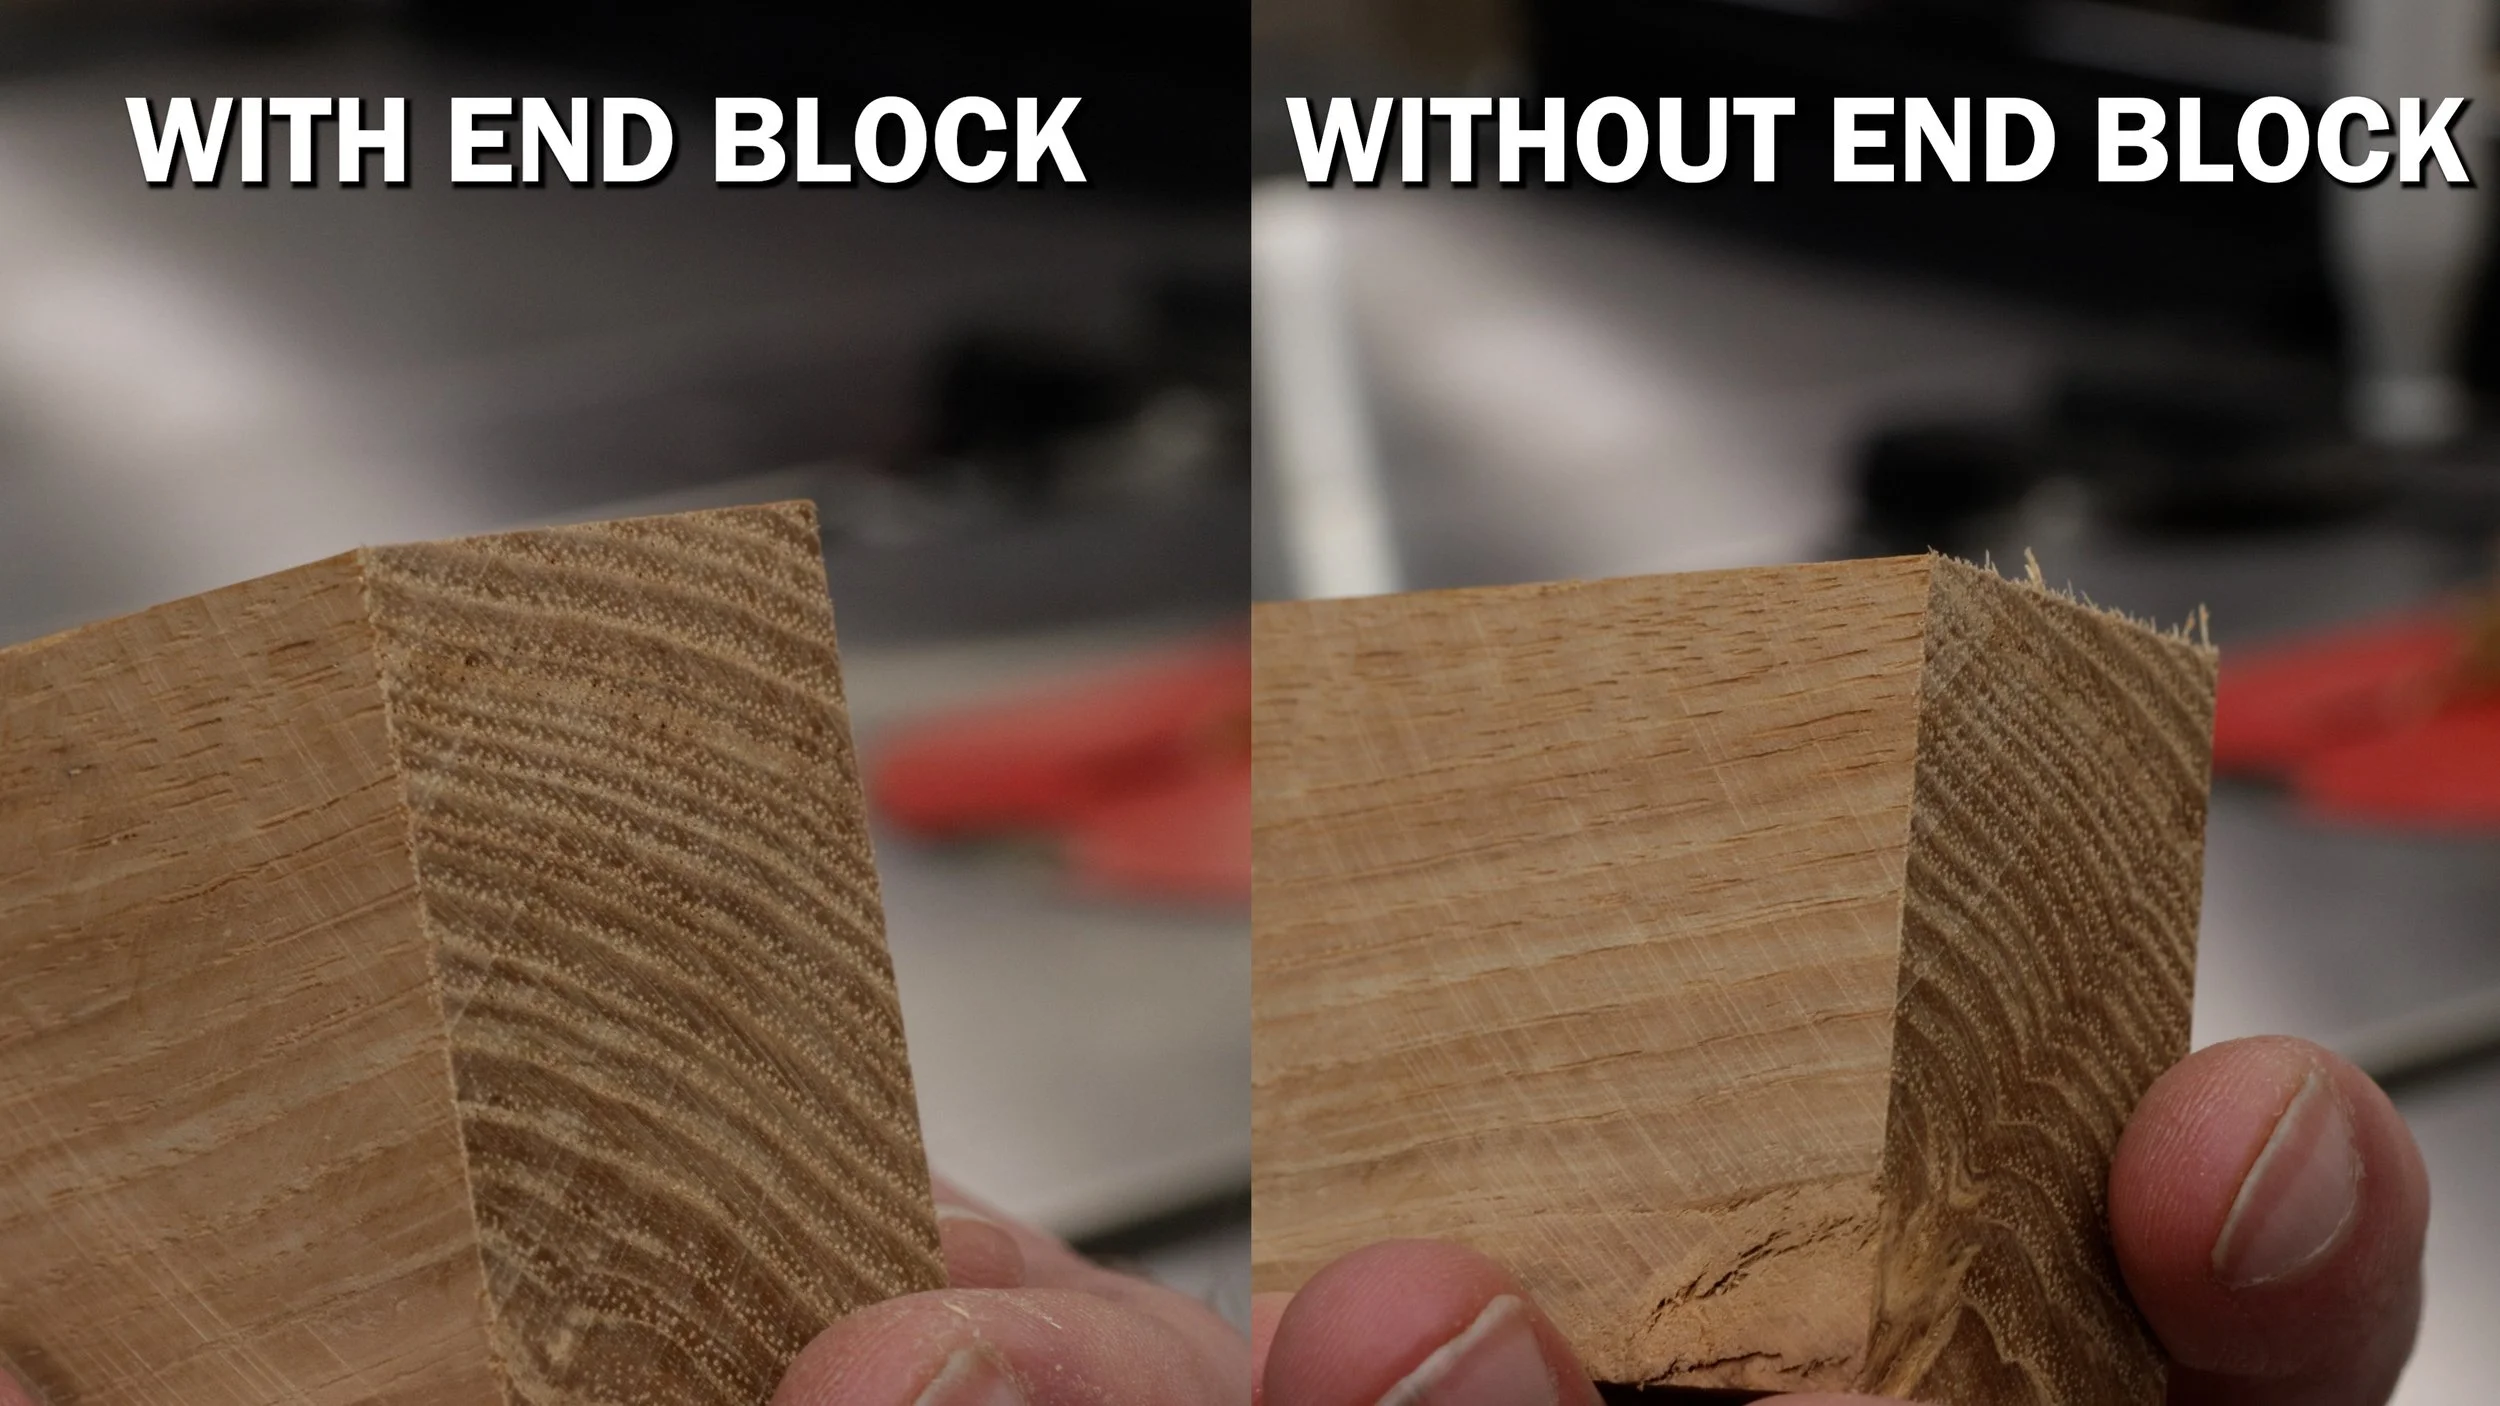
Miter Gauge End Block vs. Sacrificial Fence
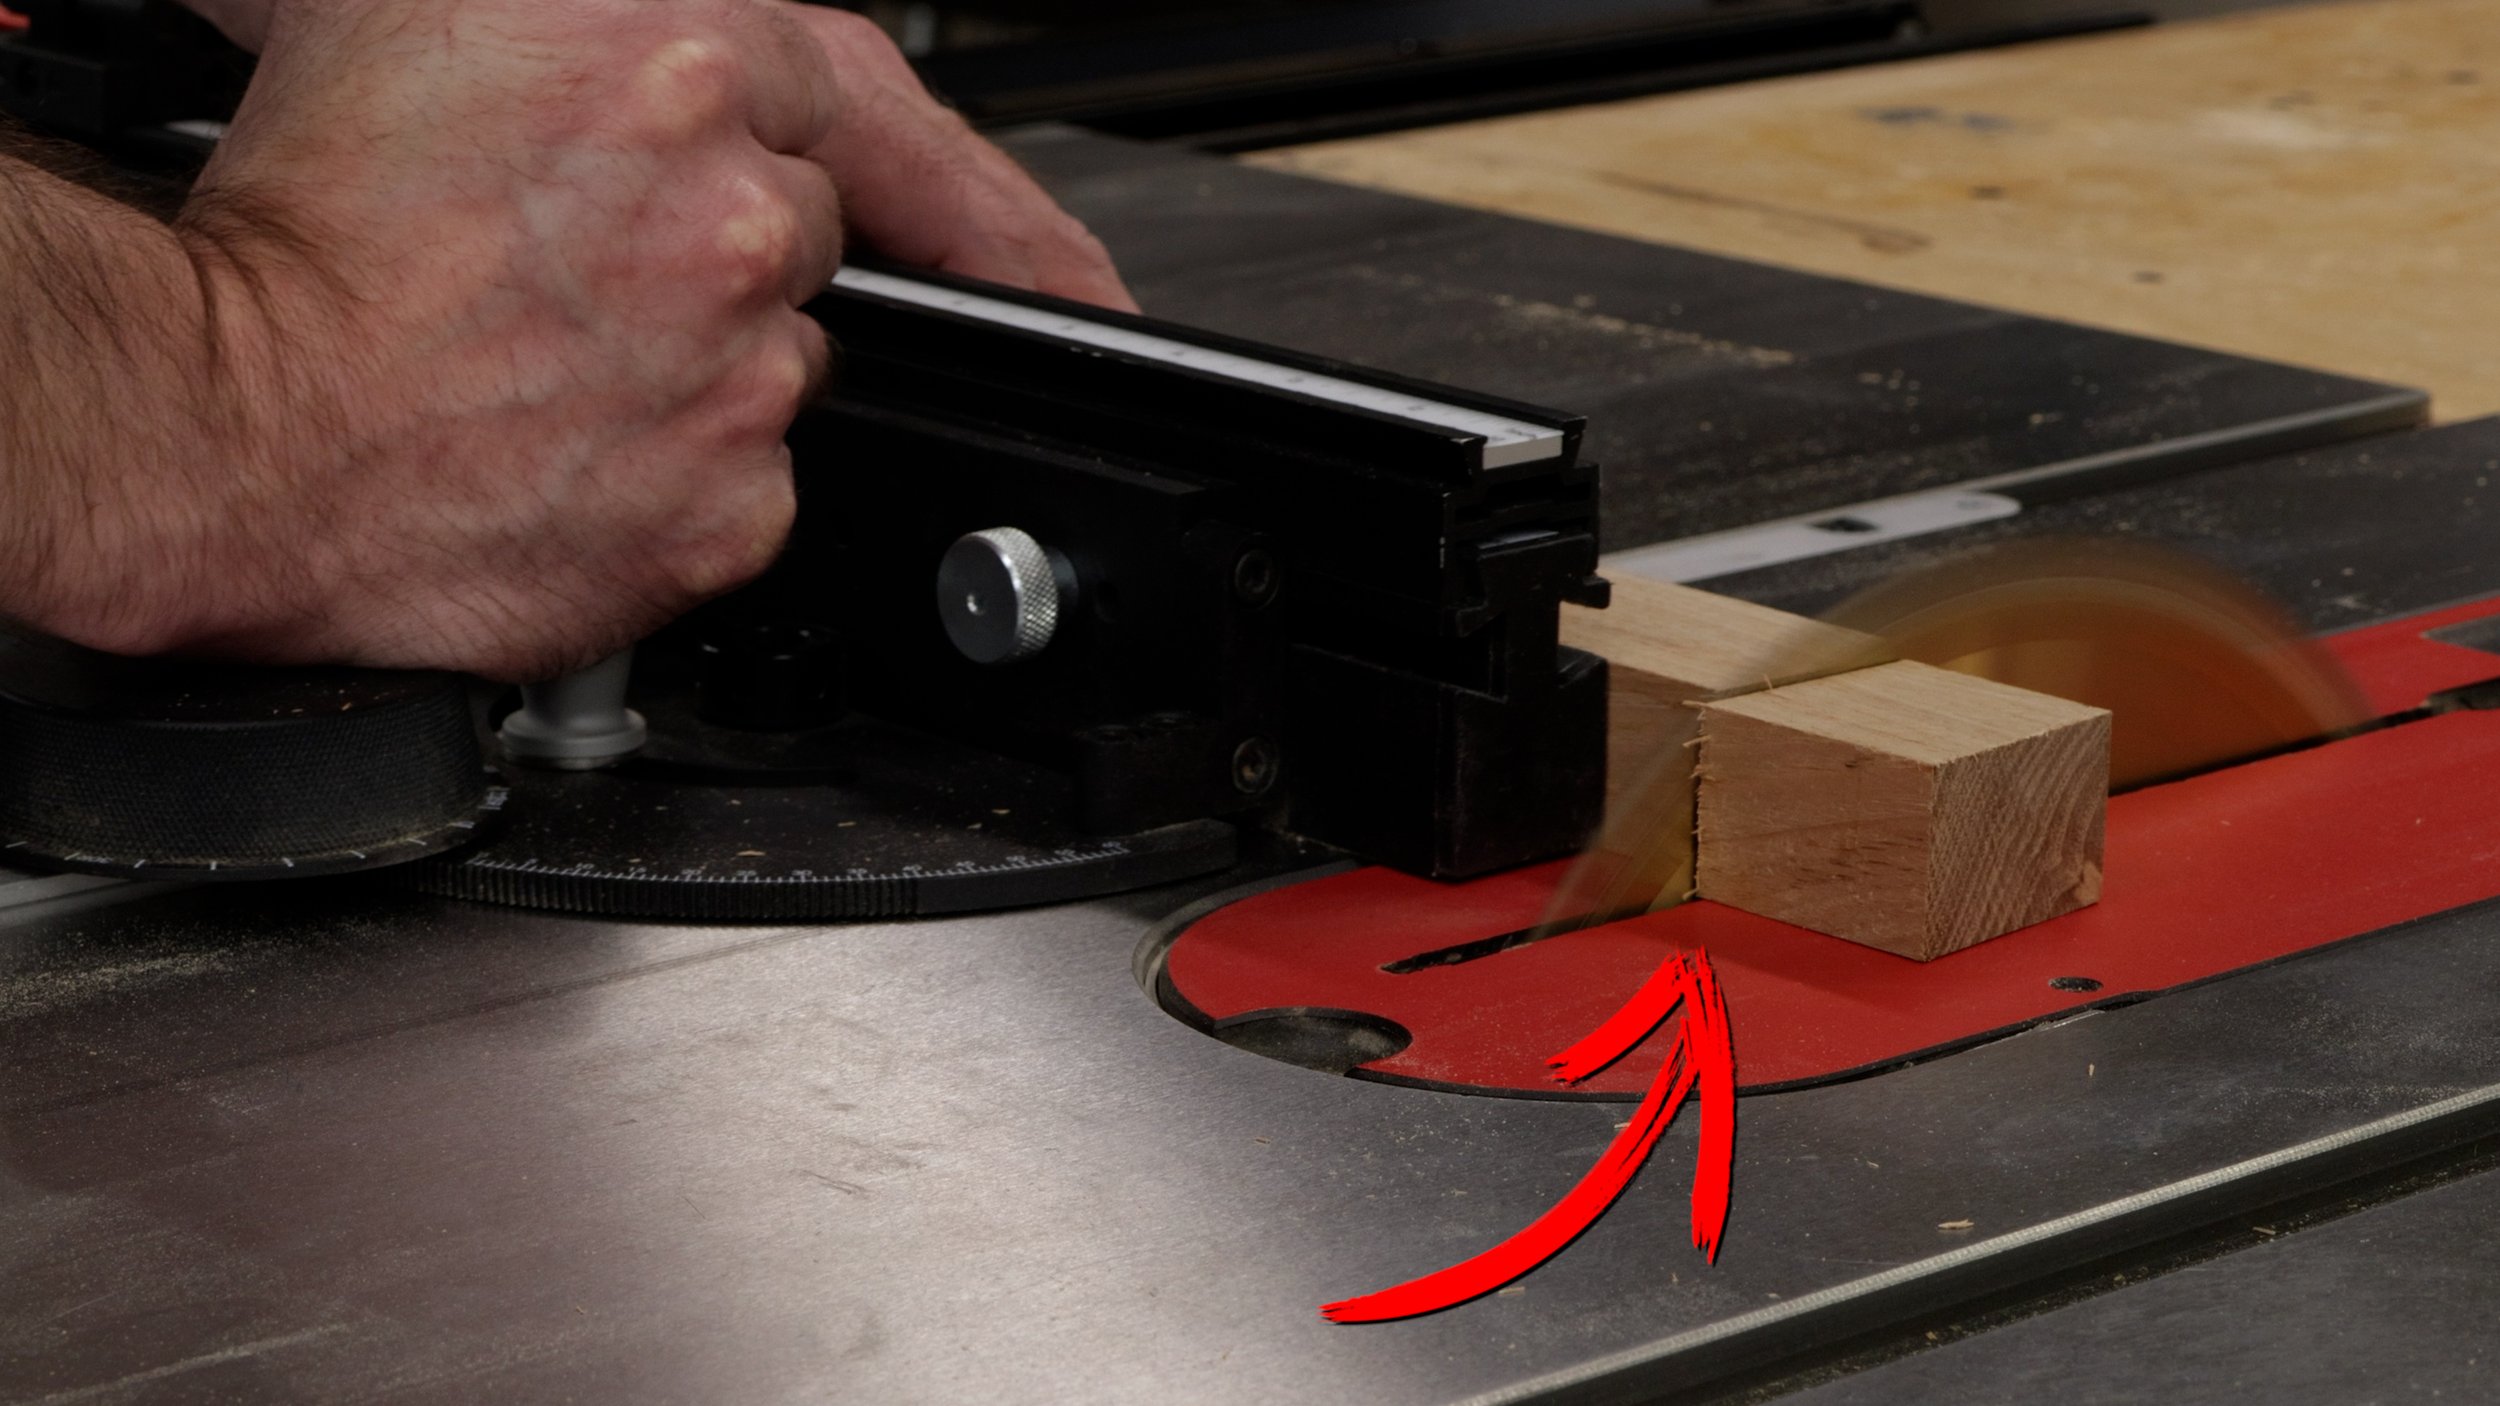
As we use our sacrificial fence, the end will get chewed up. No big deal! Loosen the bolts, slide it a little towards the blade, and retighten it. Unfortunately, this is where some of my cuts go wrong. I try to simply snug up each bolt, but found that slight differences between how much I tightened one bolt vs another caused my sacrificial board to be a tad wavy. On top that, while MDF is really flat, it’s not as flat and smooth as the miter gauge’s fence. The combination of a potentially non-flat surface plus inconsistent bolts threw my miter gauge out of calibration.
Disclaimer - We should always check that our miter gauge is still 90 degrees to the saw blade after making adjustments to a sacrificial fence. I know this, but I also know that I sometimes forget to do it. There’s nothing wrong with using a sacrificial fence when we pay close attention to the details. In my case, I found an alternative solutions: an end block!
How to Make a Miter Gauge End Block
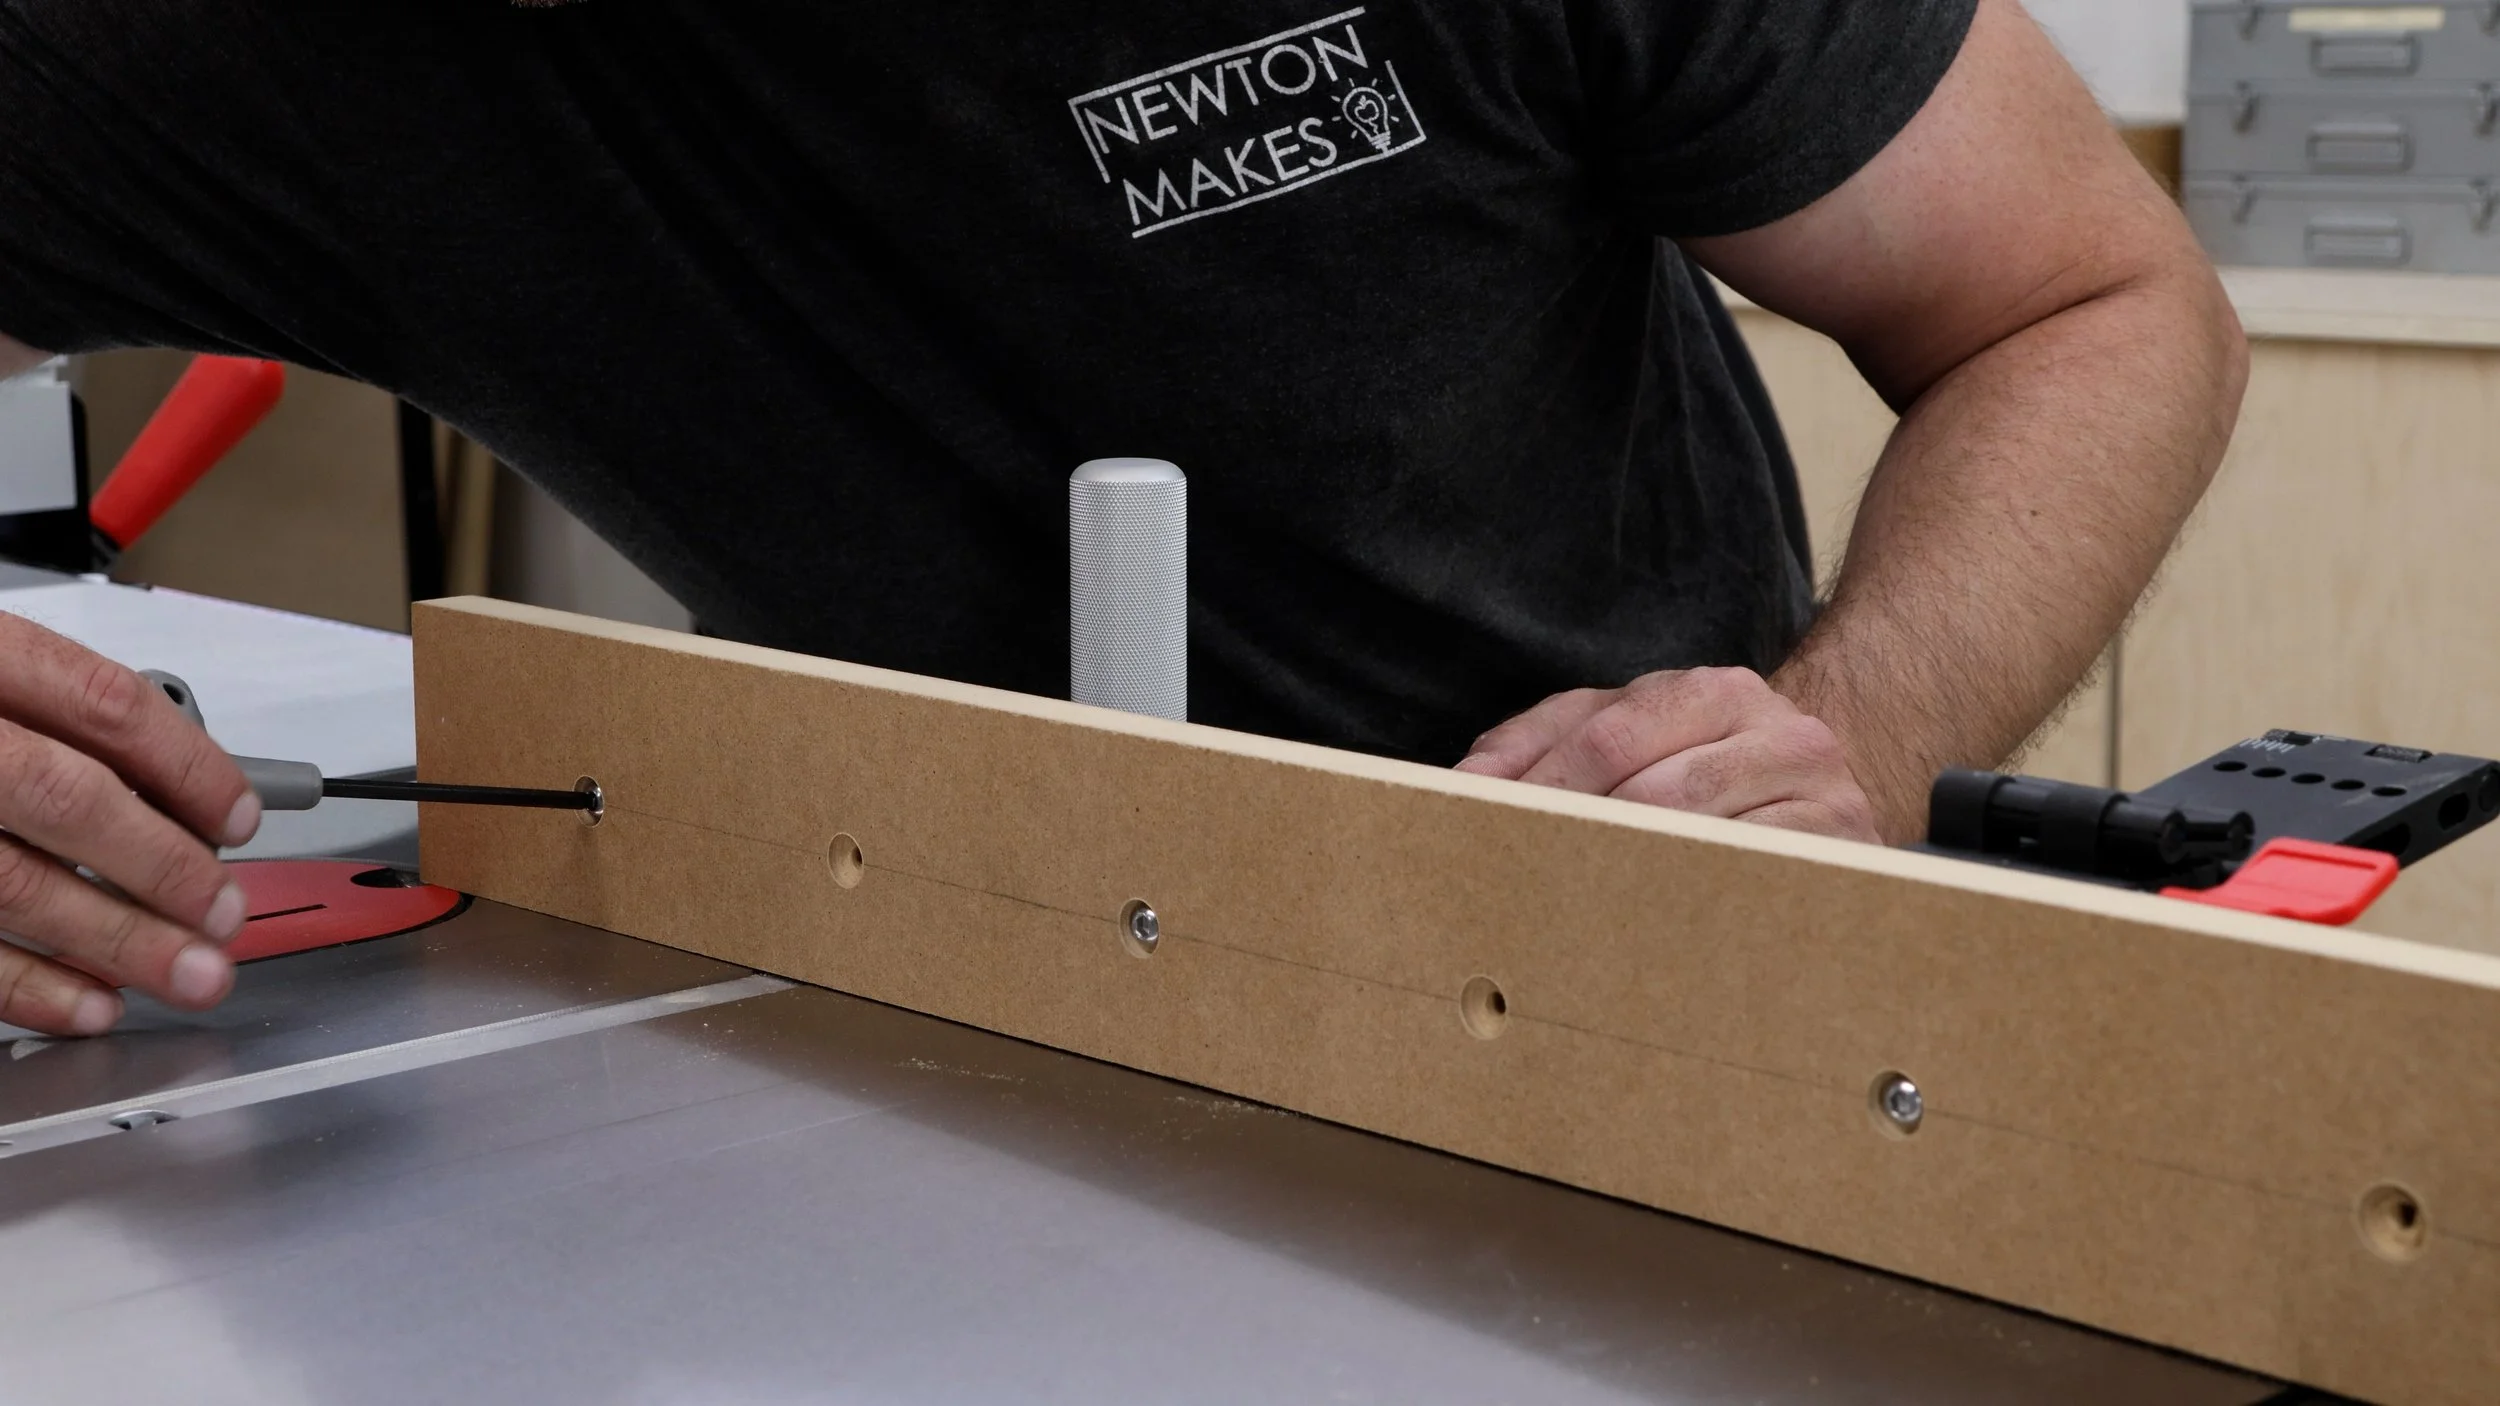
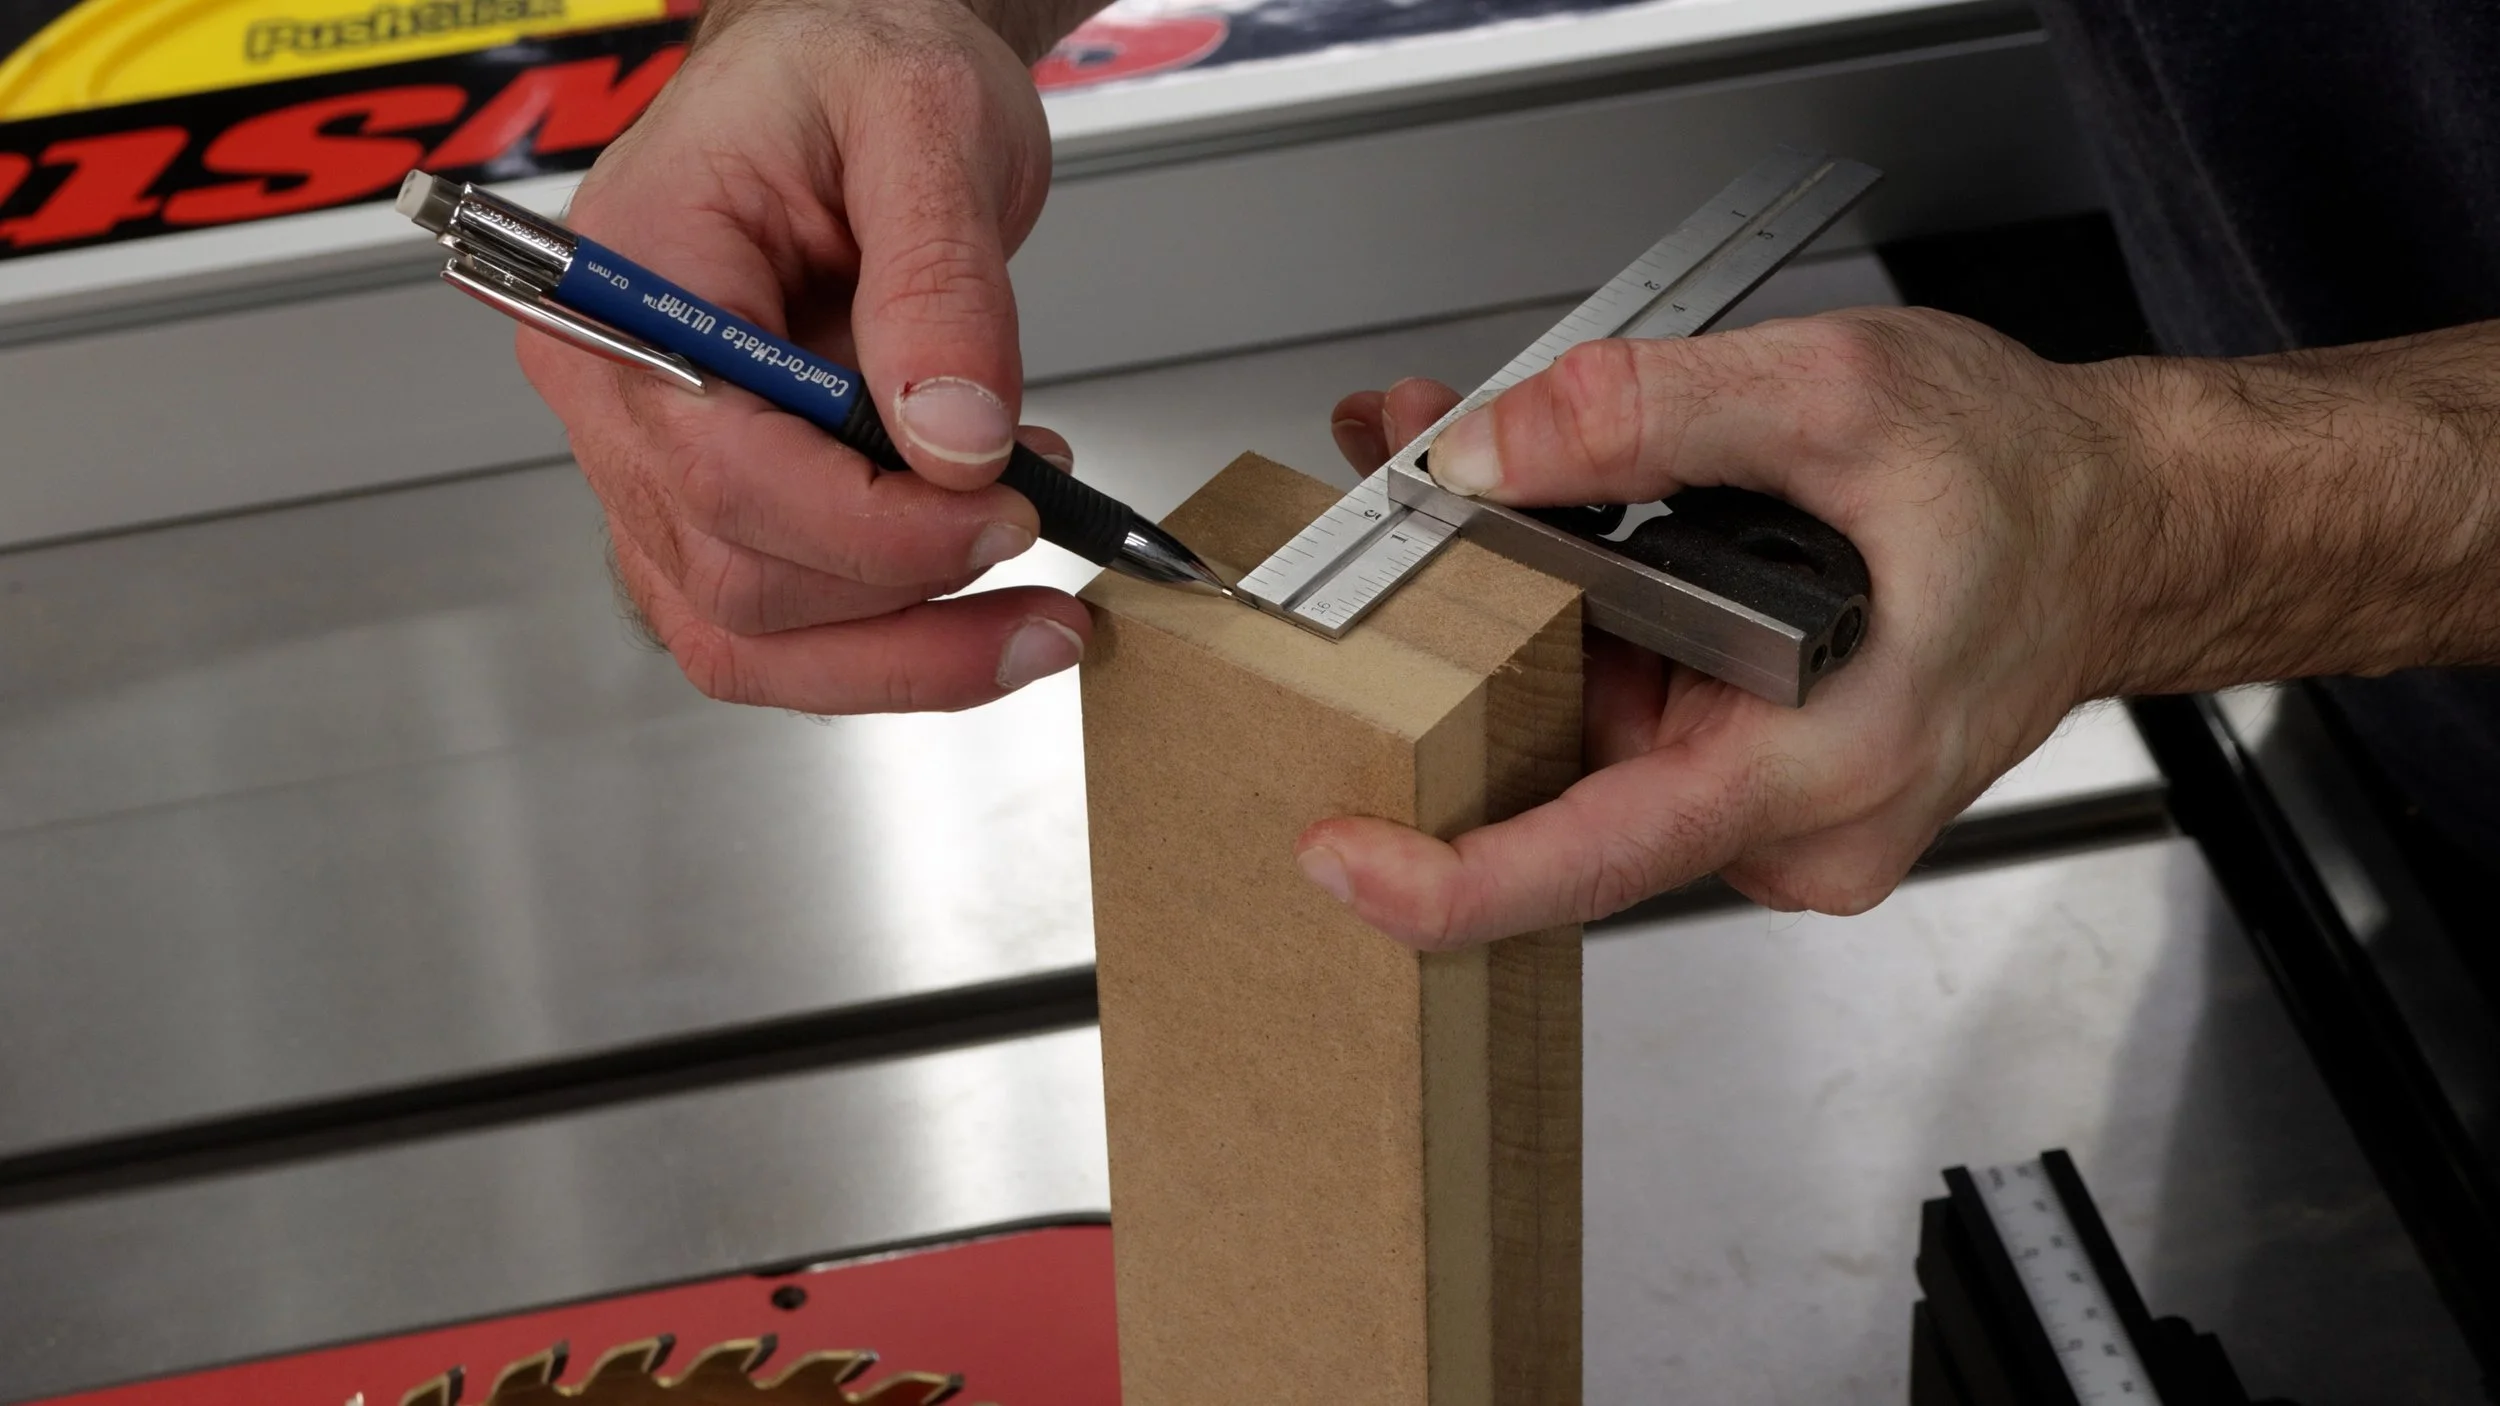
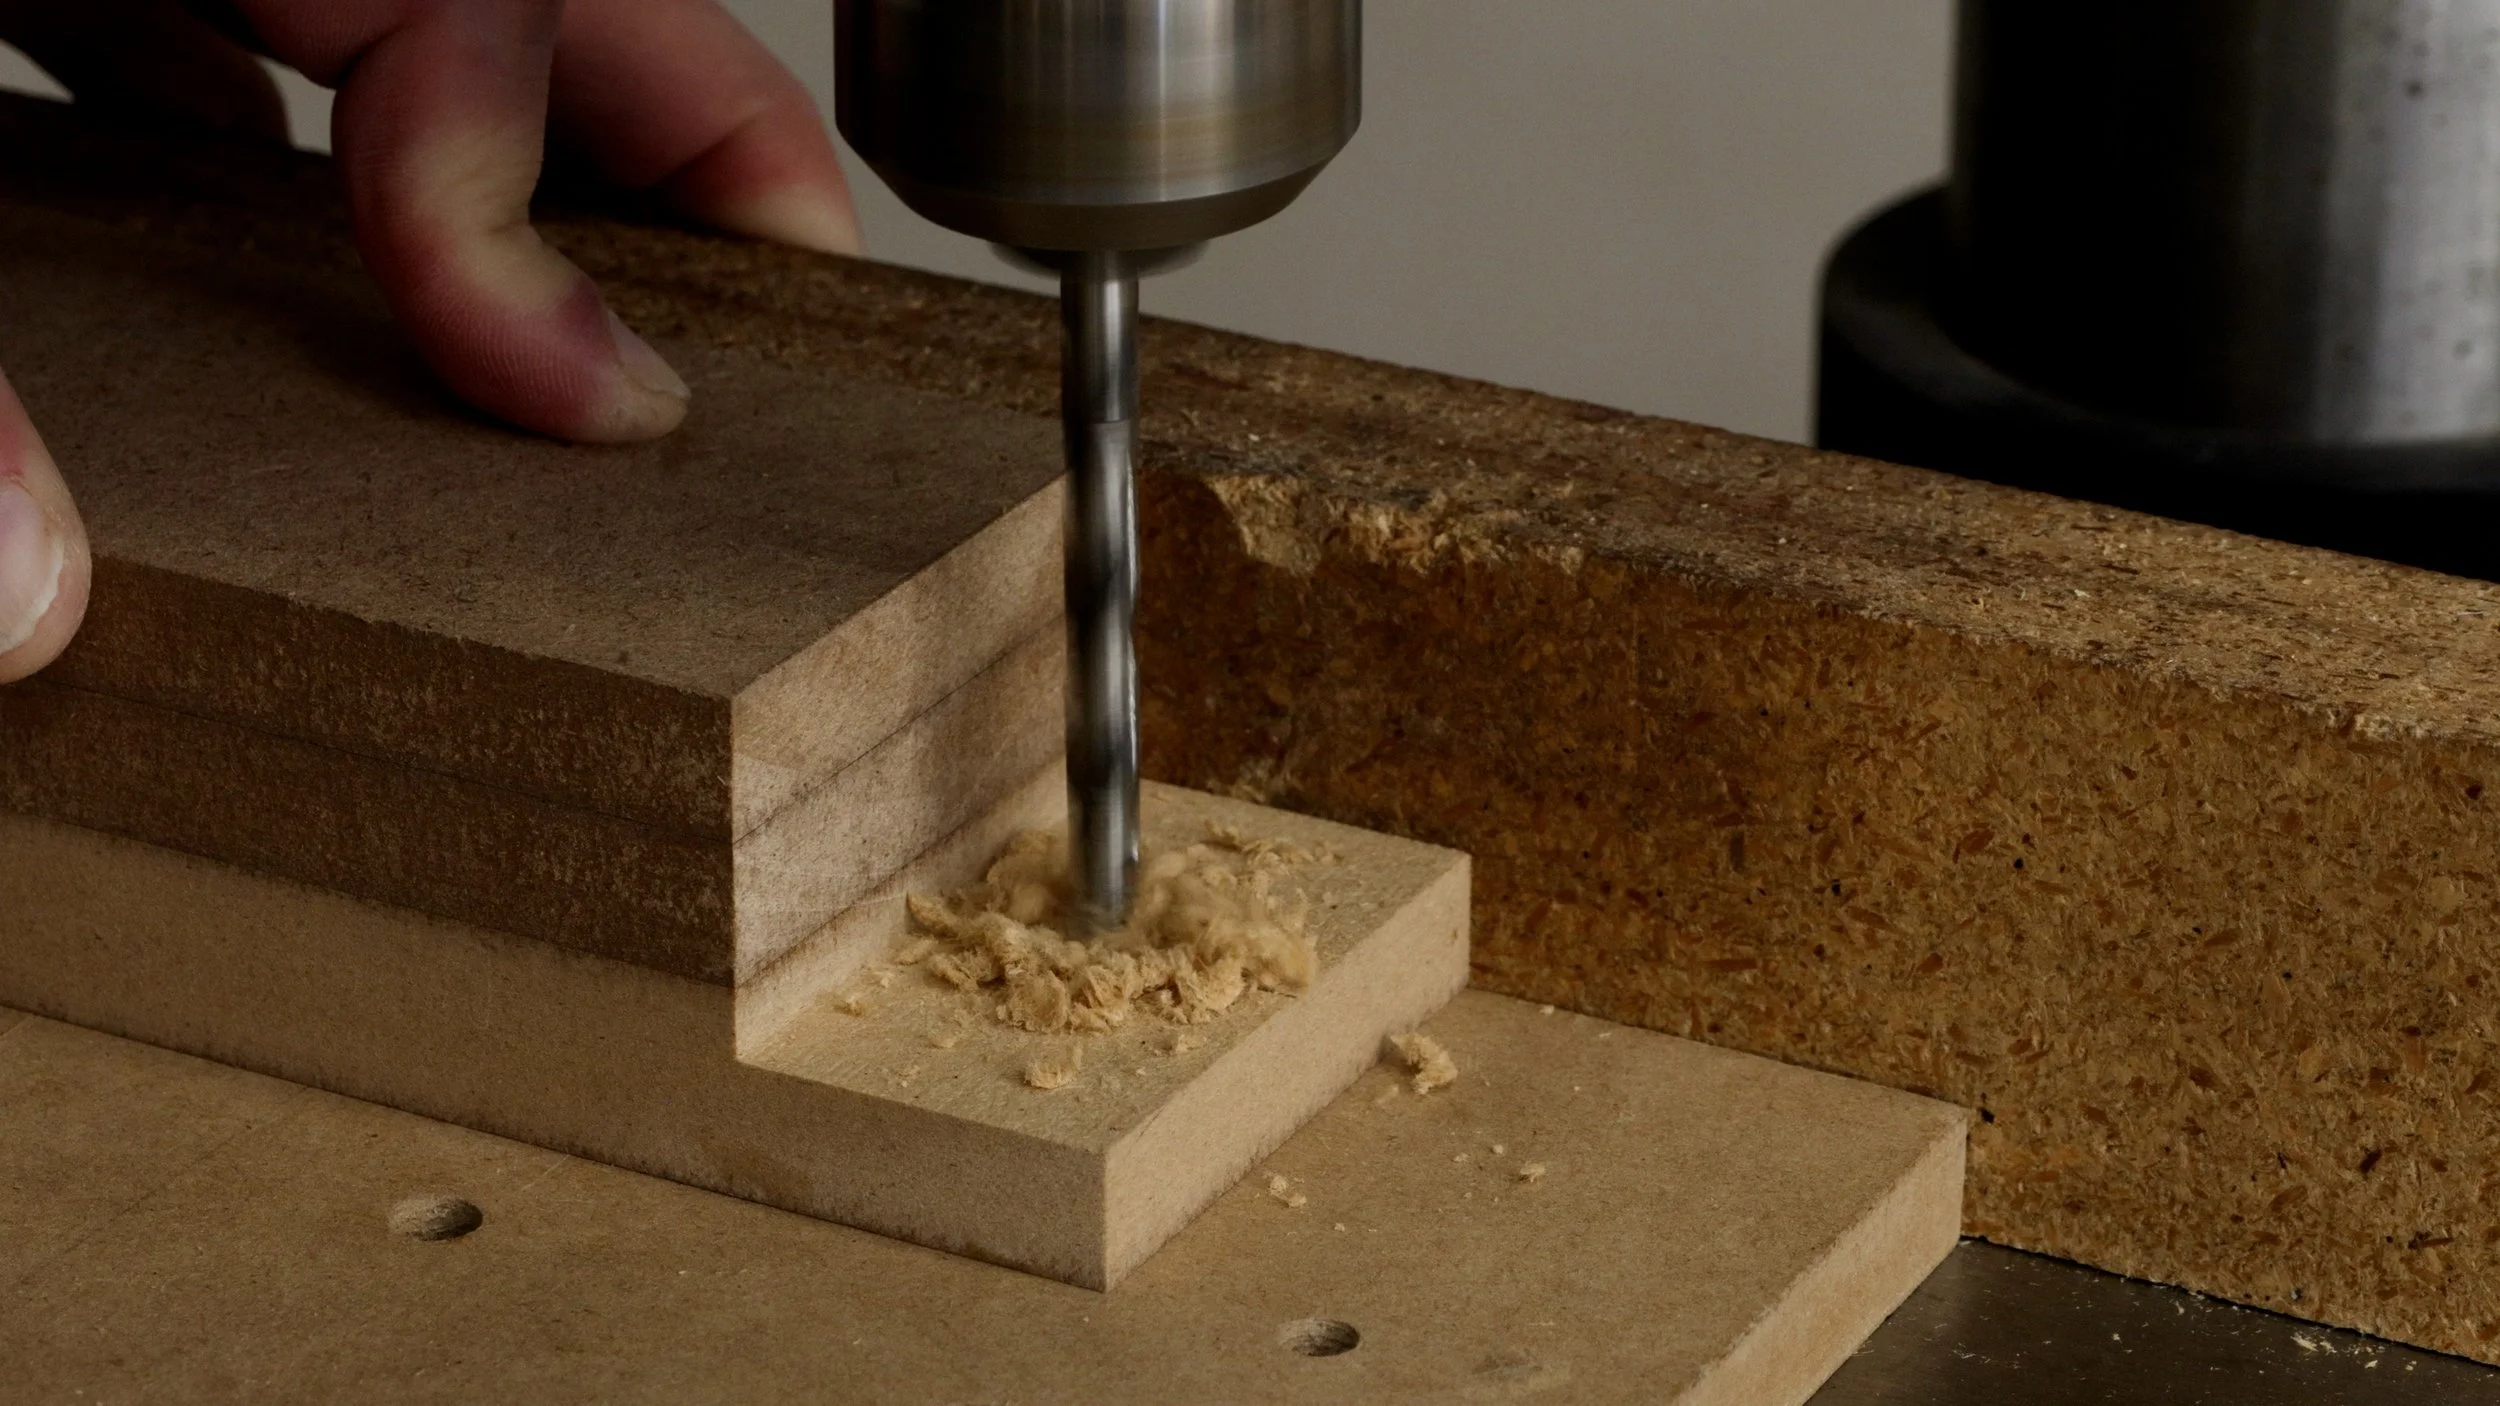
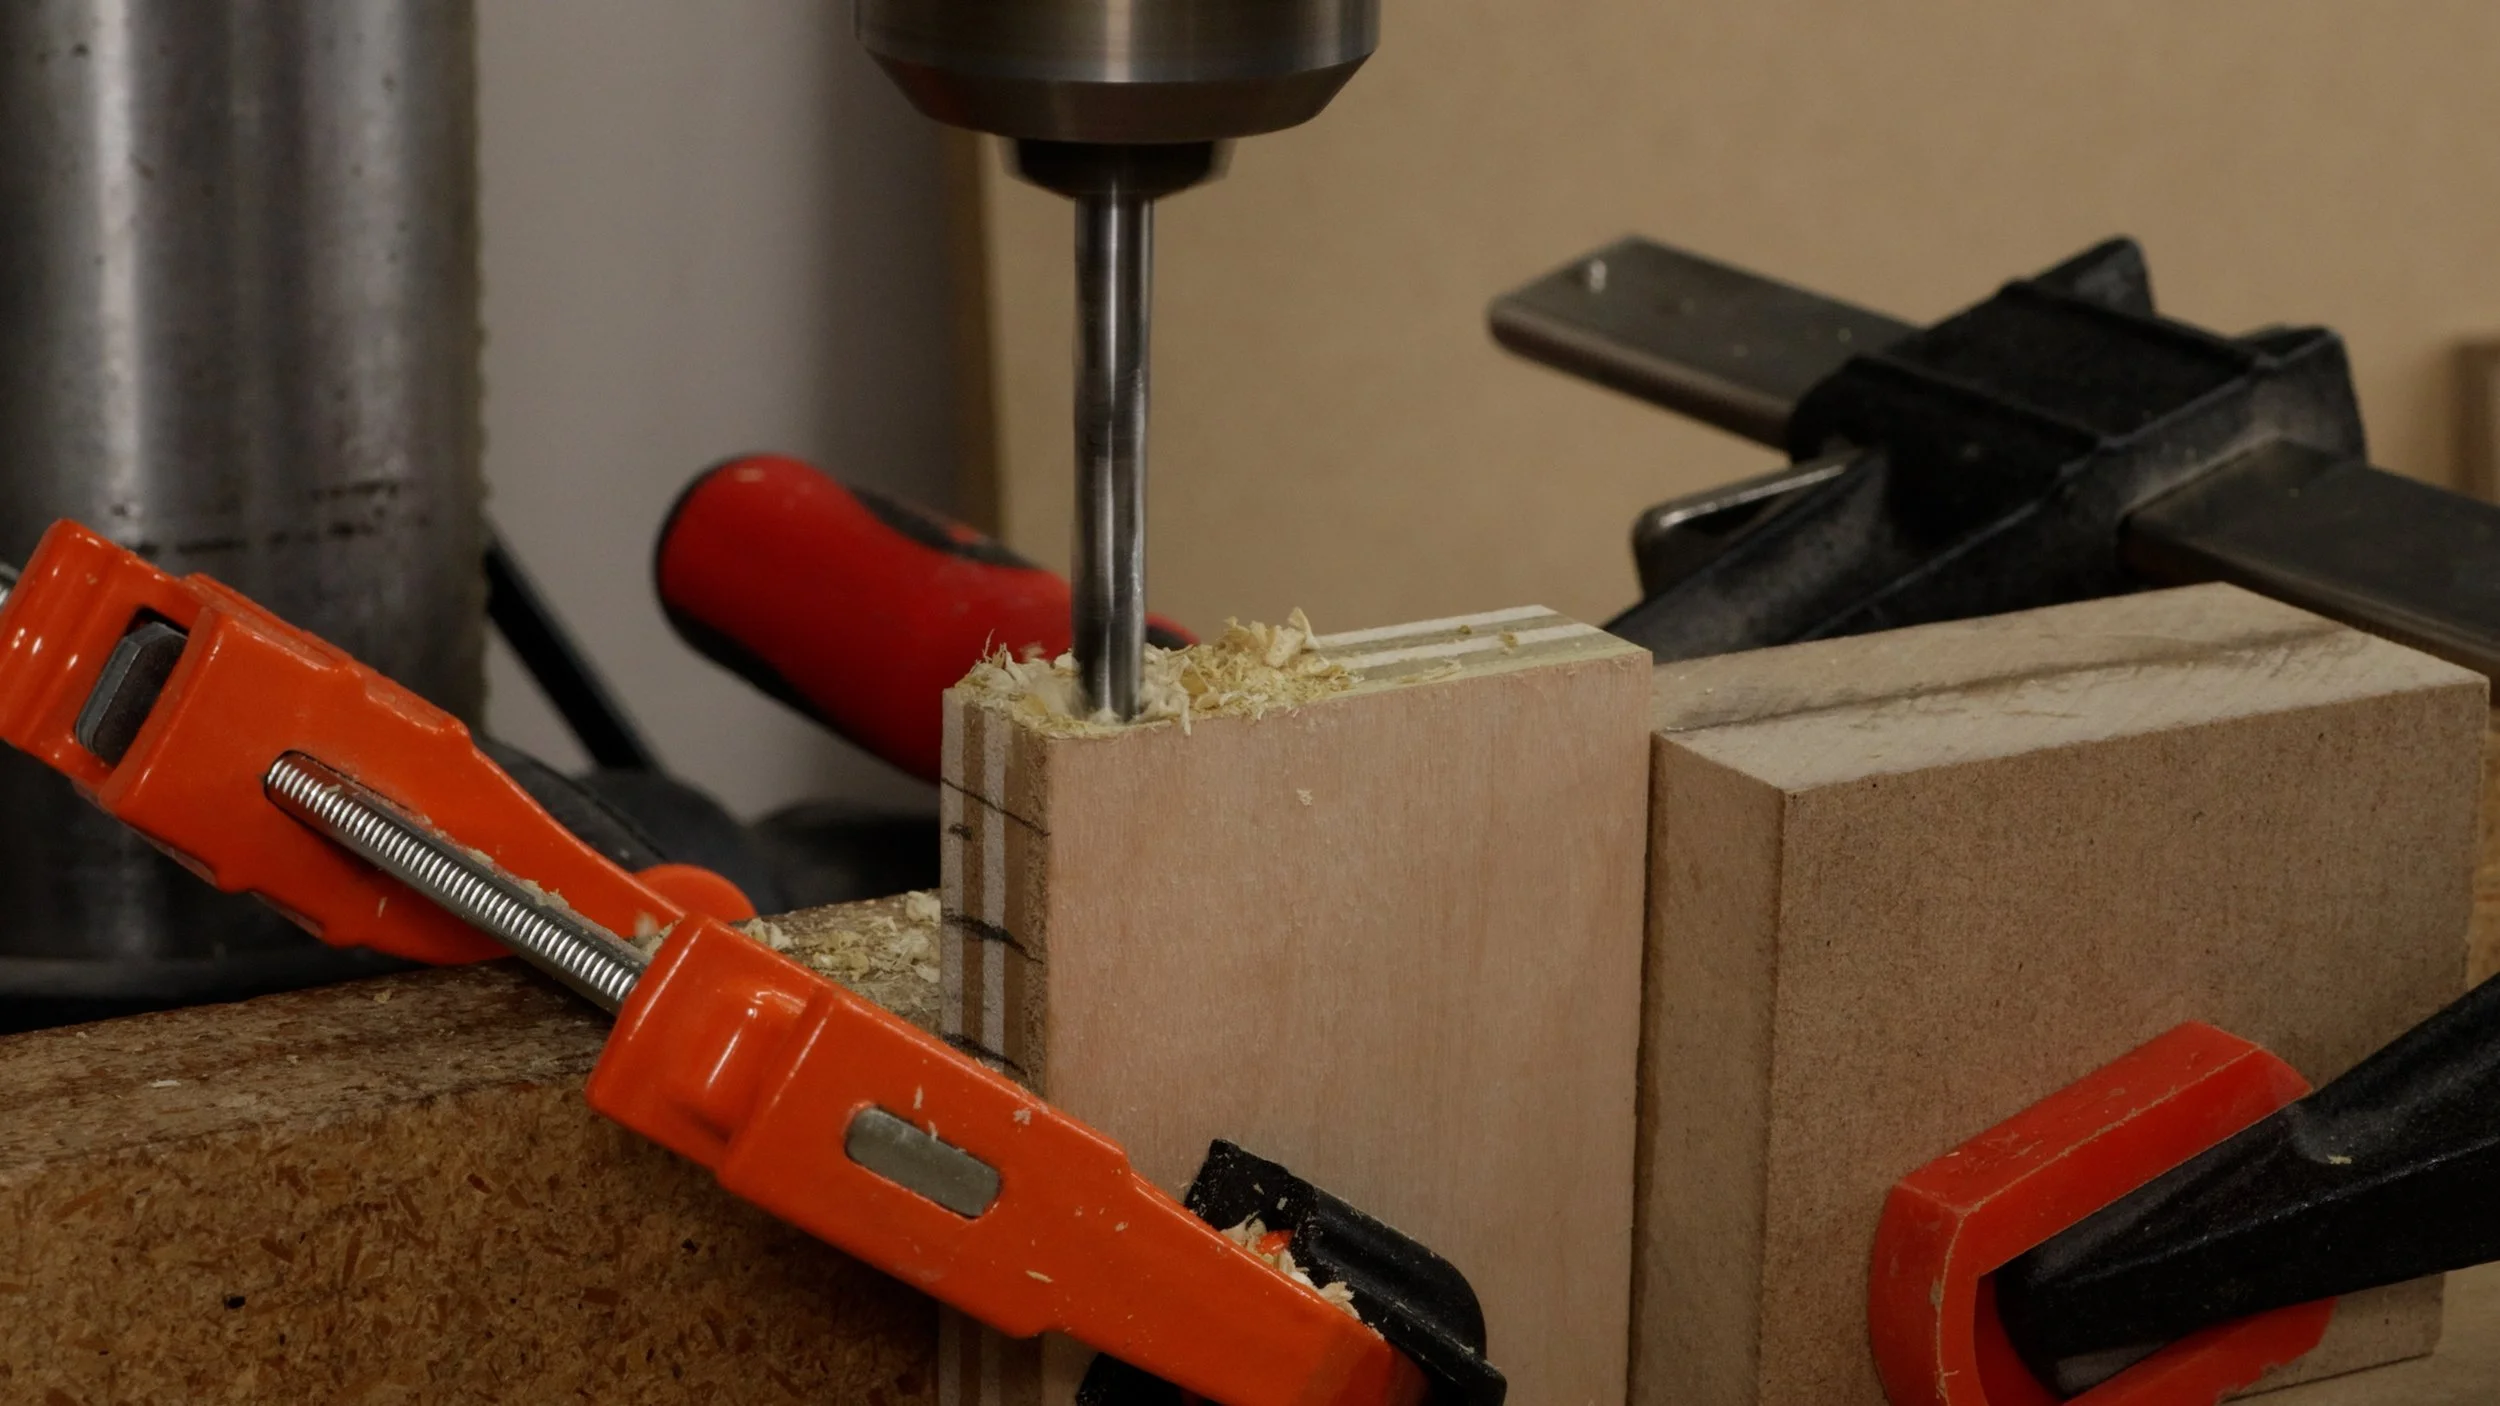
Measure the thickness of your miter gauge fence and then glue together multiple pieces of MDF so they are about 1/4” - 1/2” thicker than the fence. Each miter gauge is different. Look at the back of the fence to determine how thick of a workpiece can fit between the fence and the angle indicator.
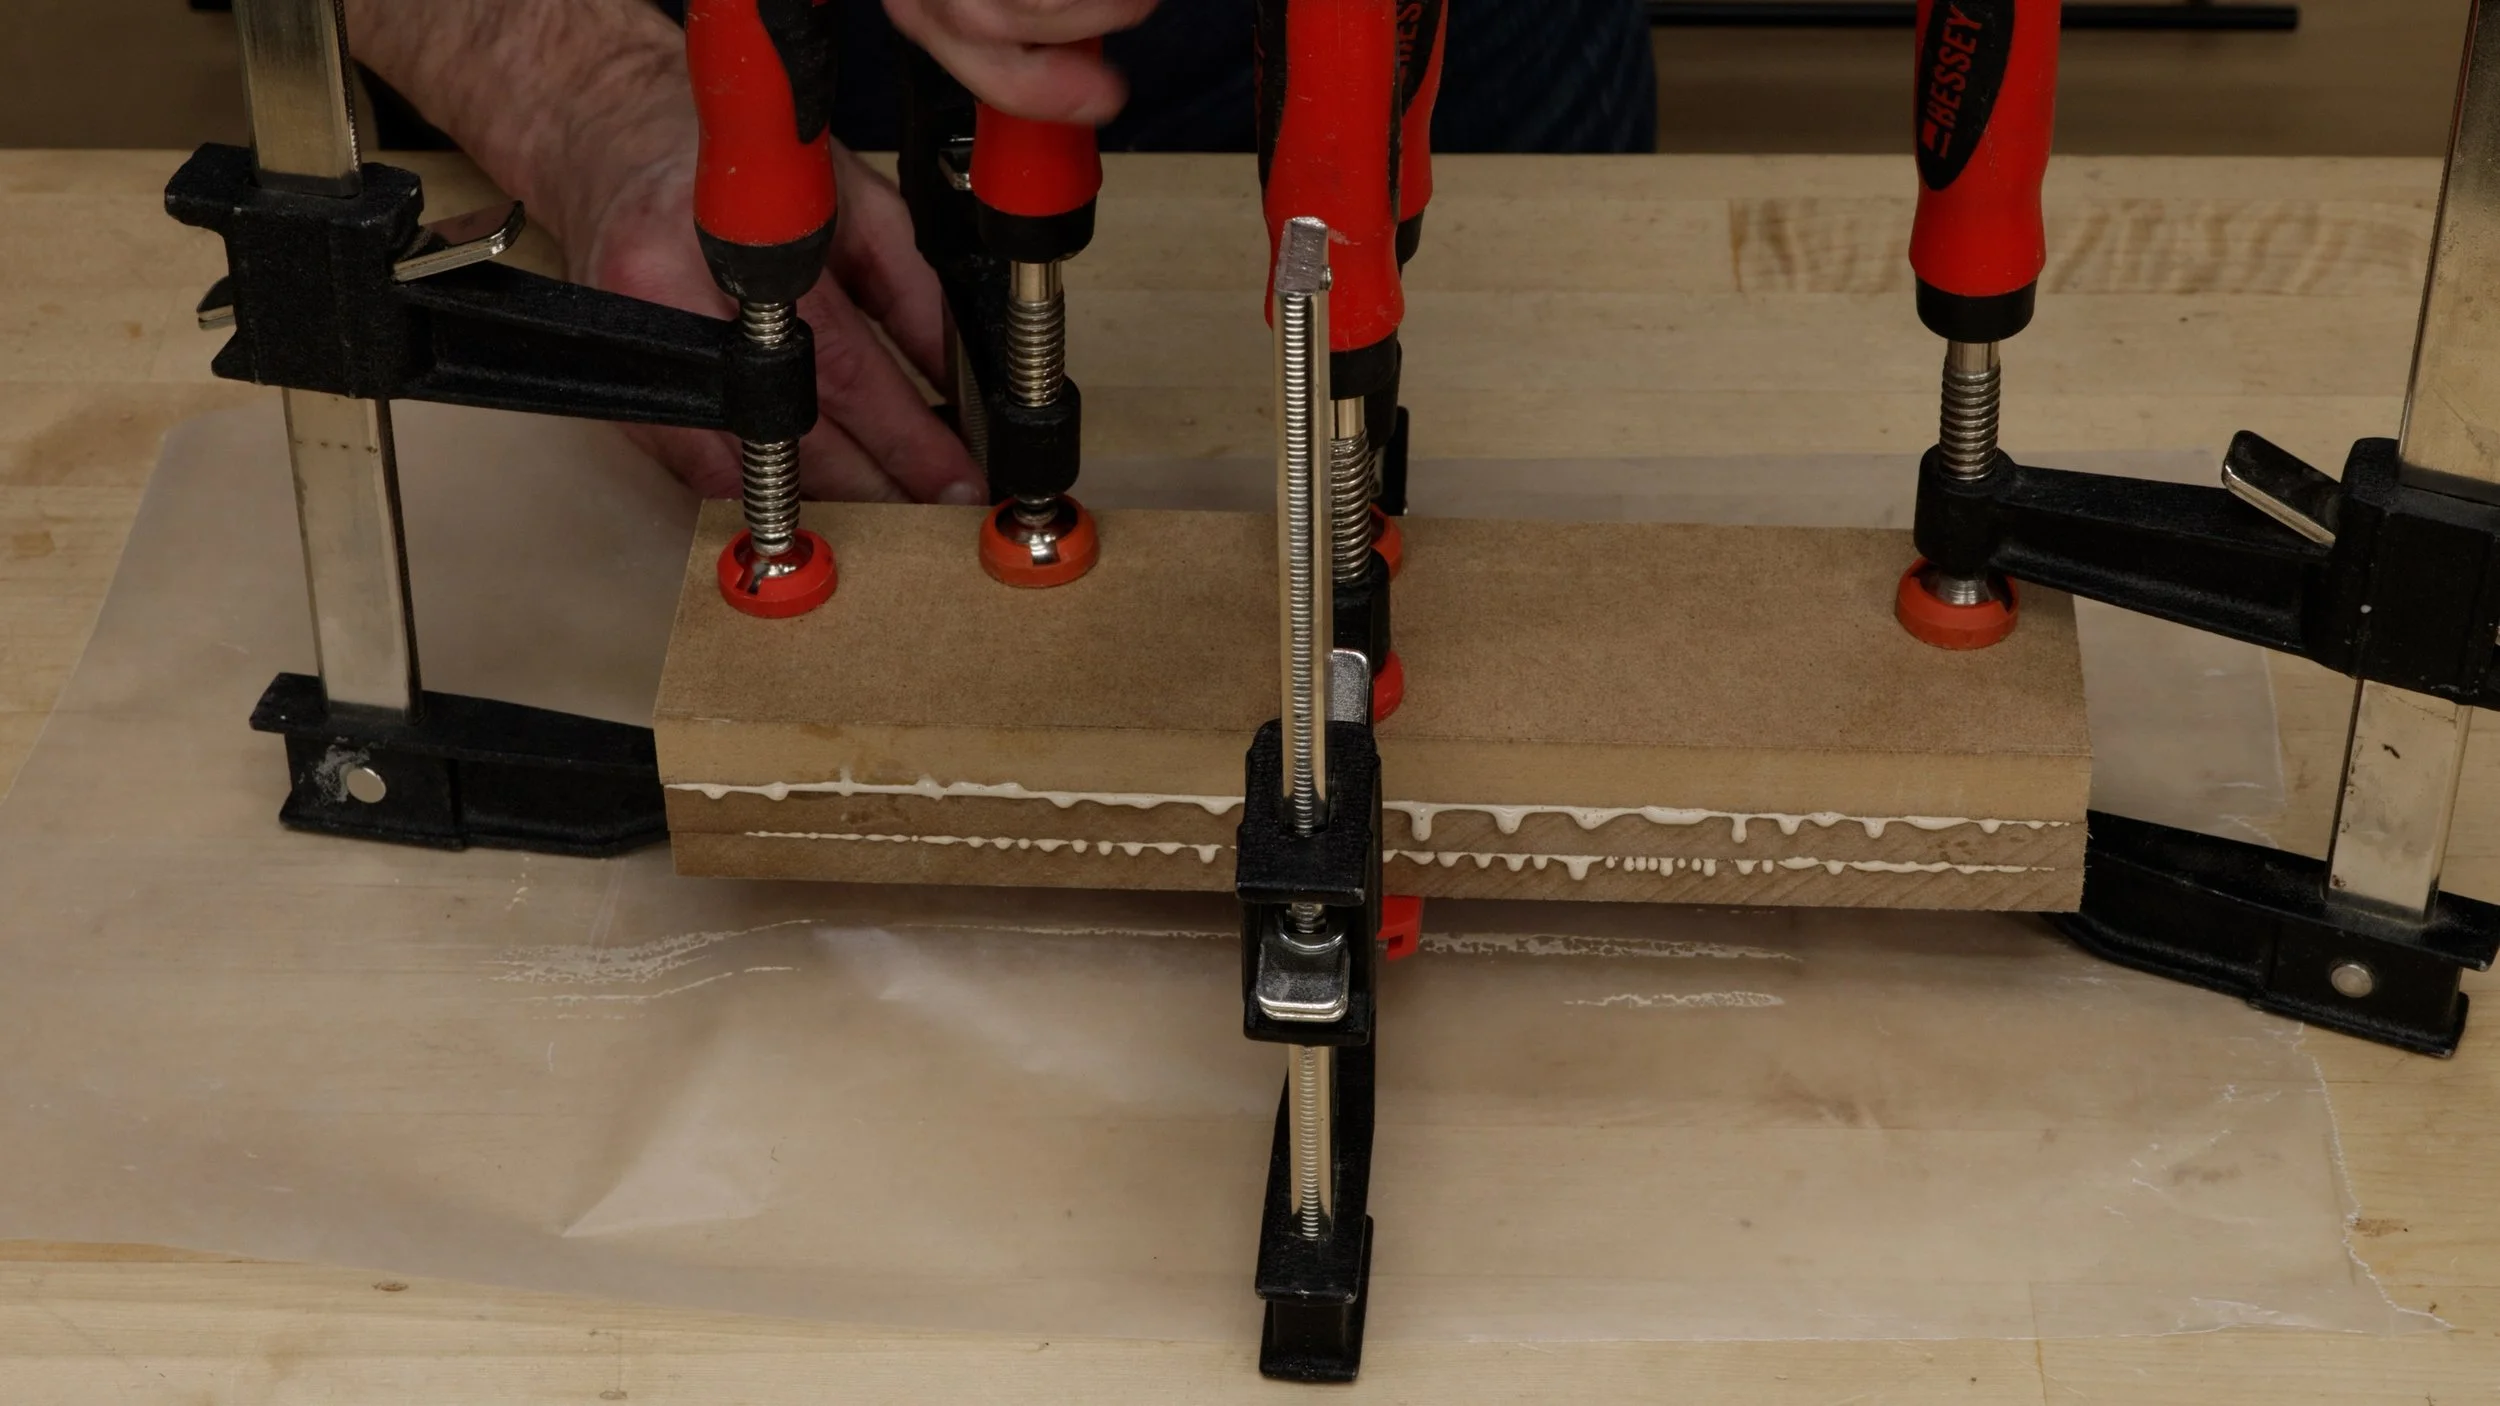
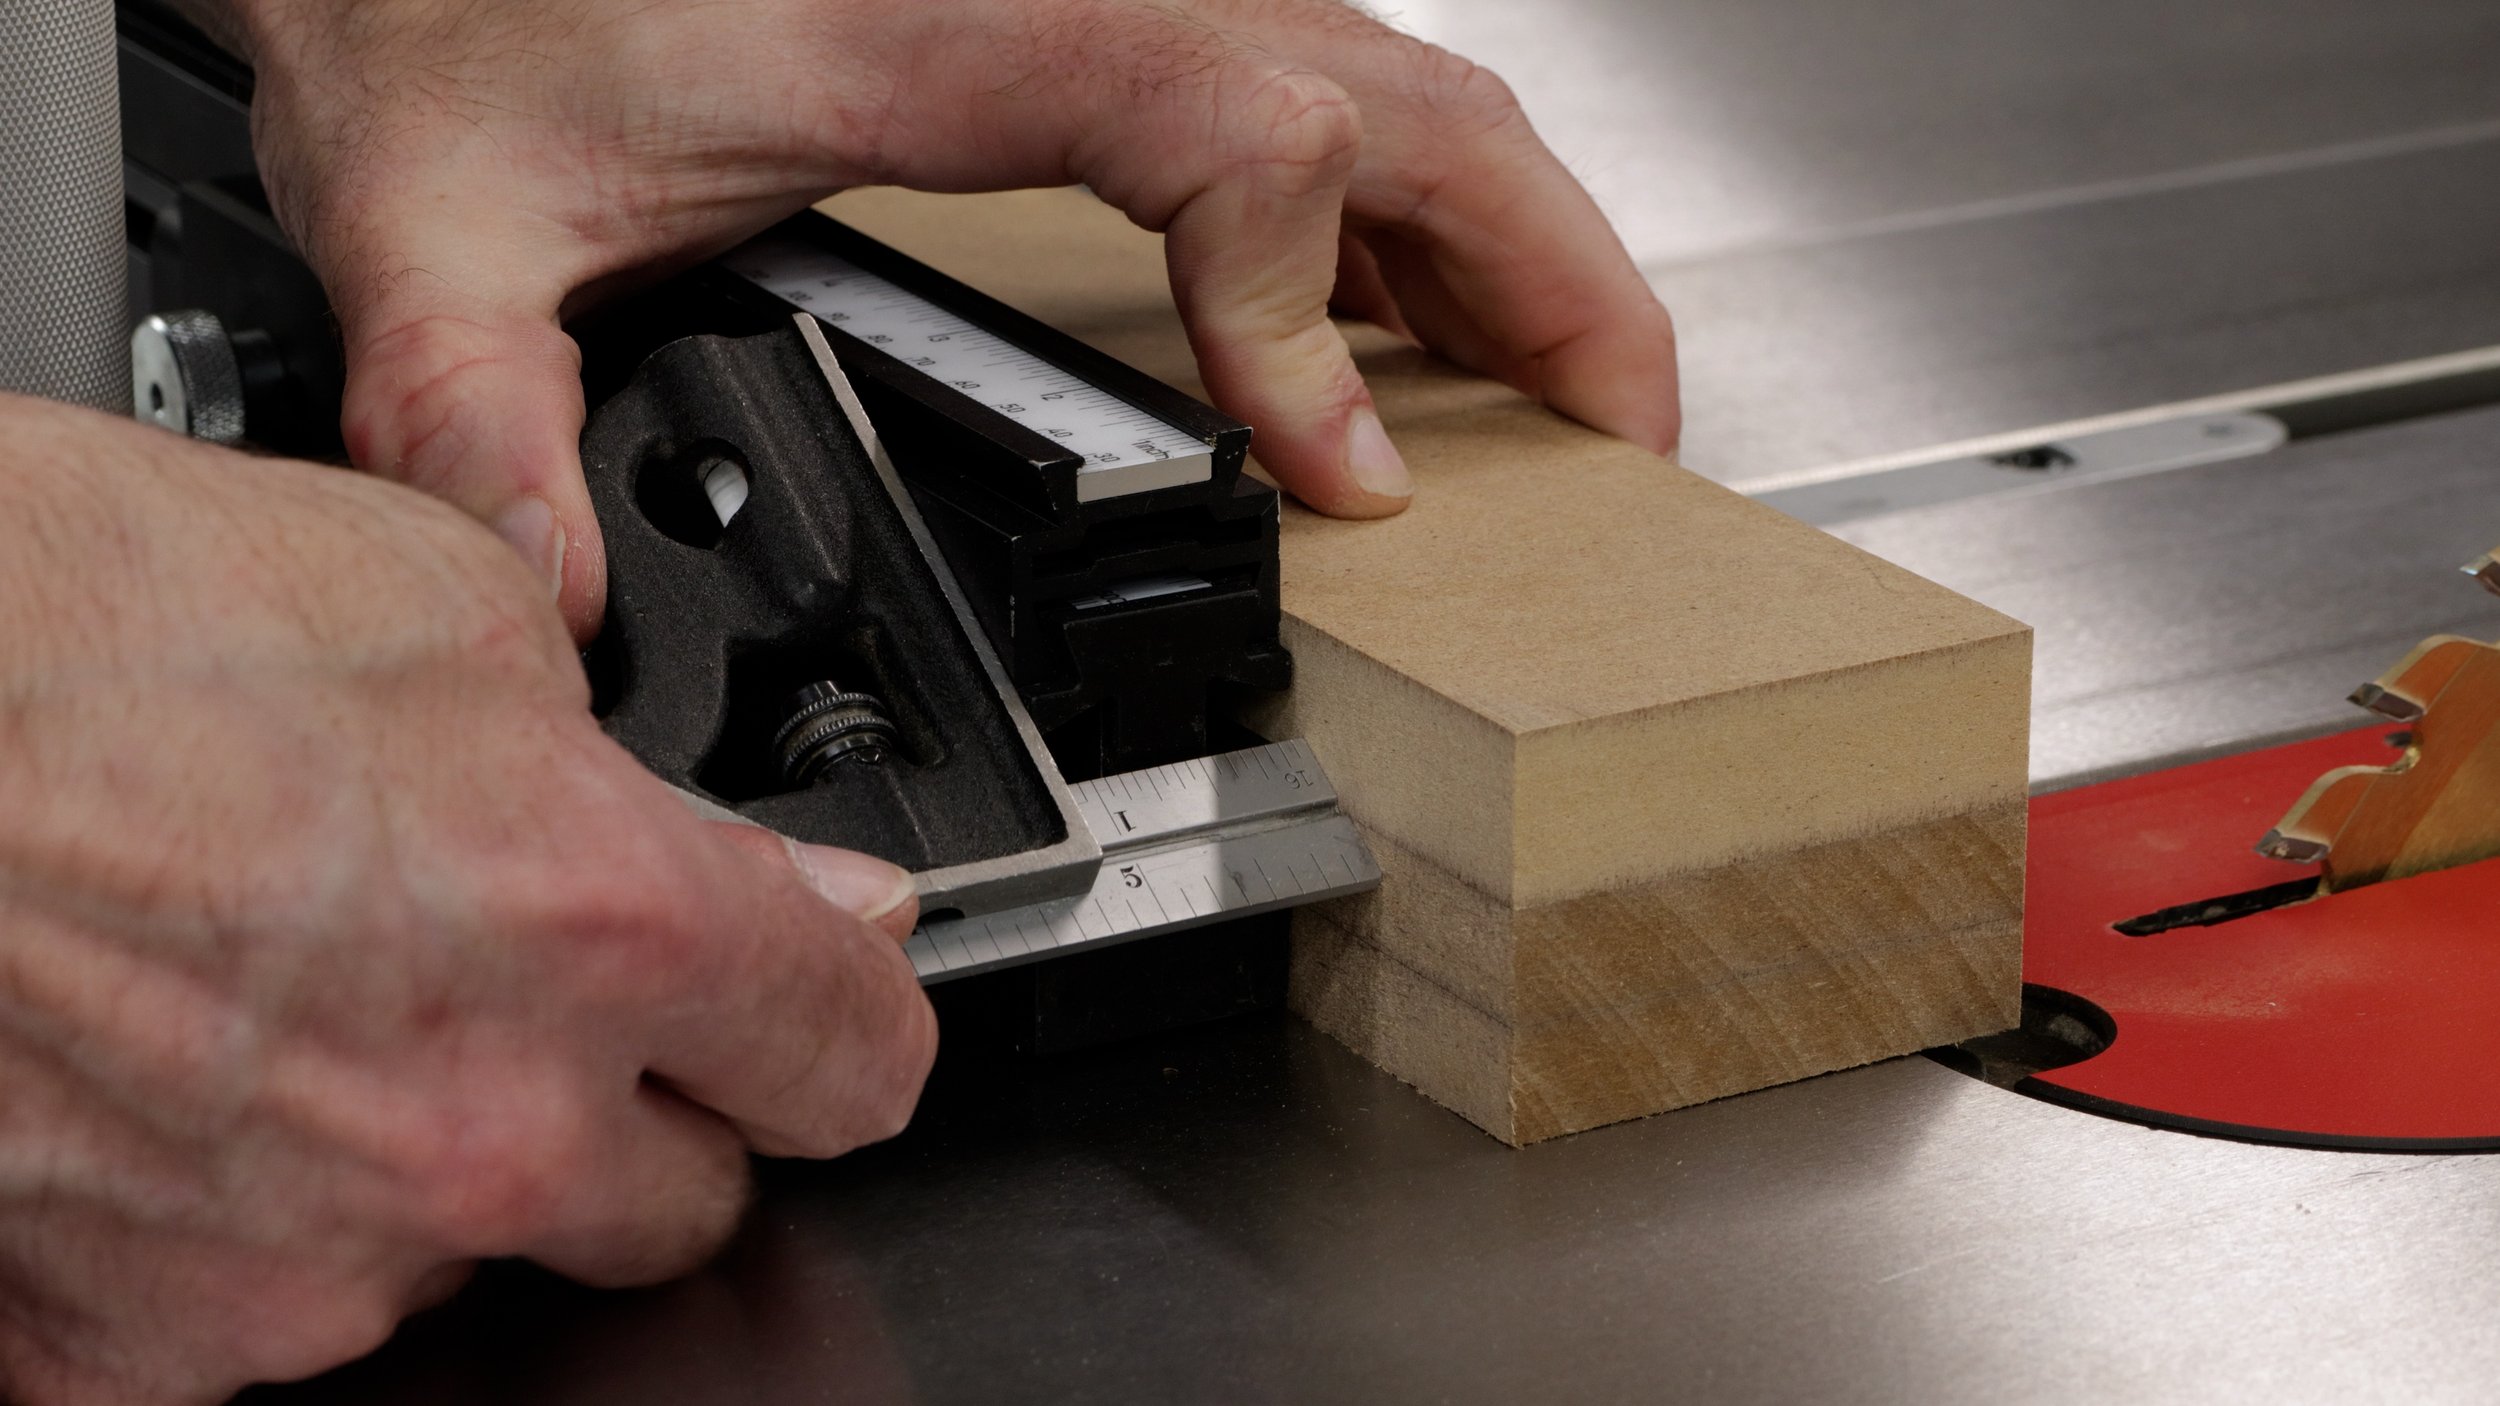
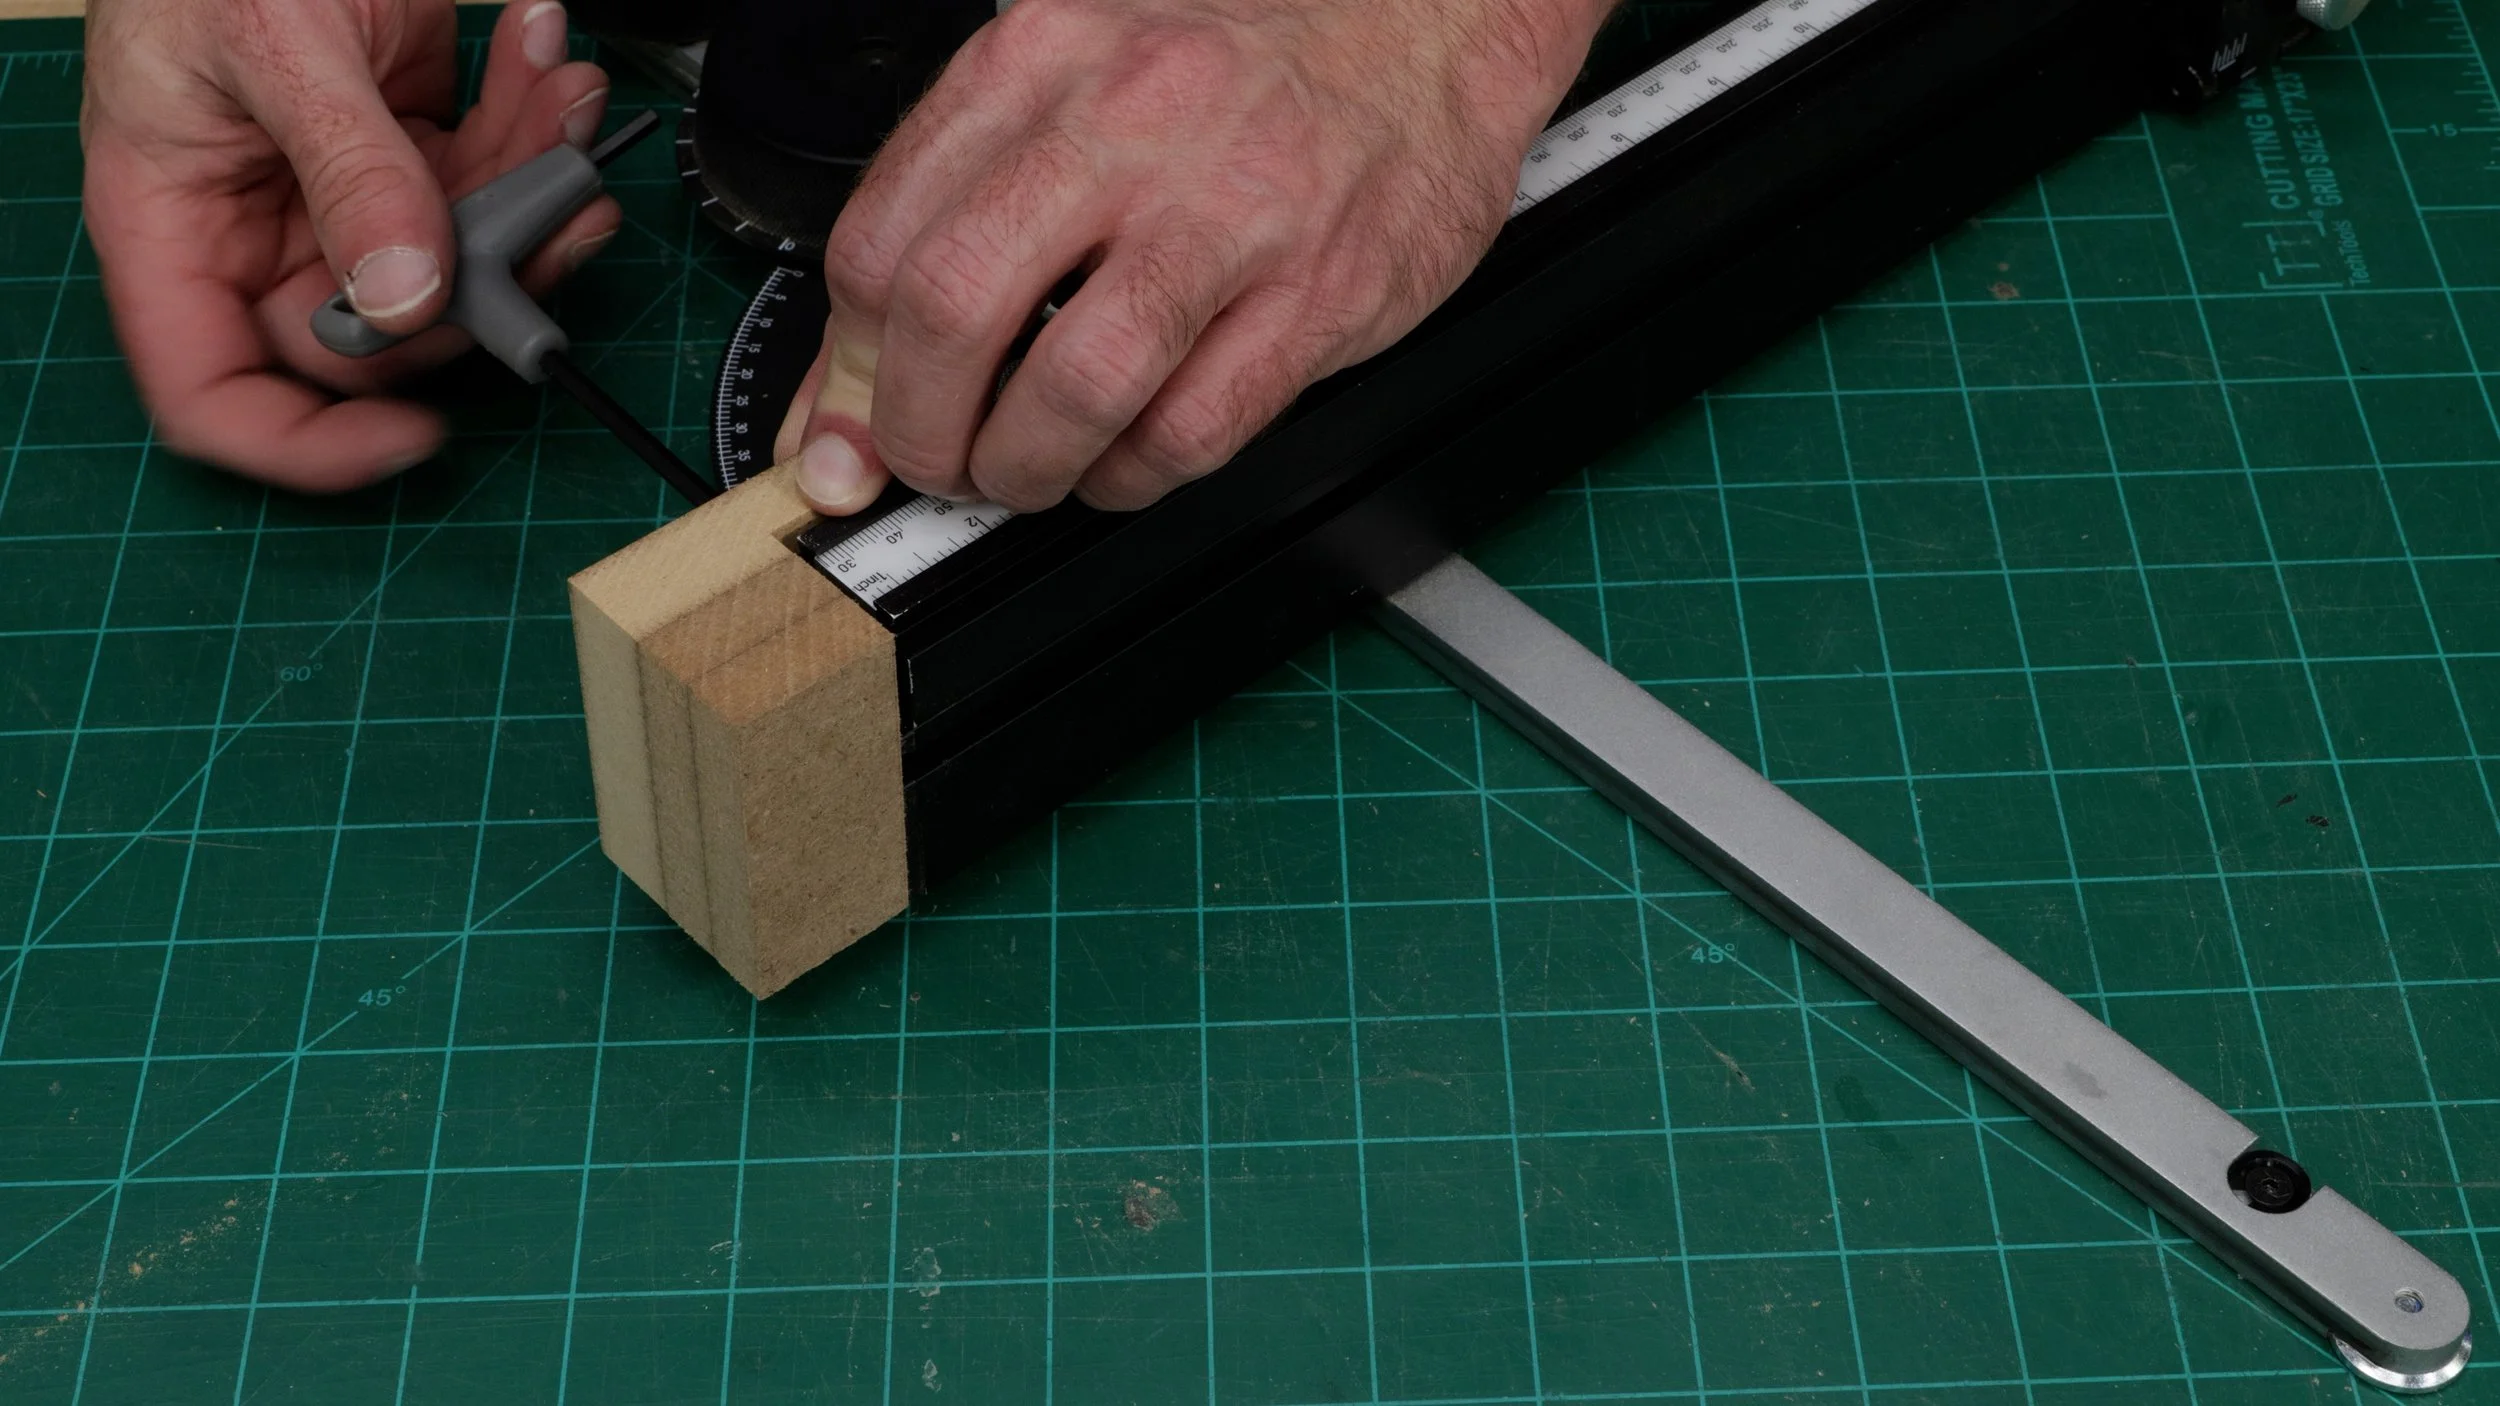
Cut the MDF so it is the same height as your miter gauge fence. Also, cut both ends of the MDF so they are smooth and clean of glue. Use a combination square to find the thickness of the fence and transcribe it to the piece. Then, set the height of the table saw blade so it kisses that line. It’s best to cut under the line and raise the blade higher if needed.
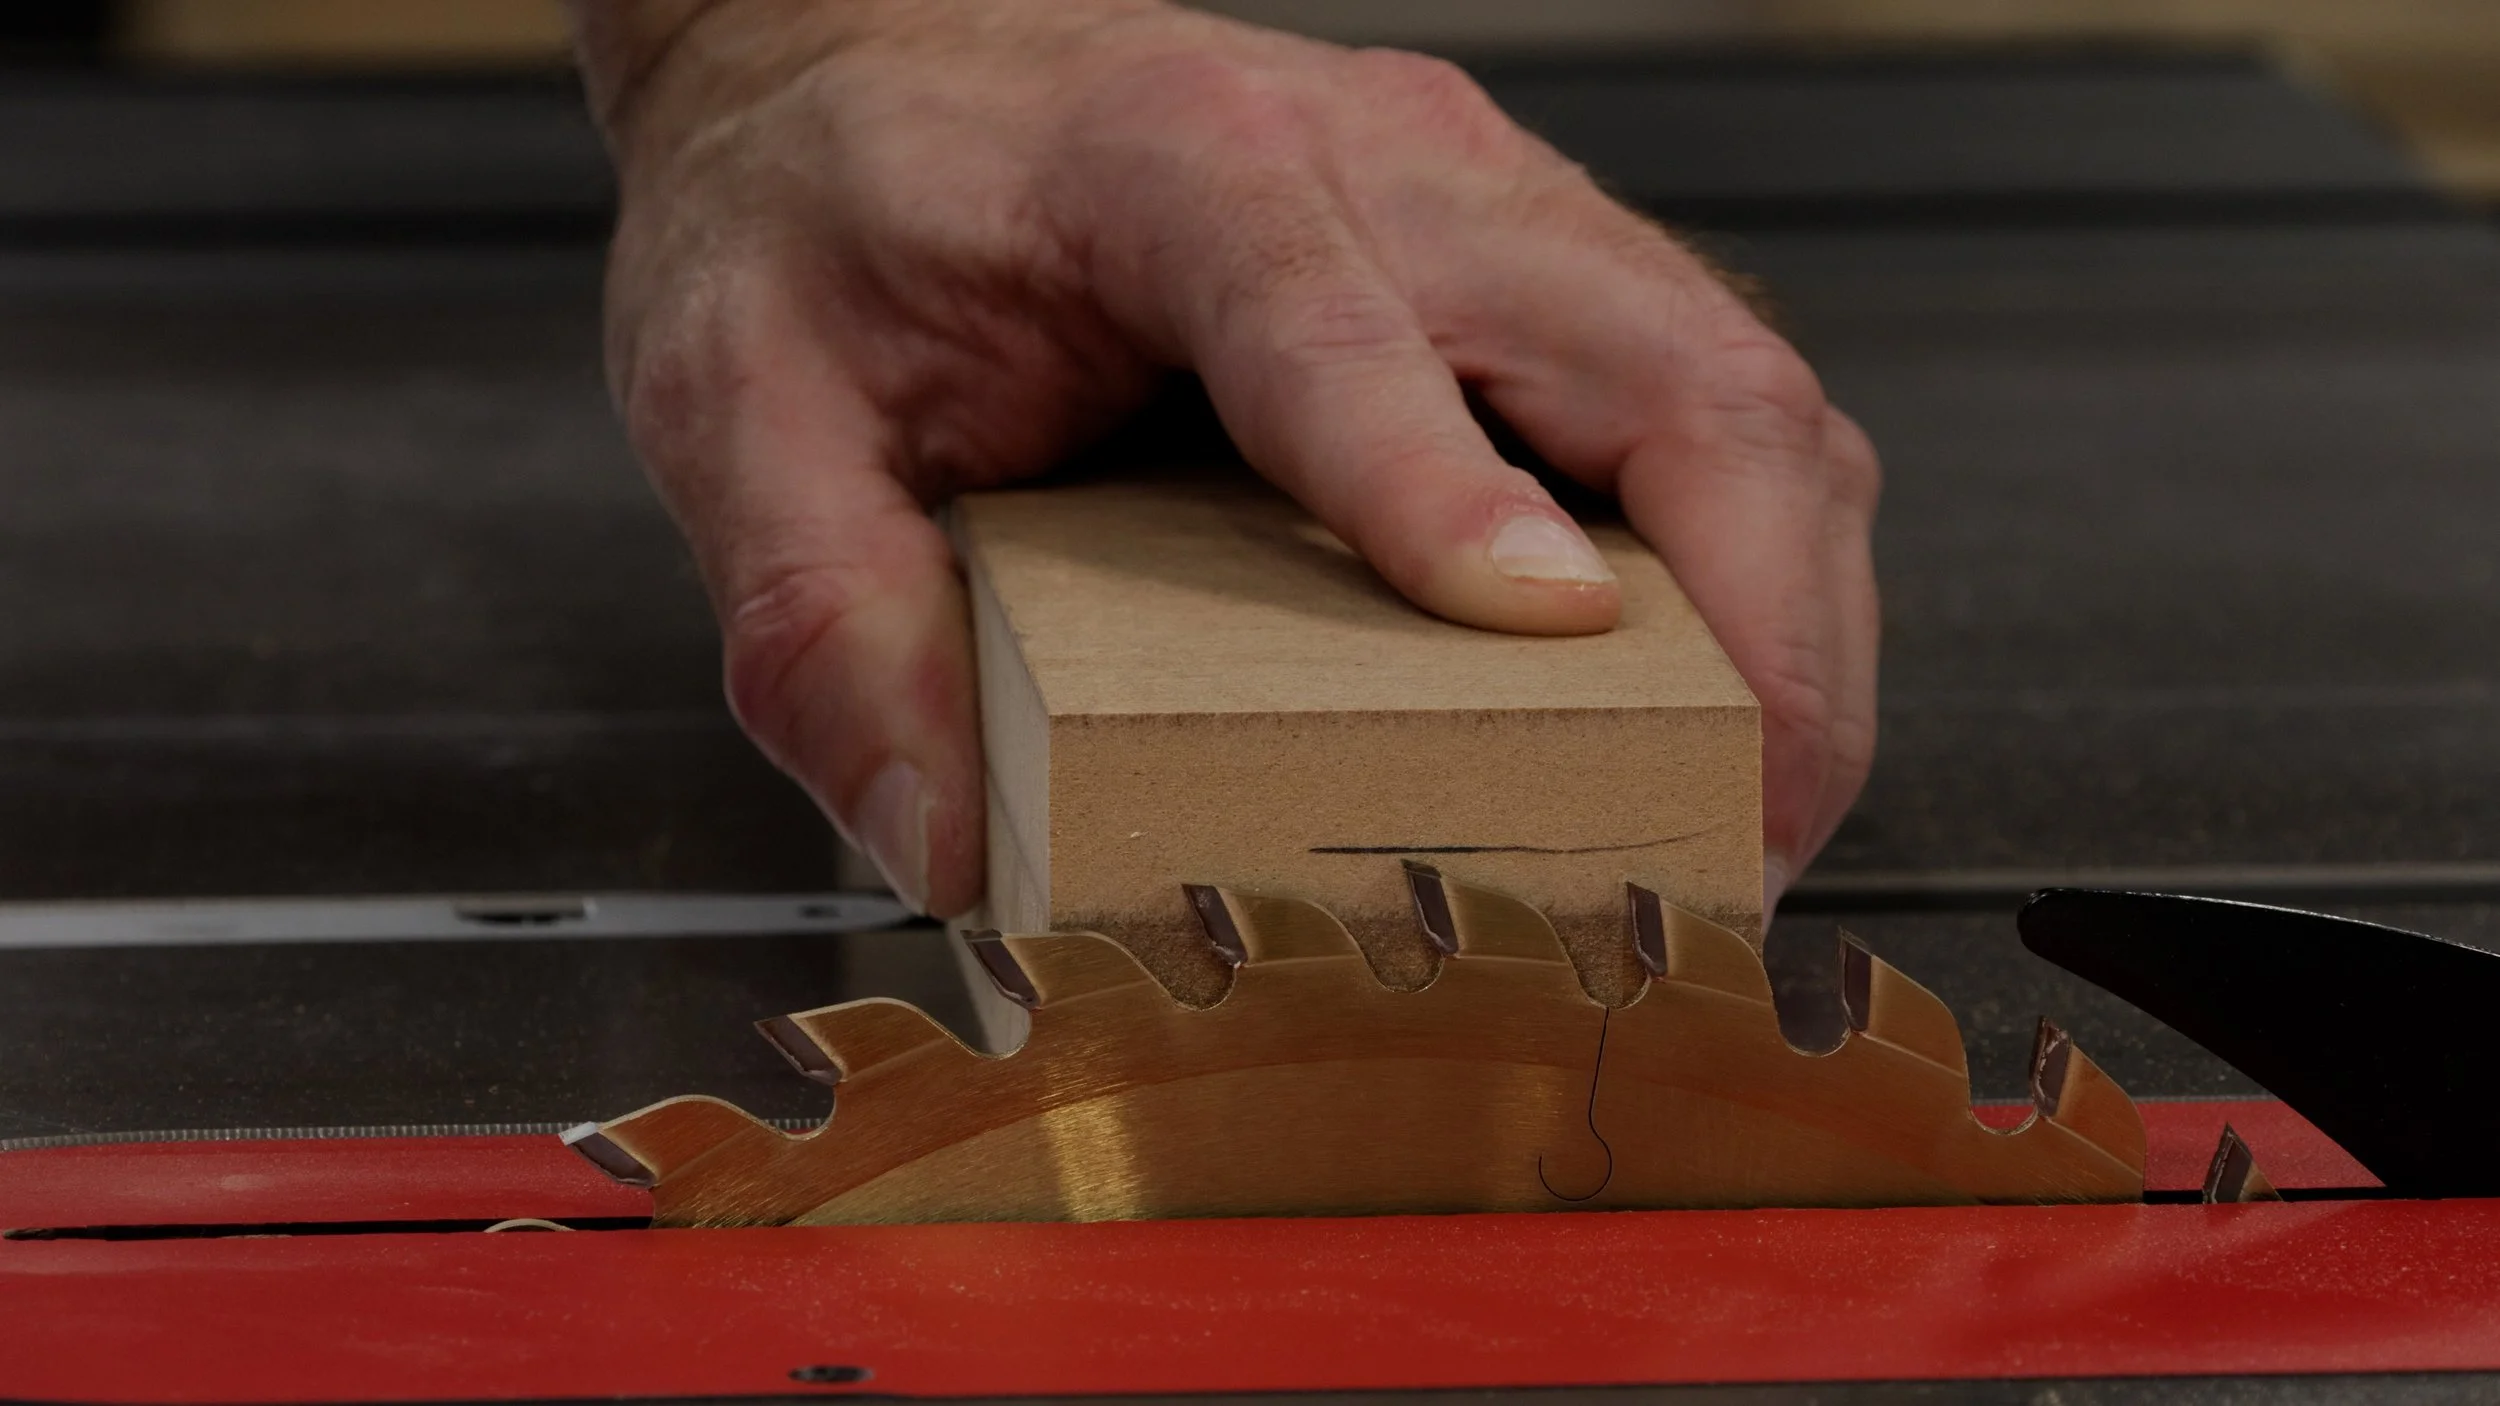
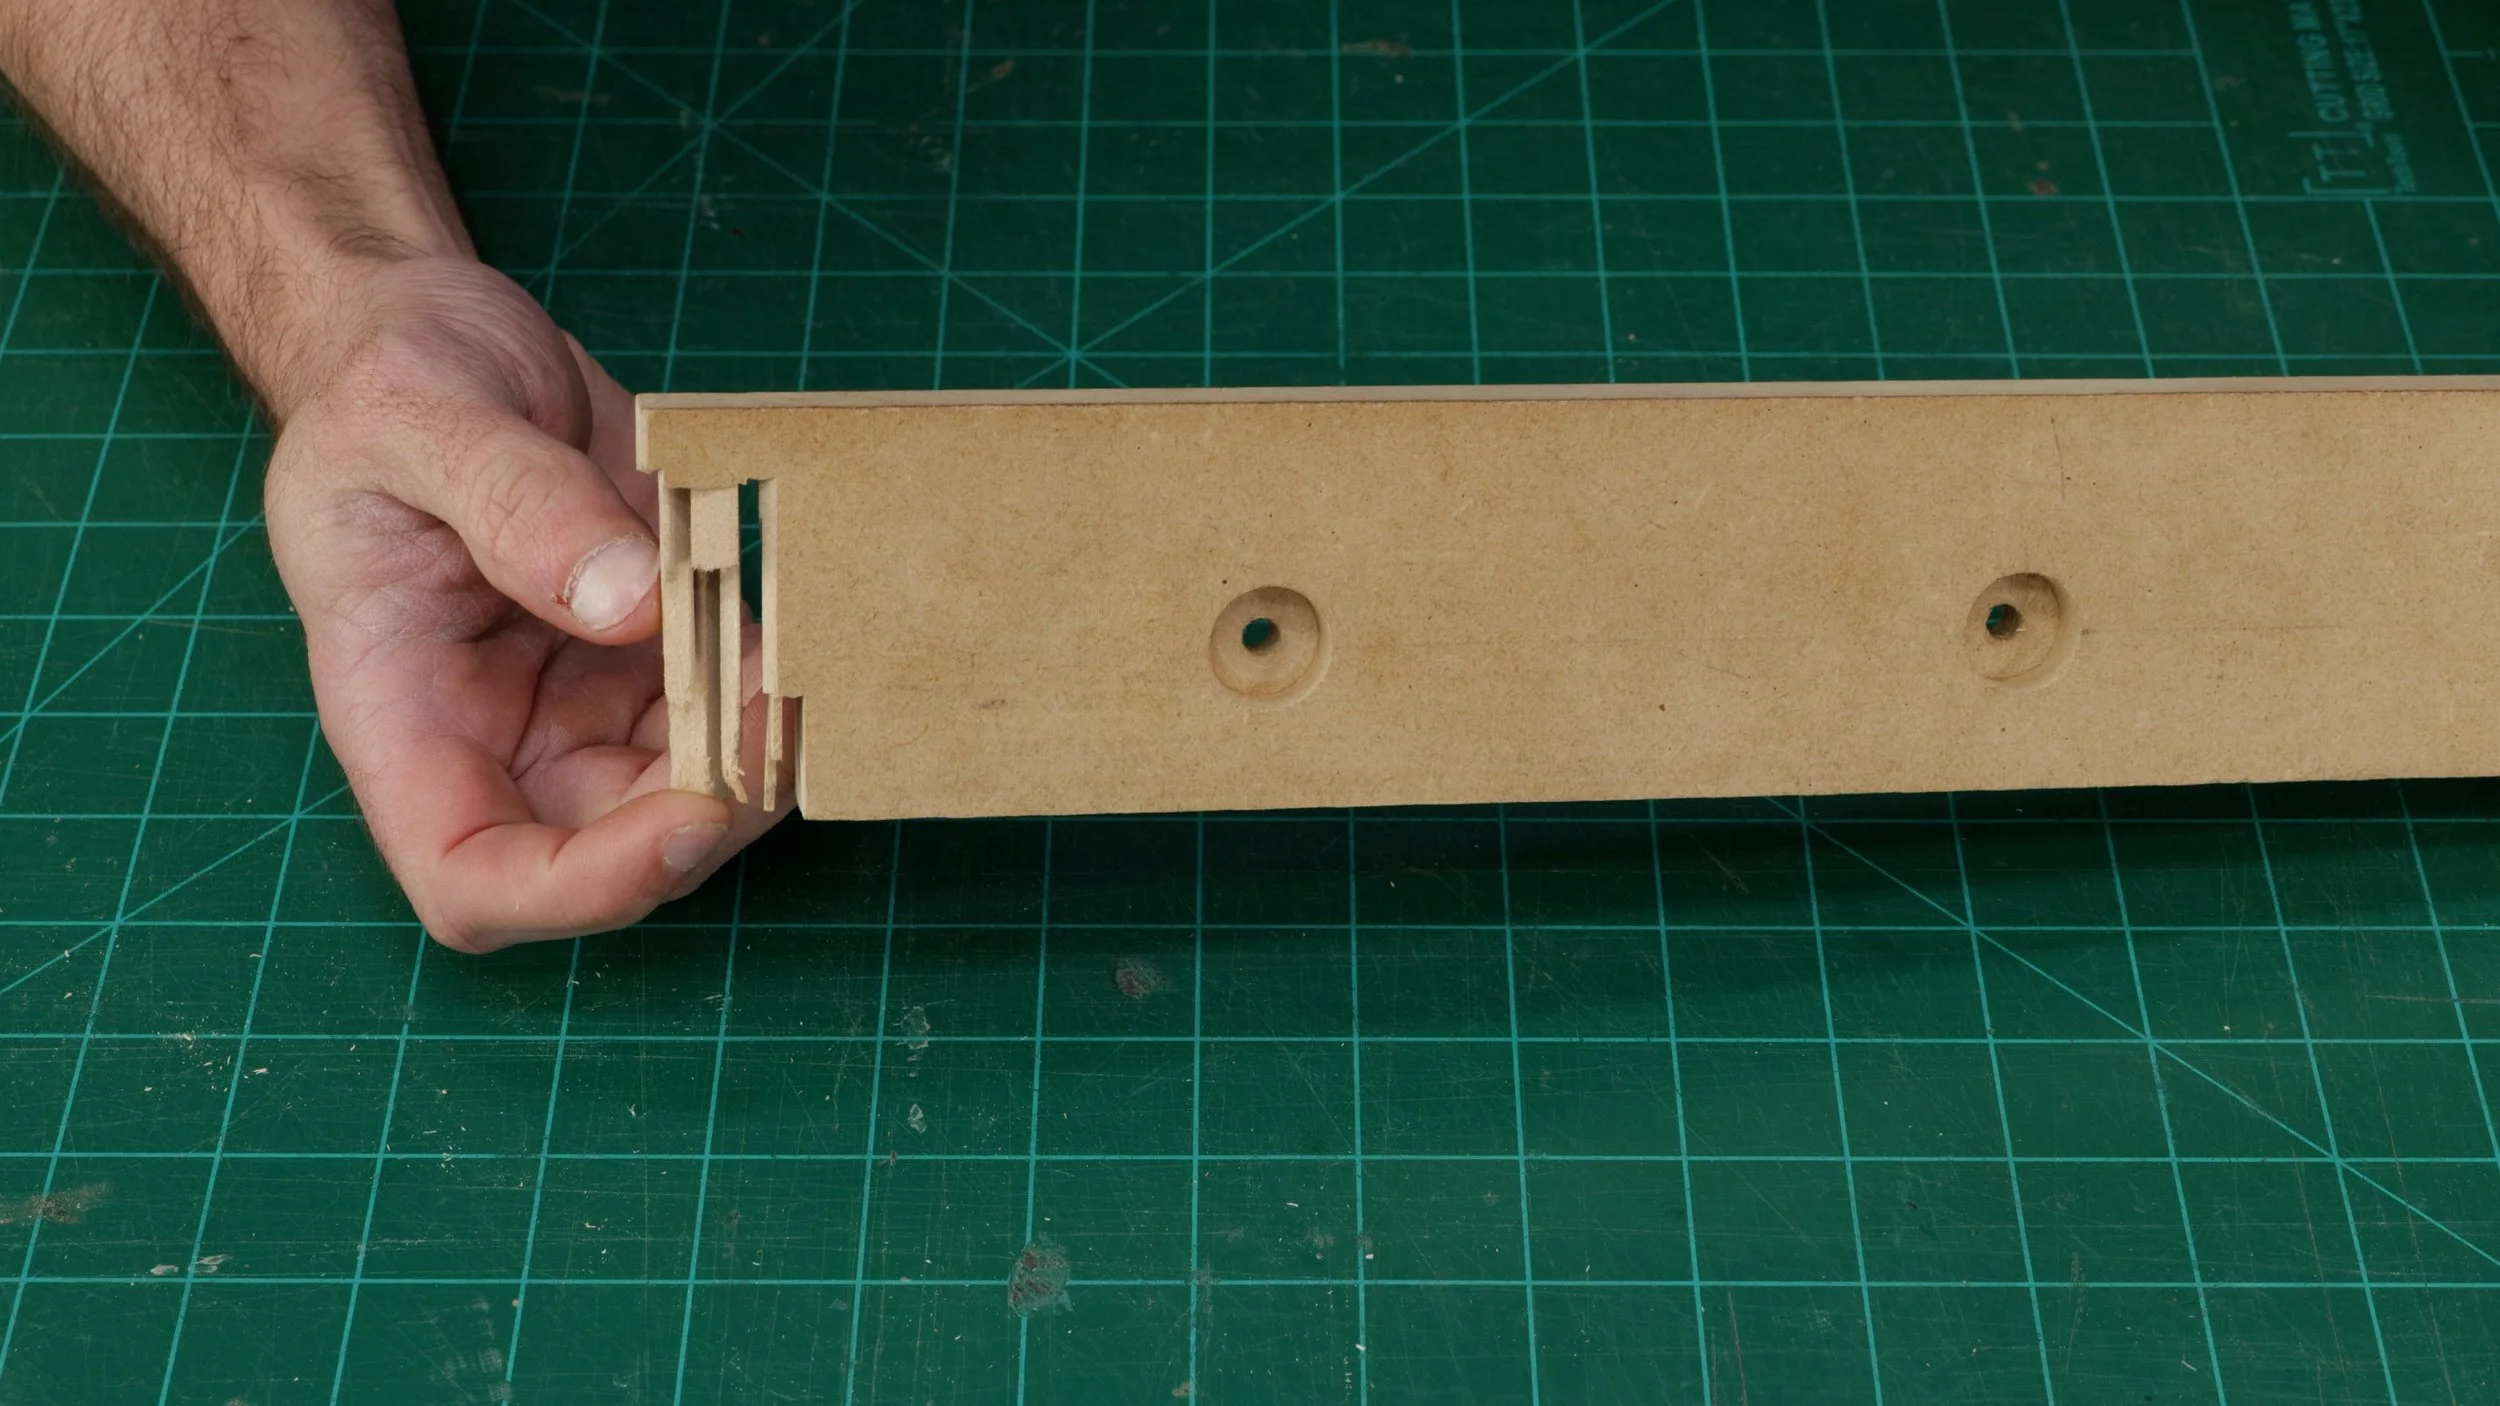
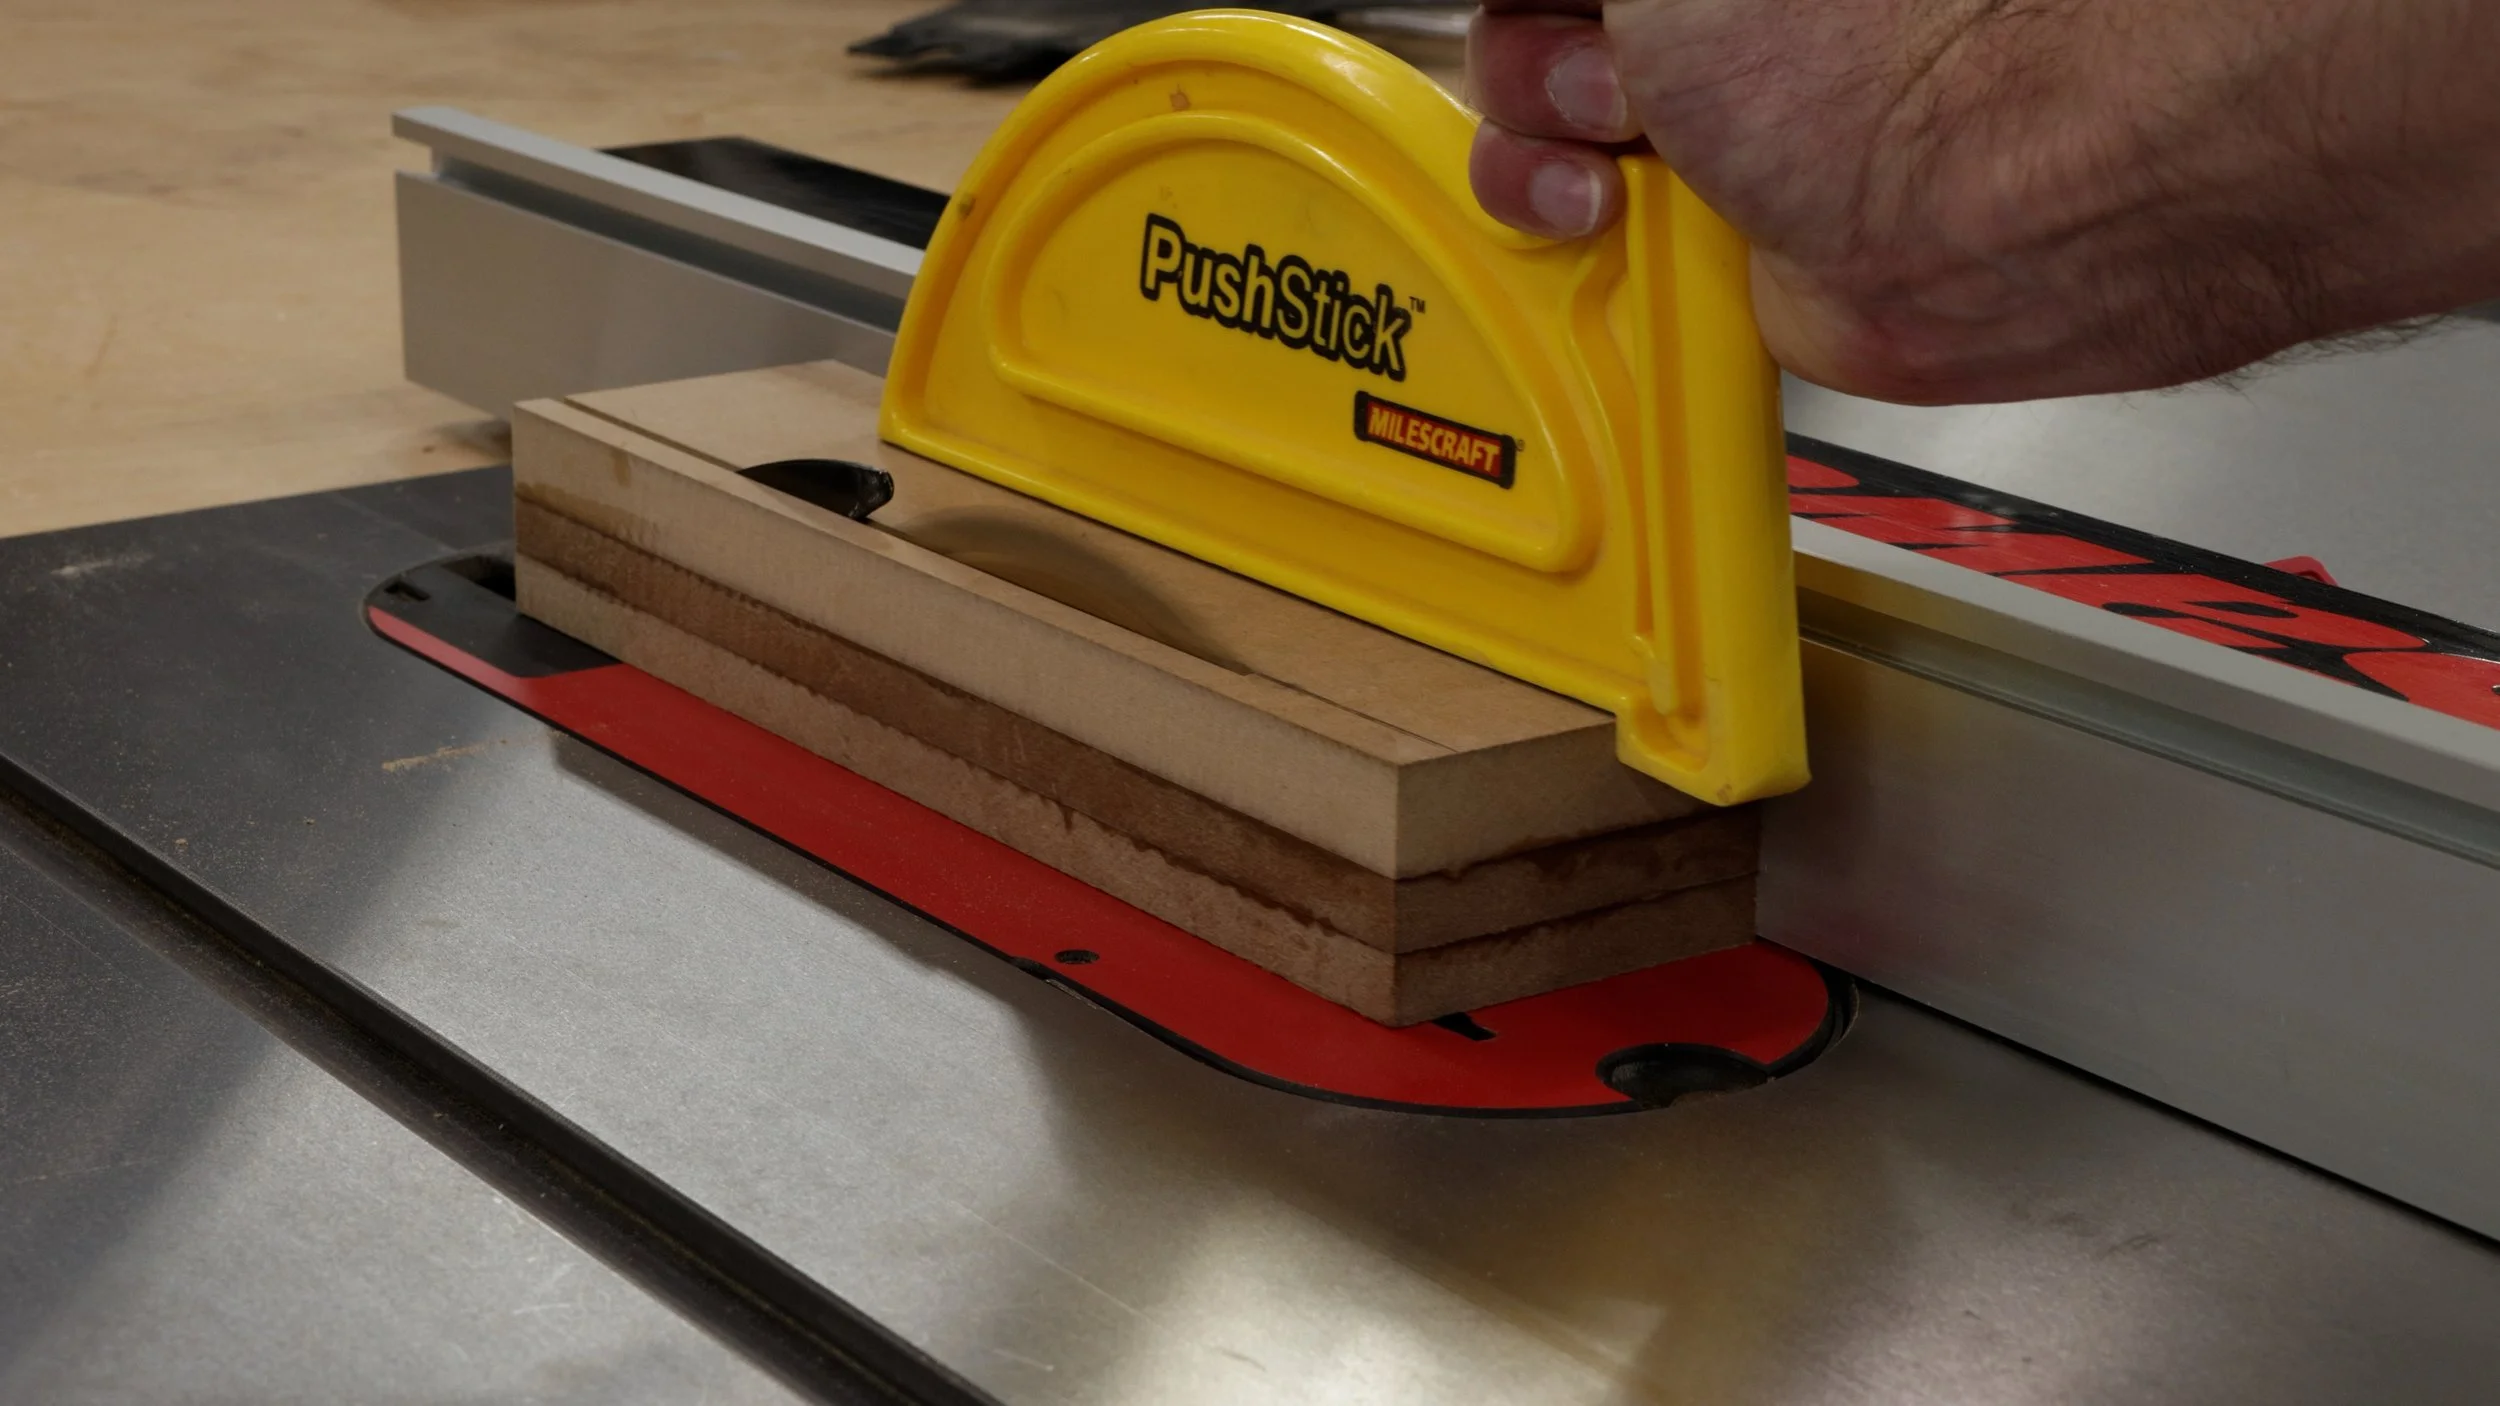
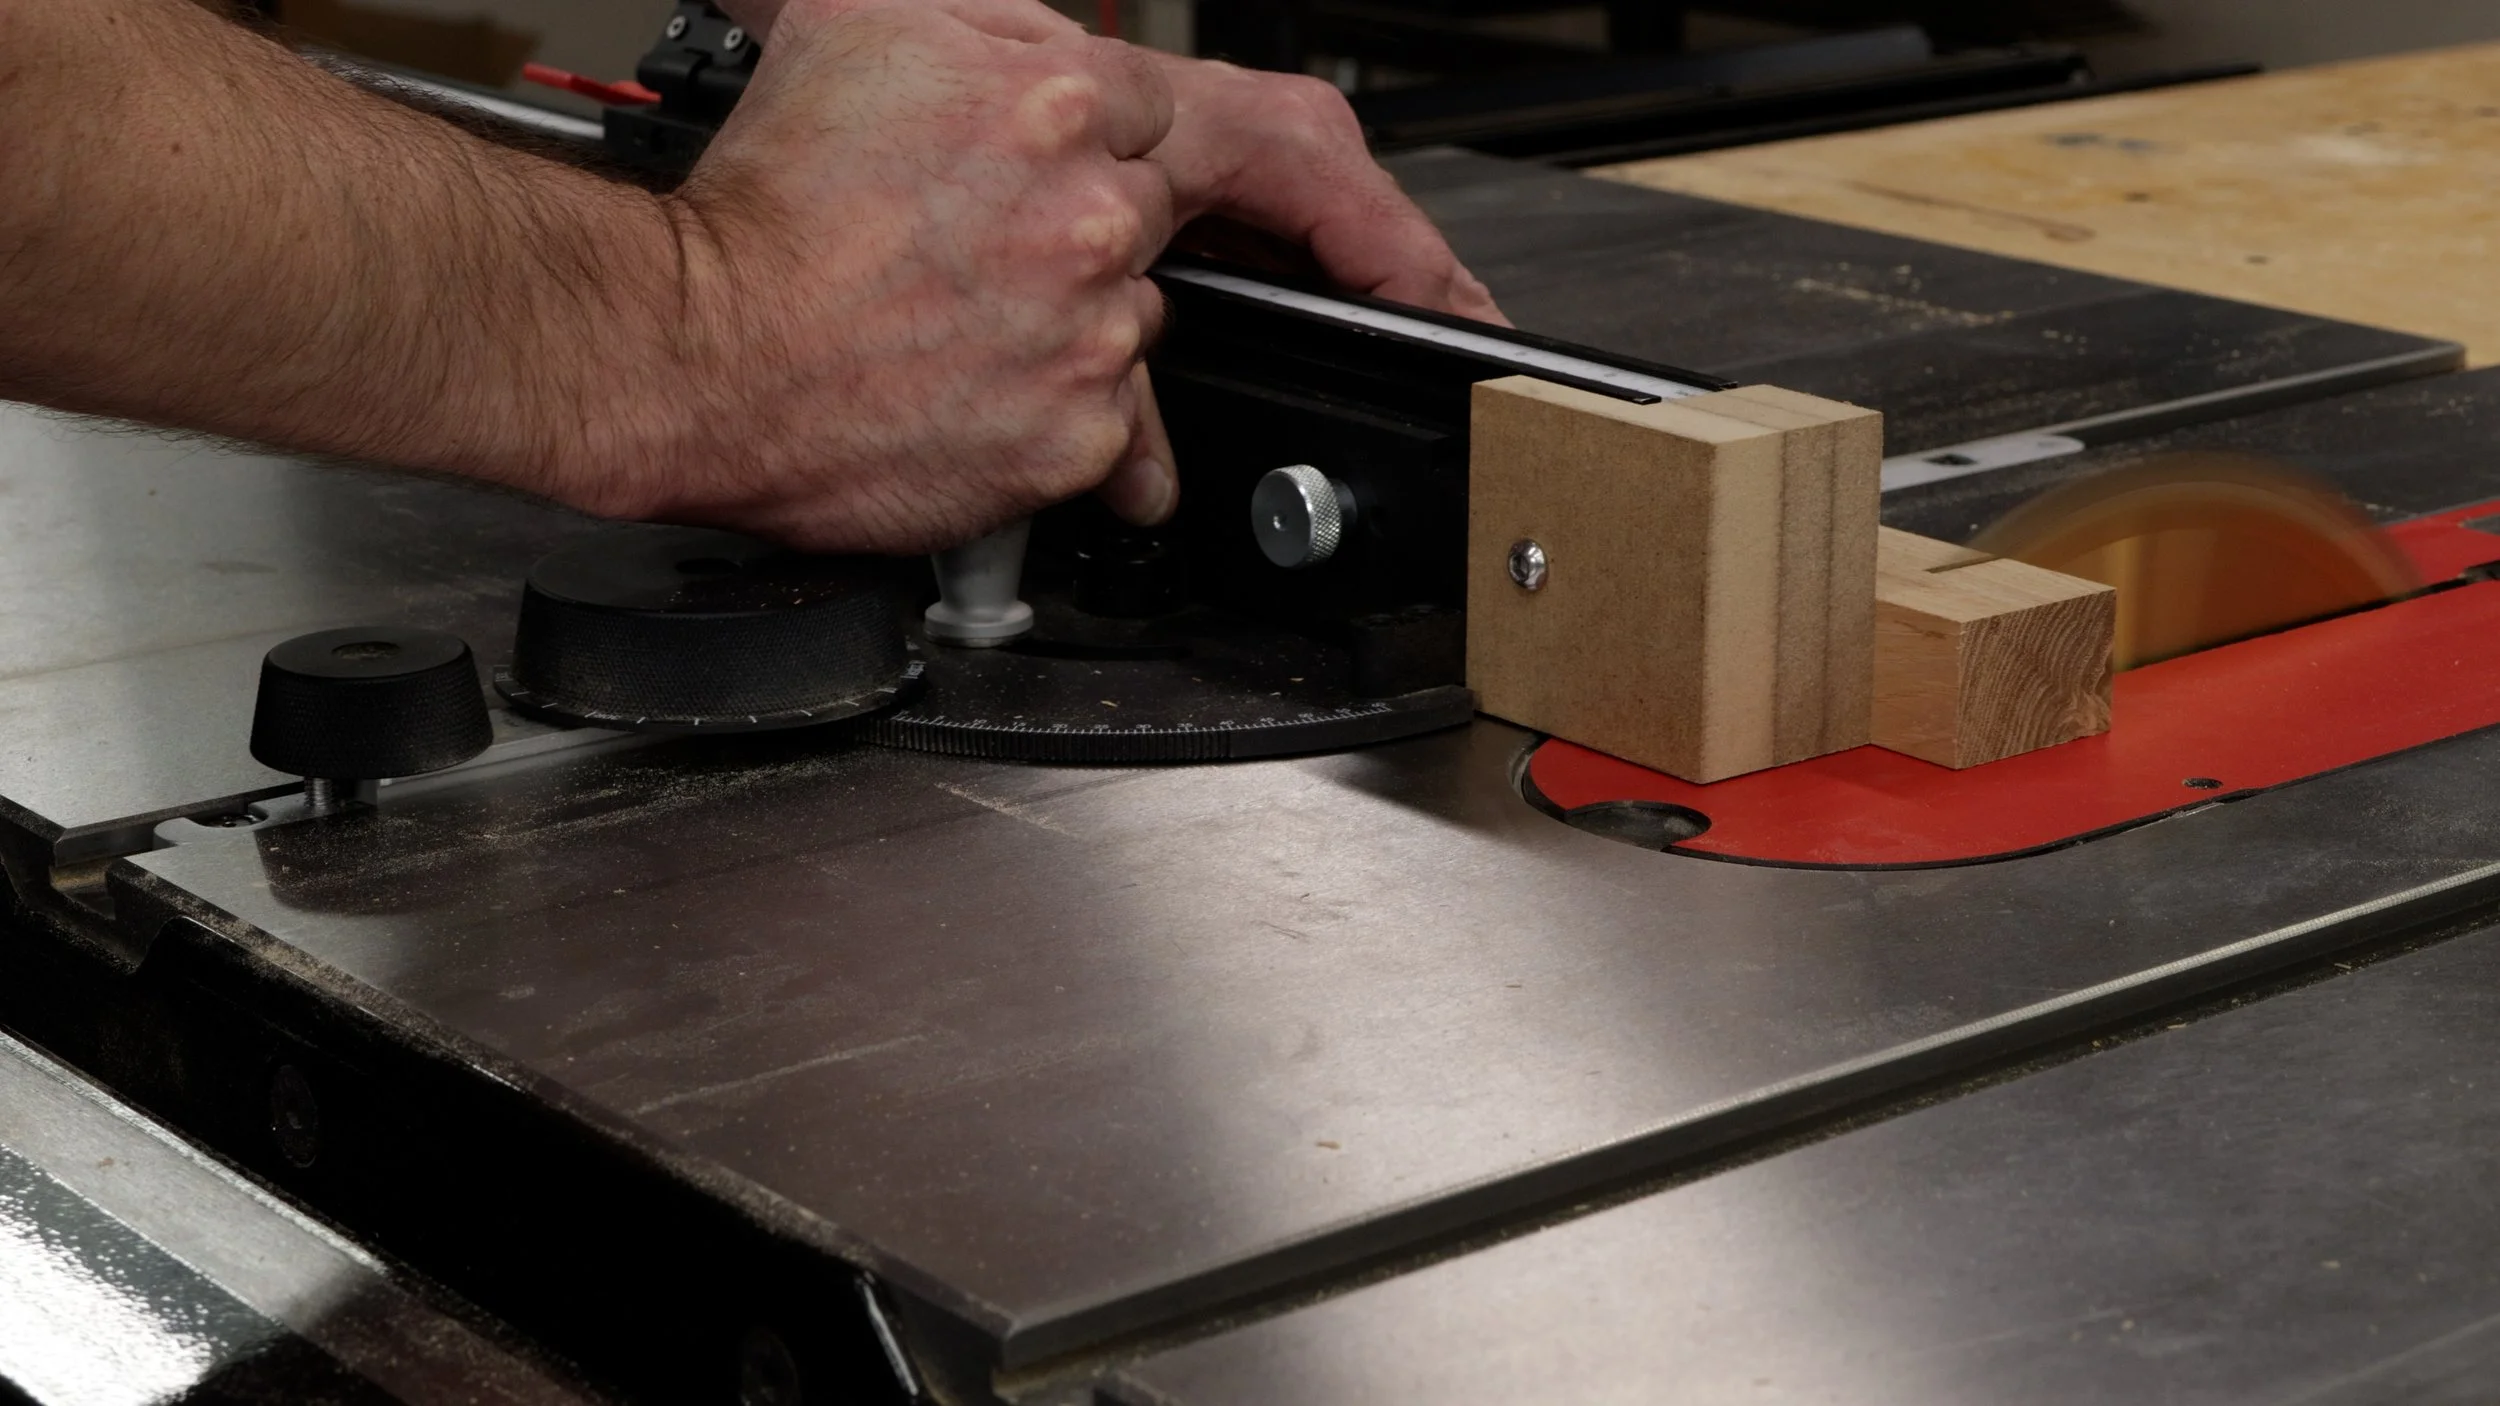
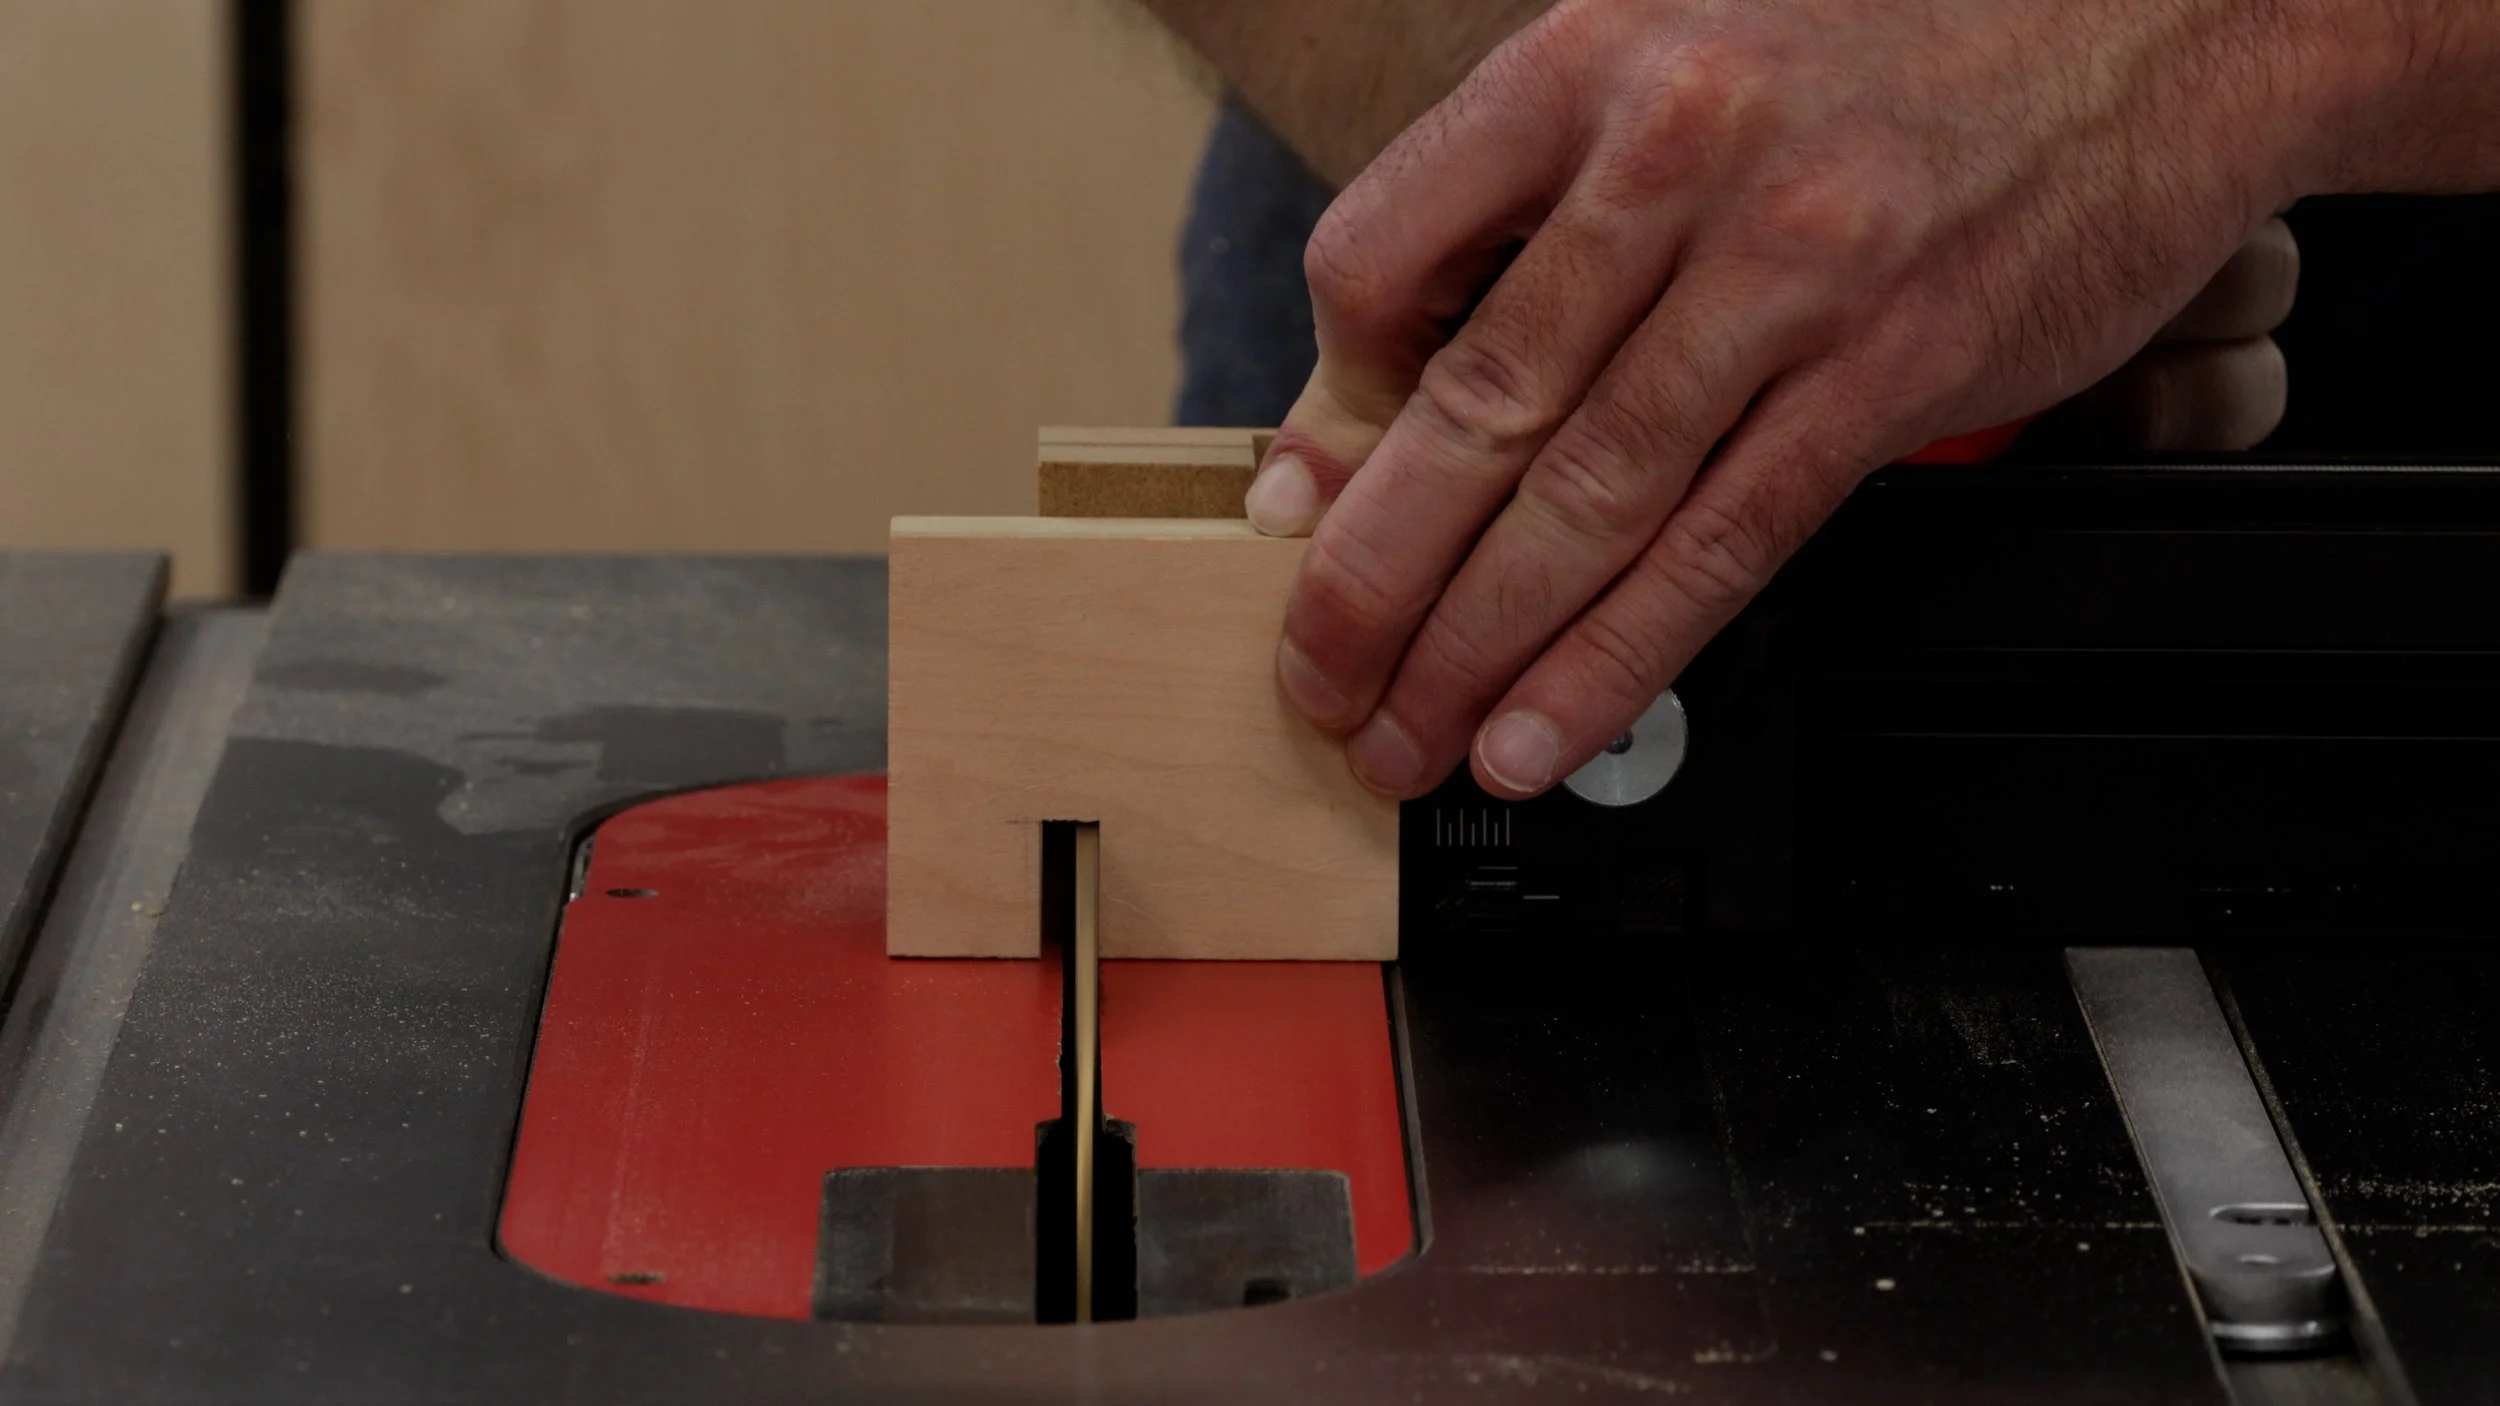
Lay the front face of the MDF down on the table saw and cut away material to make a “L” shape. A dado stack will make it faster, but a regular old blade works just fine. The amount of material you need to cut depends on the miter gauge and how far away you set it from saw blade. The “L” on my end block is 1-3/8” long.
It’s important to ensure the block does not stick out past the front face of the miter gauge. Use something flat like a square or steel ruler to confirm. If the block isn’t deep enough (there’s a gap between your workpiece and front face of the end block, raise the saw blade higher and recut the “L”.
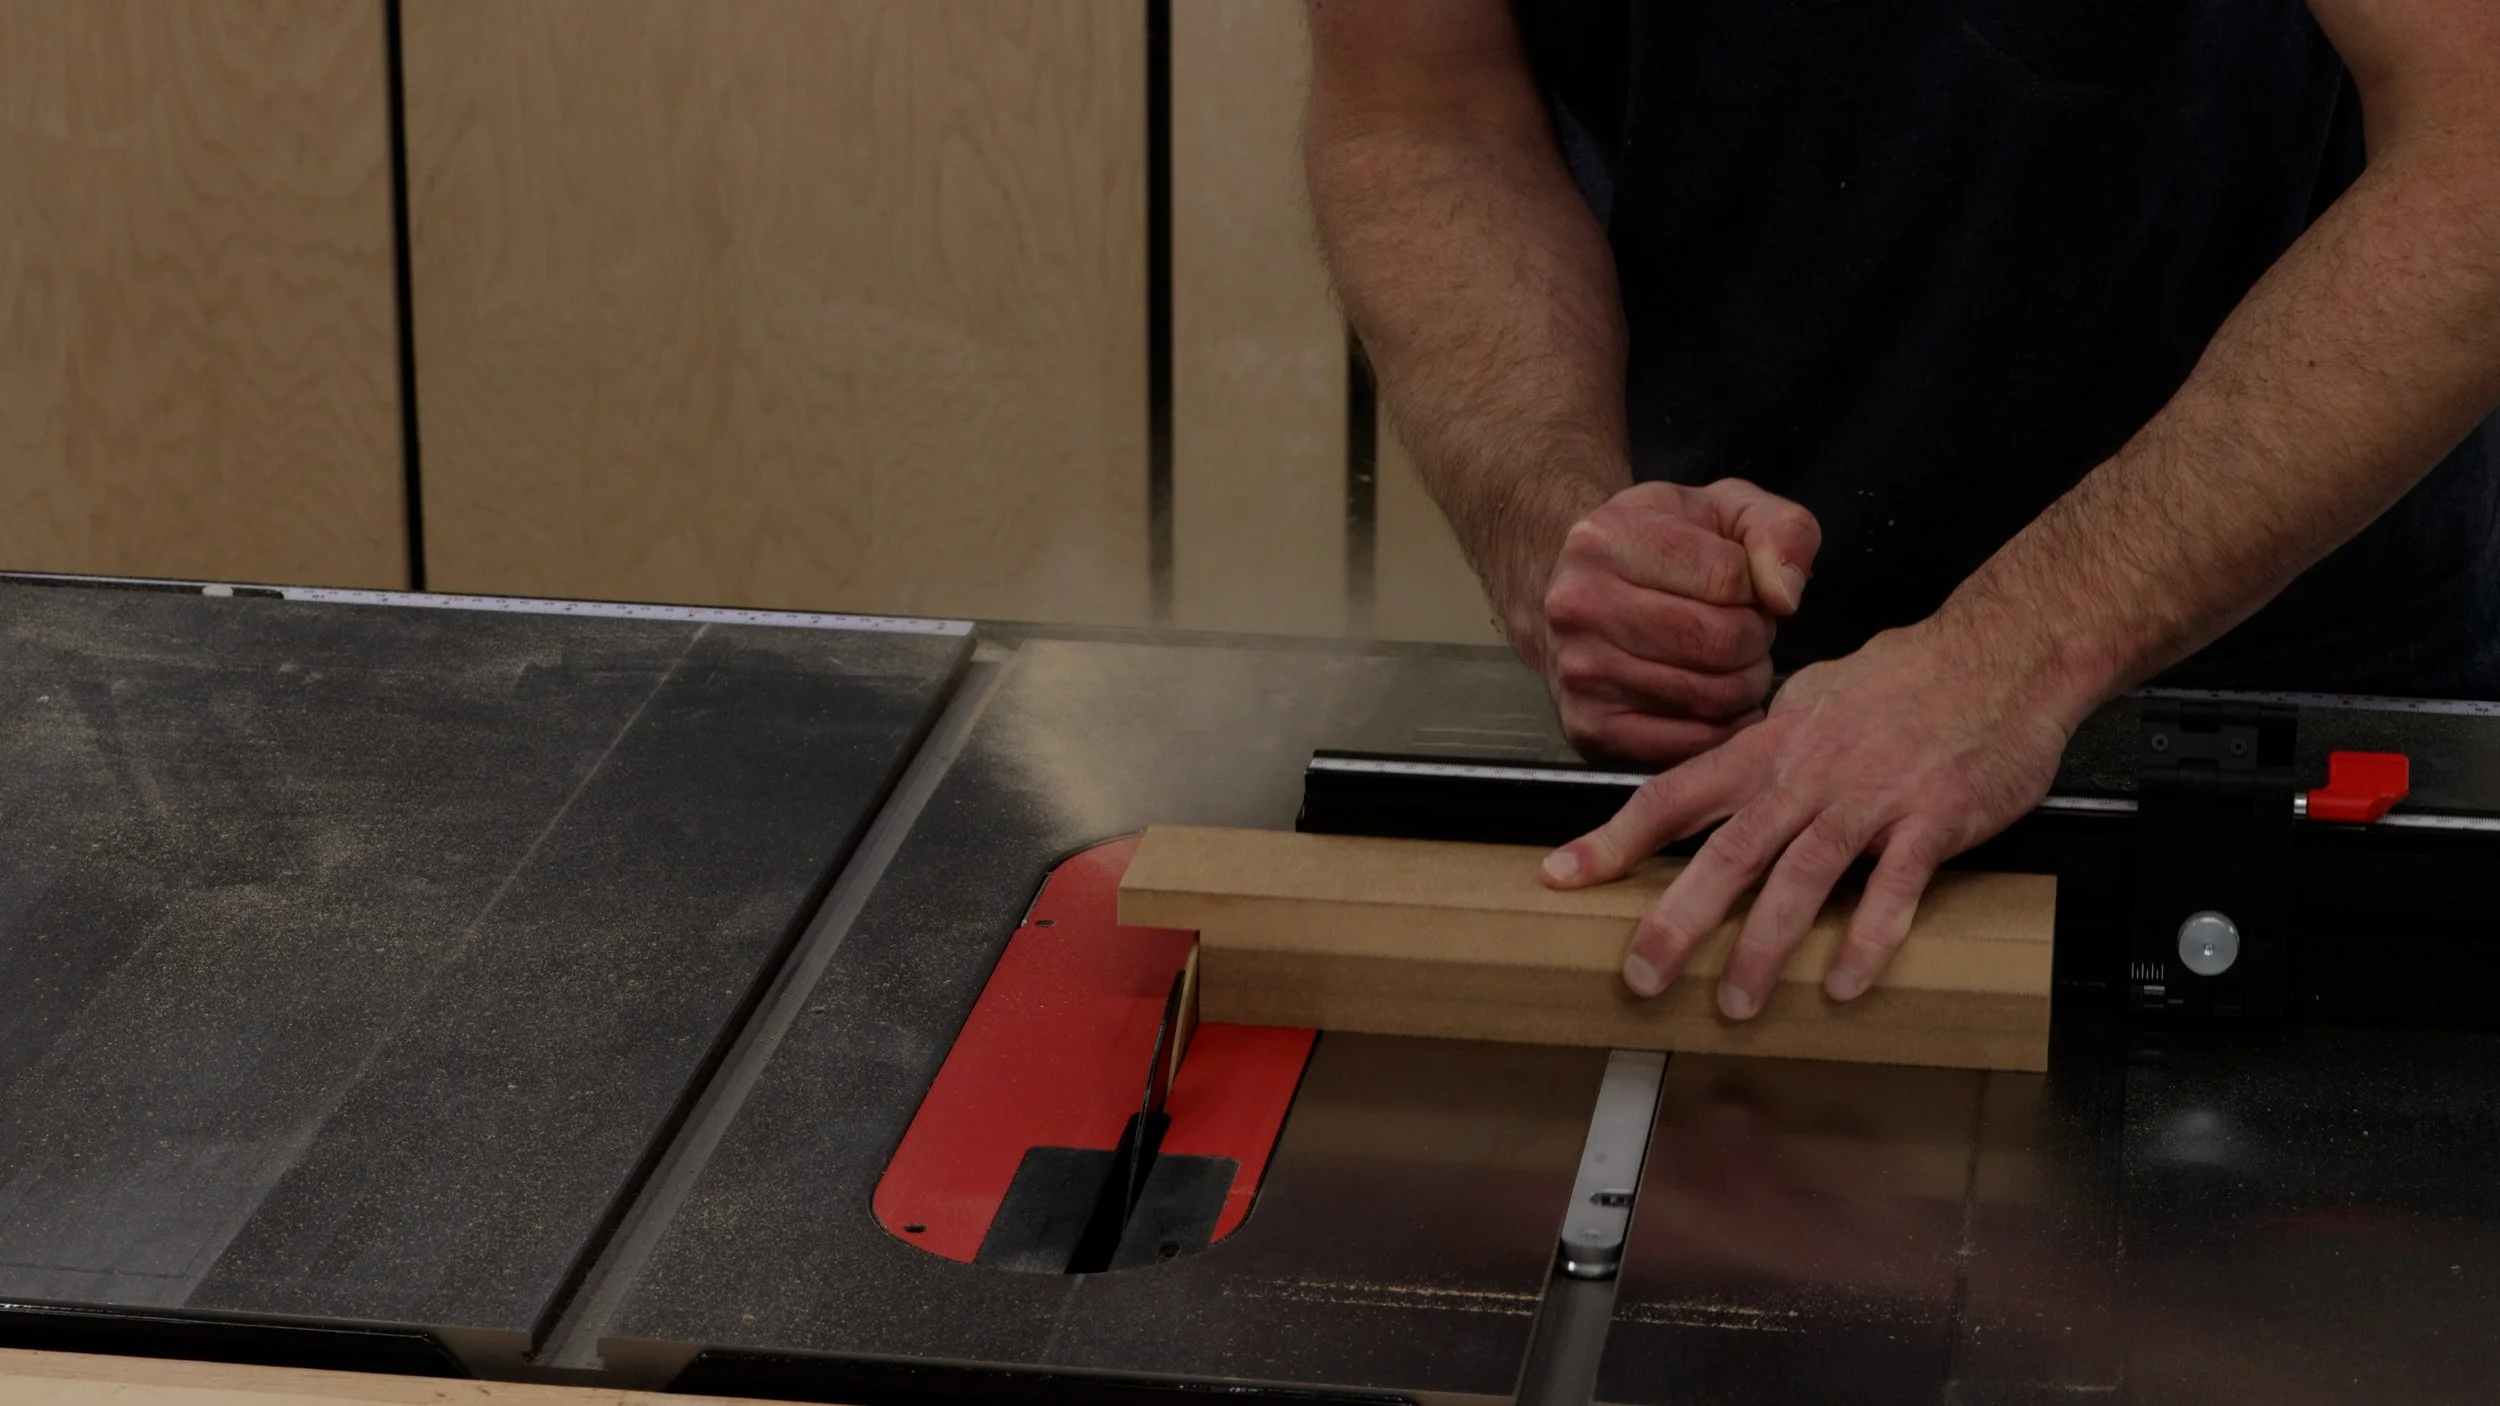
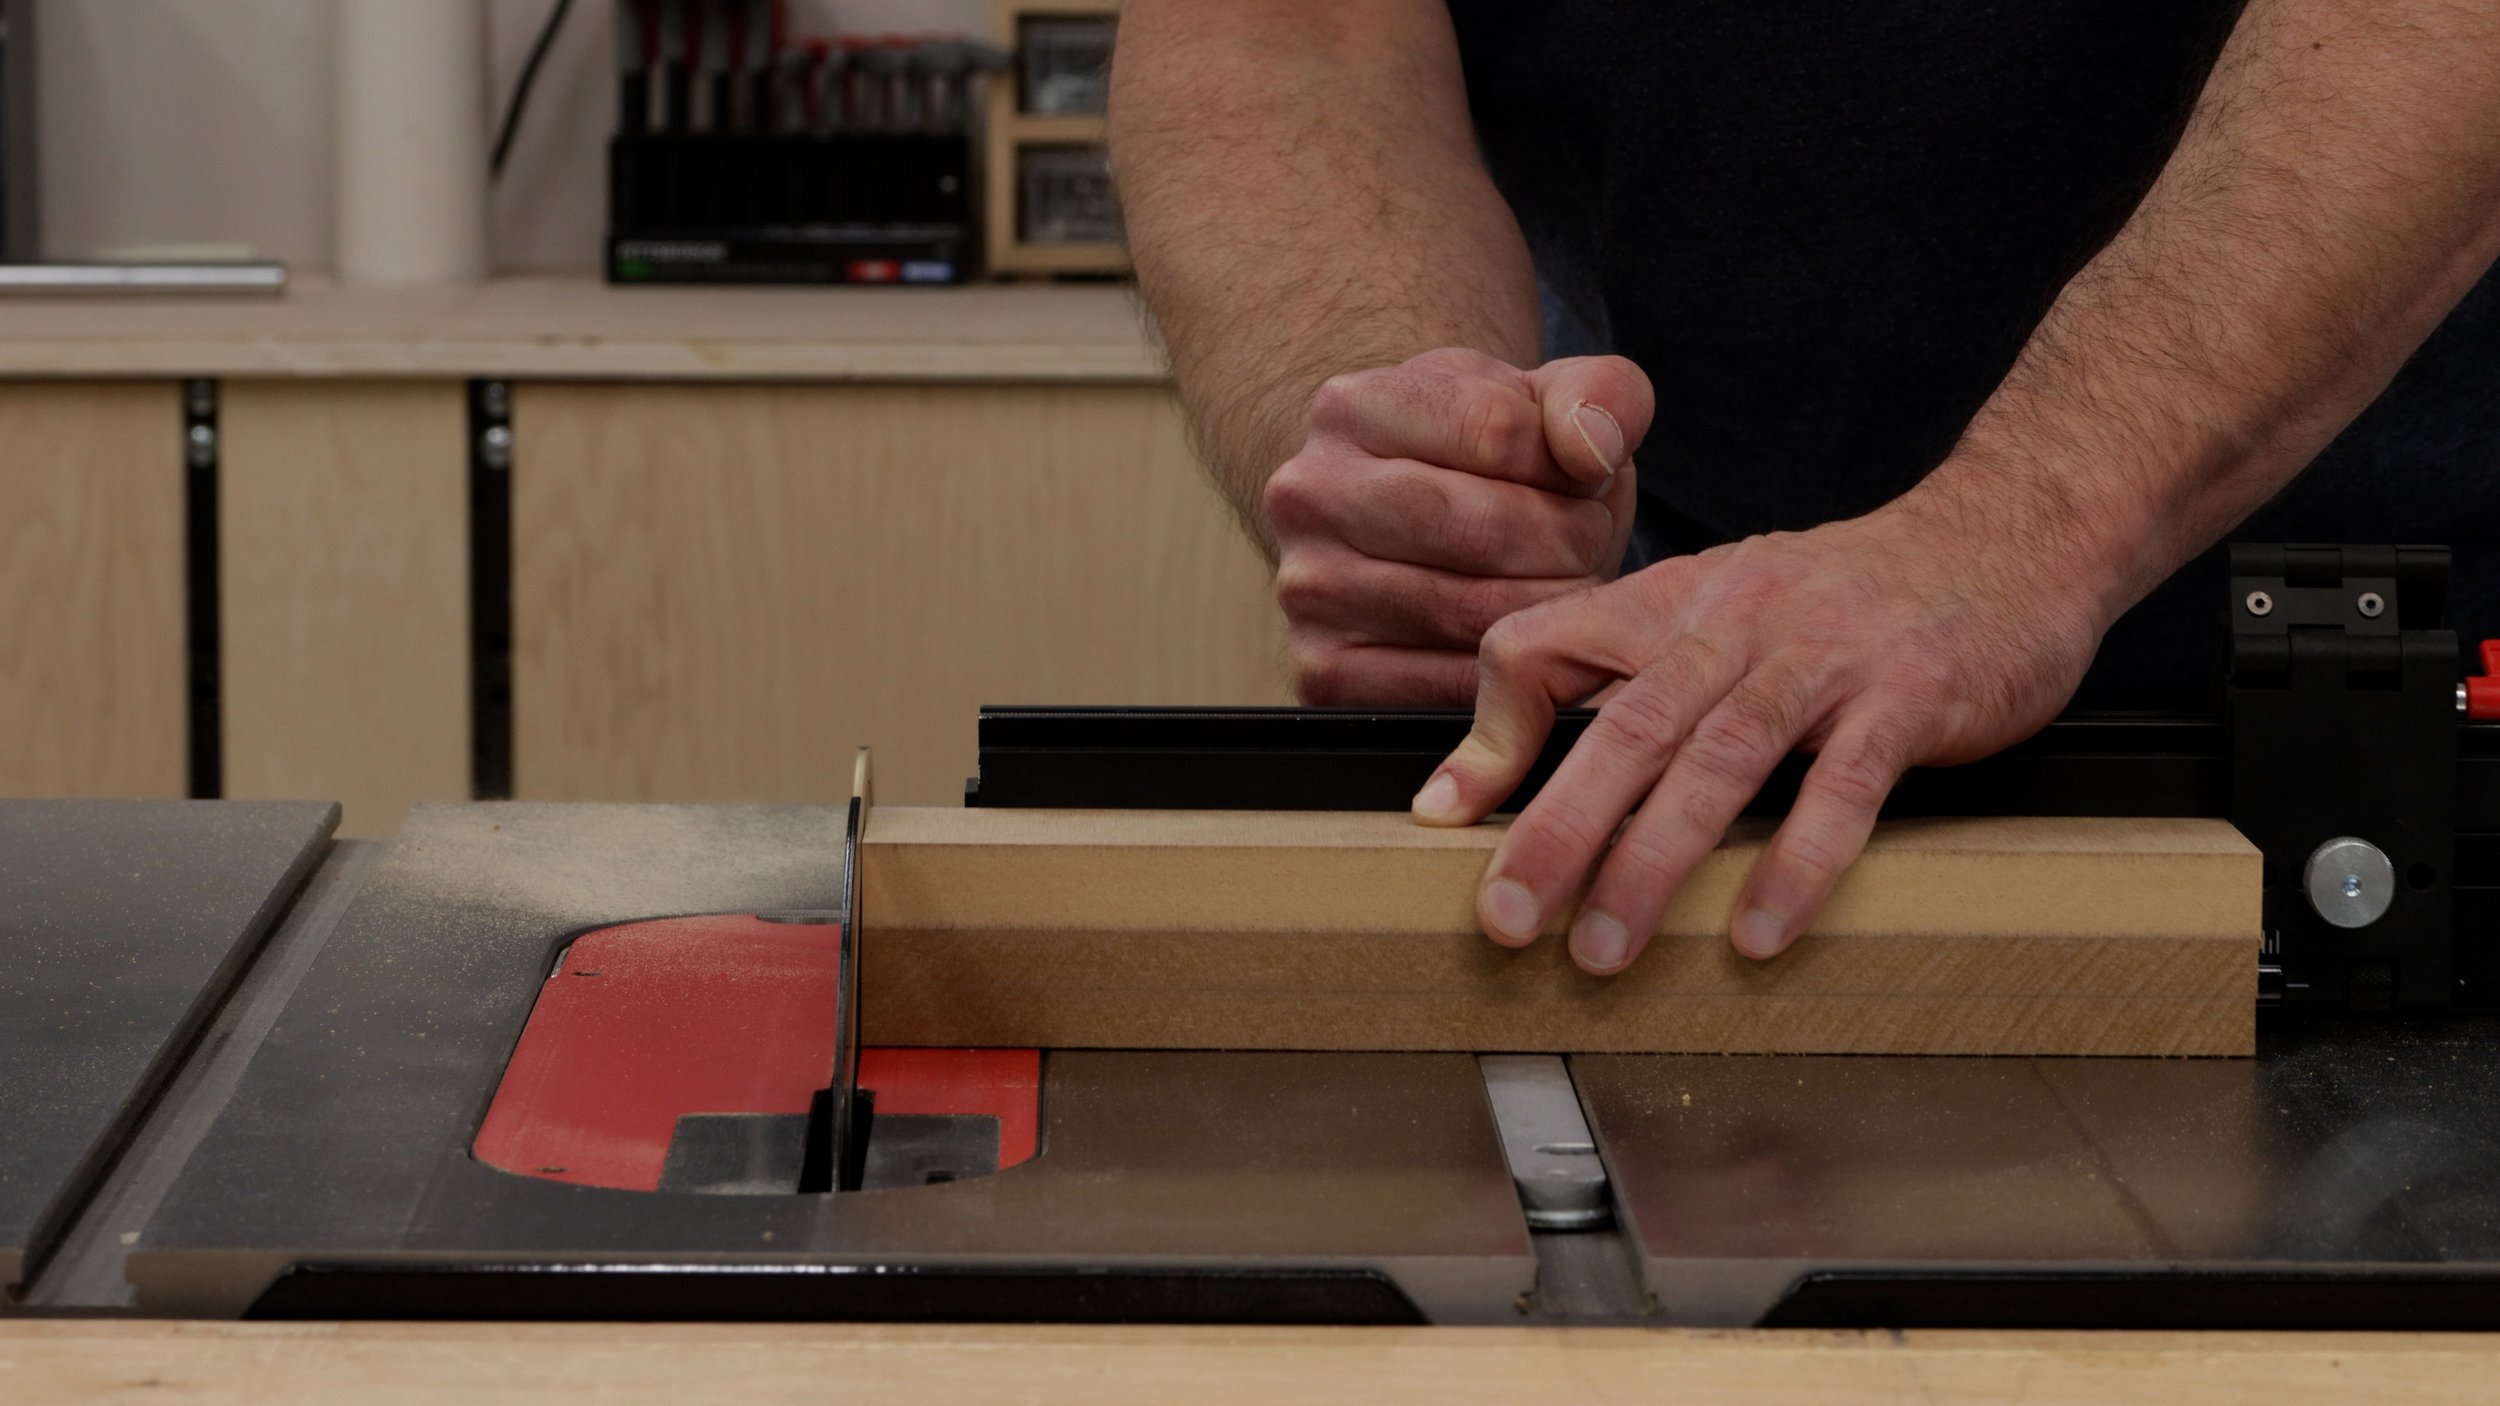
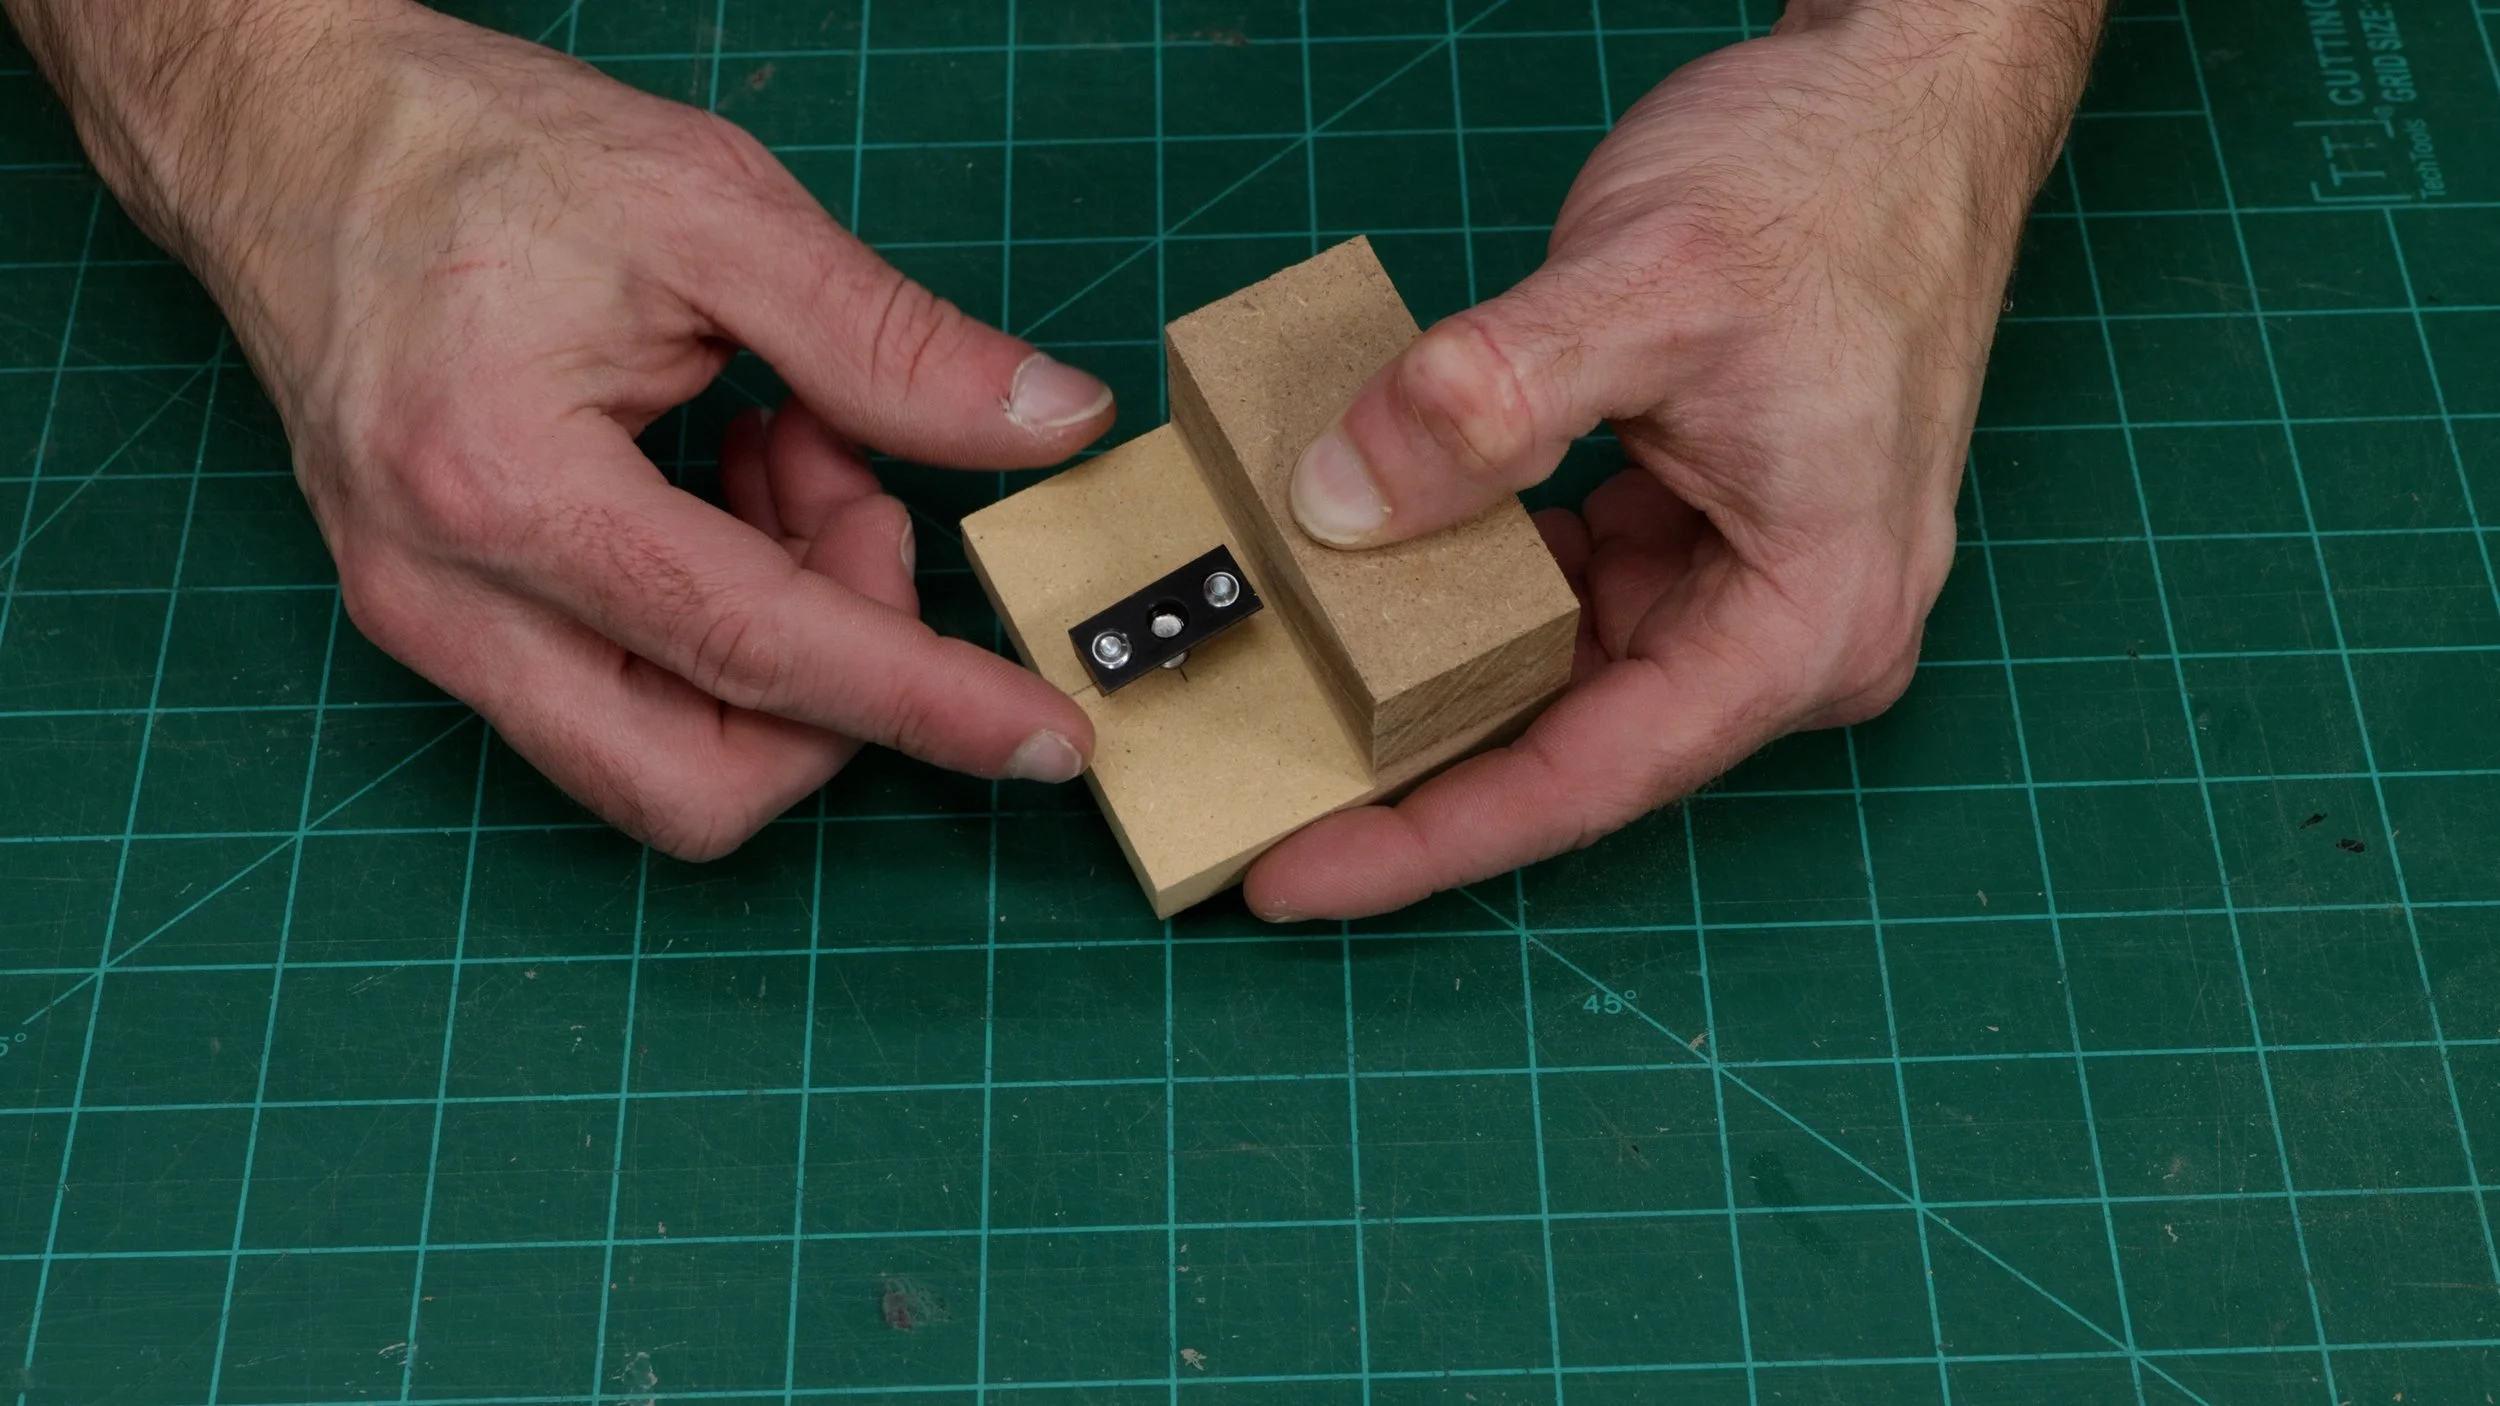
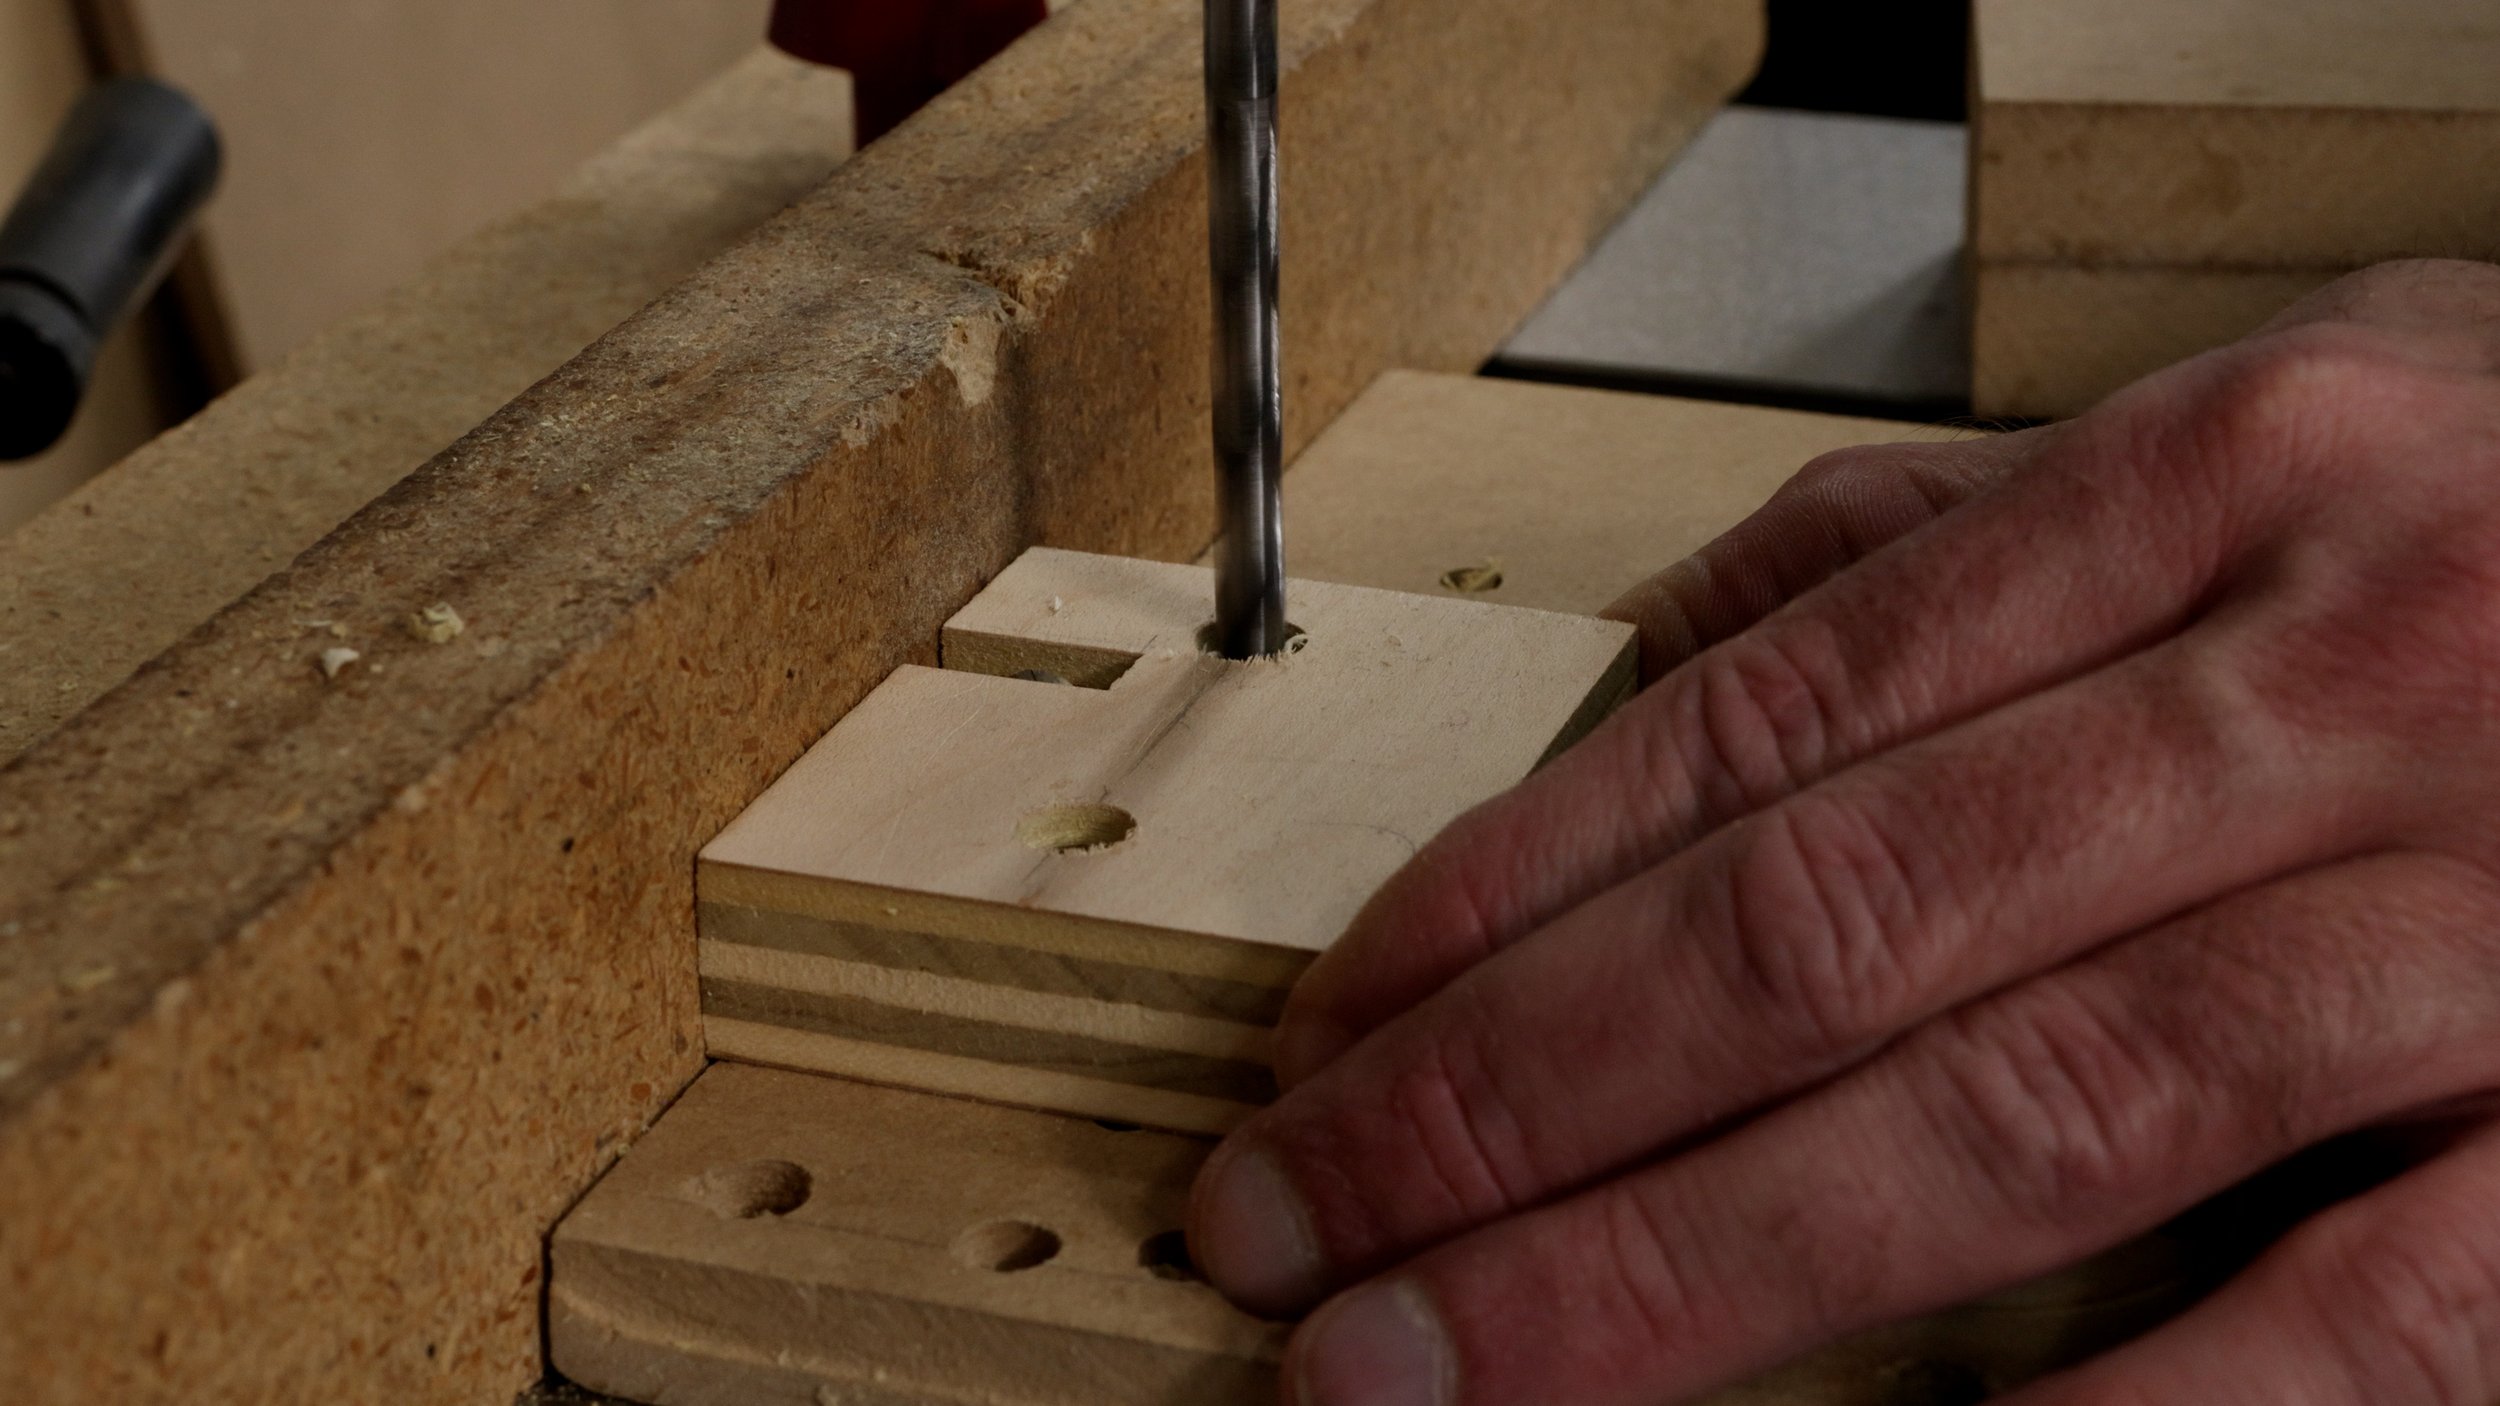
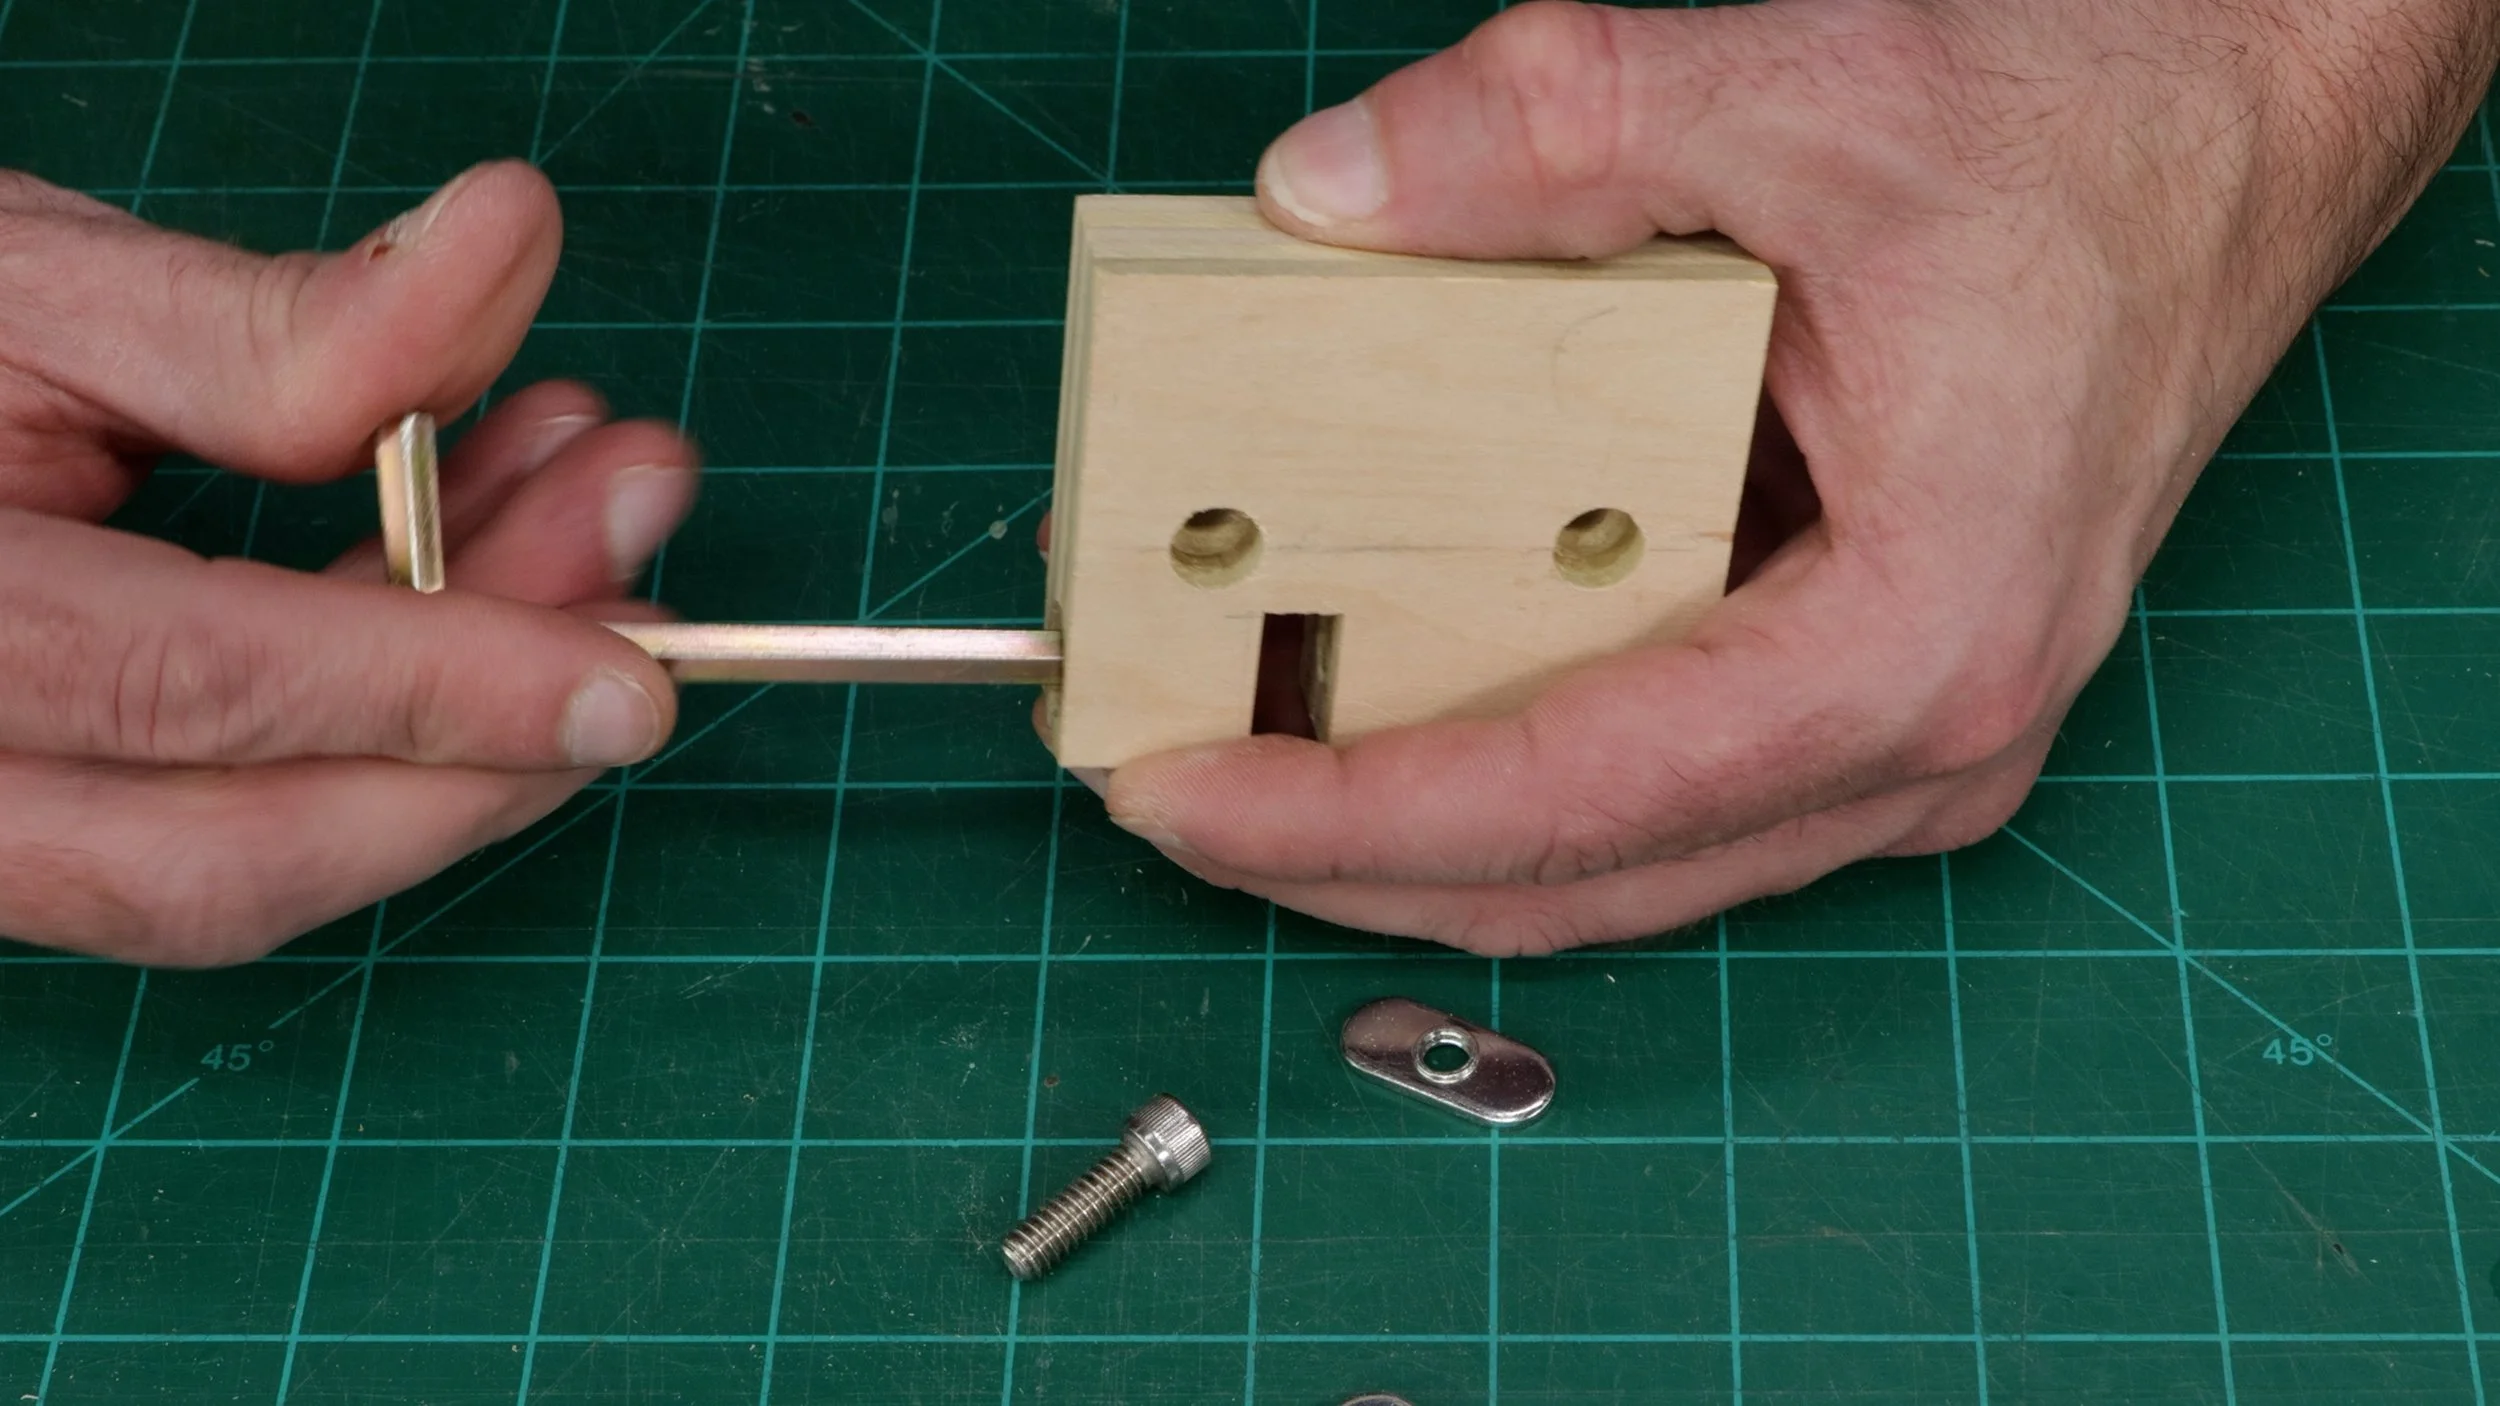
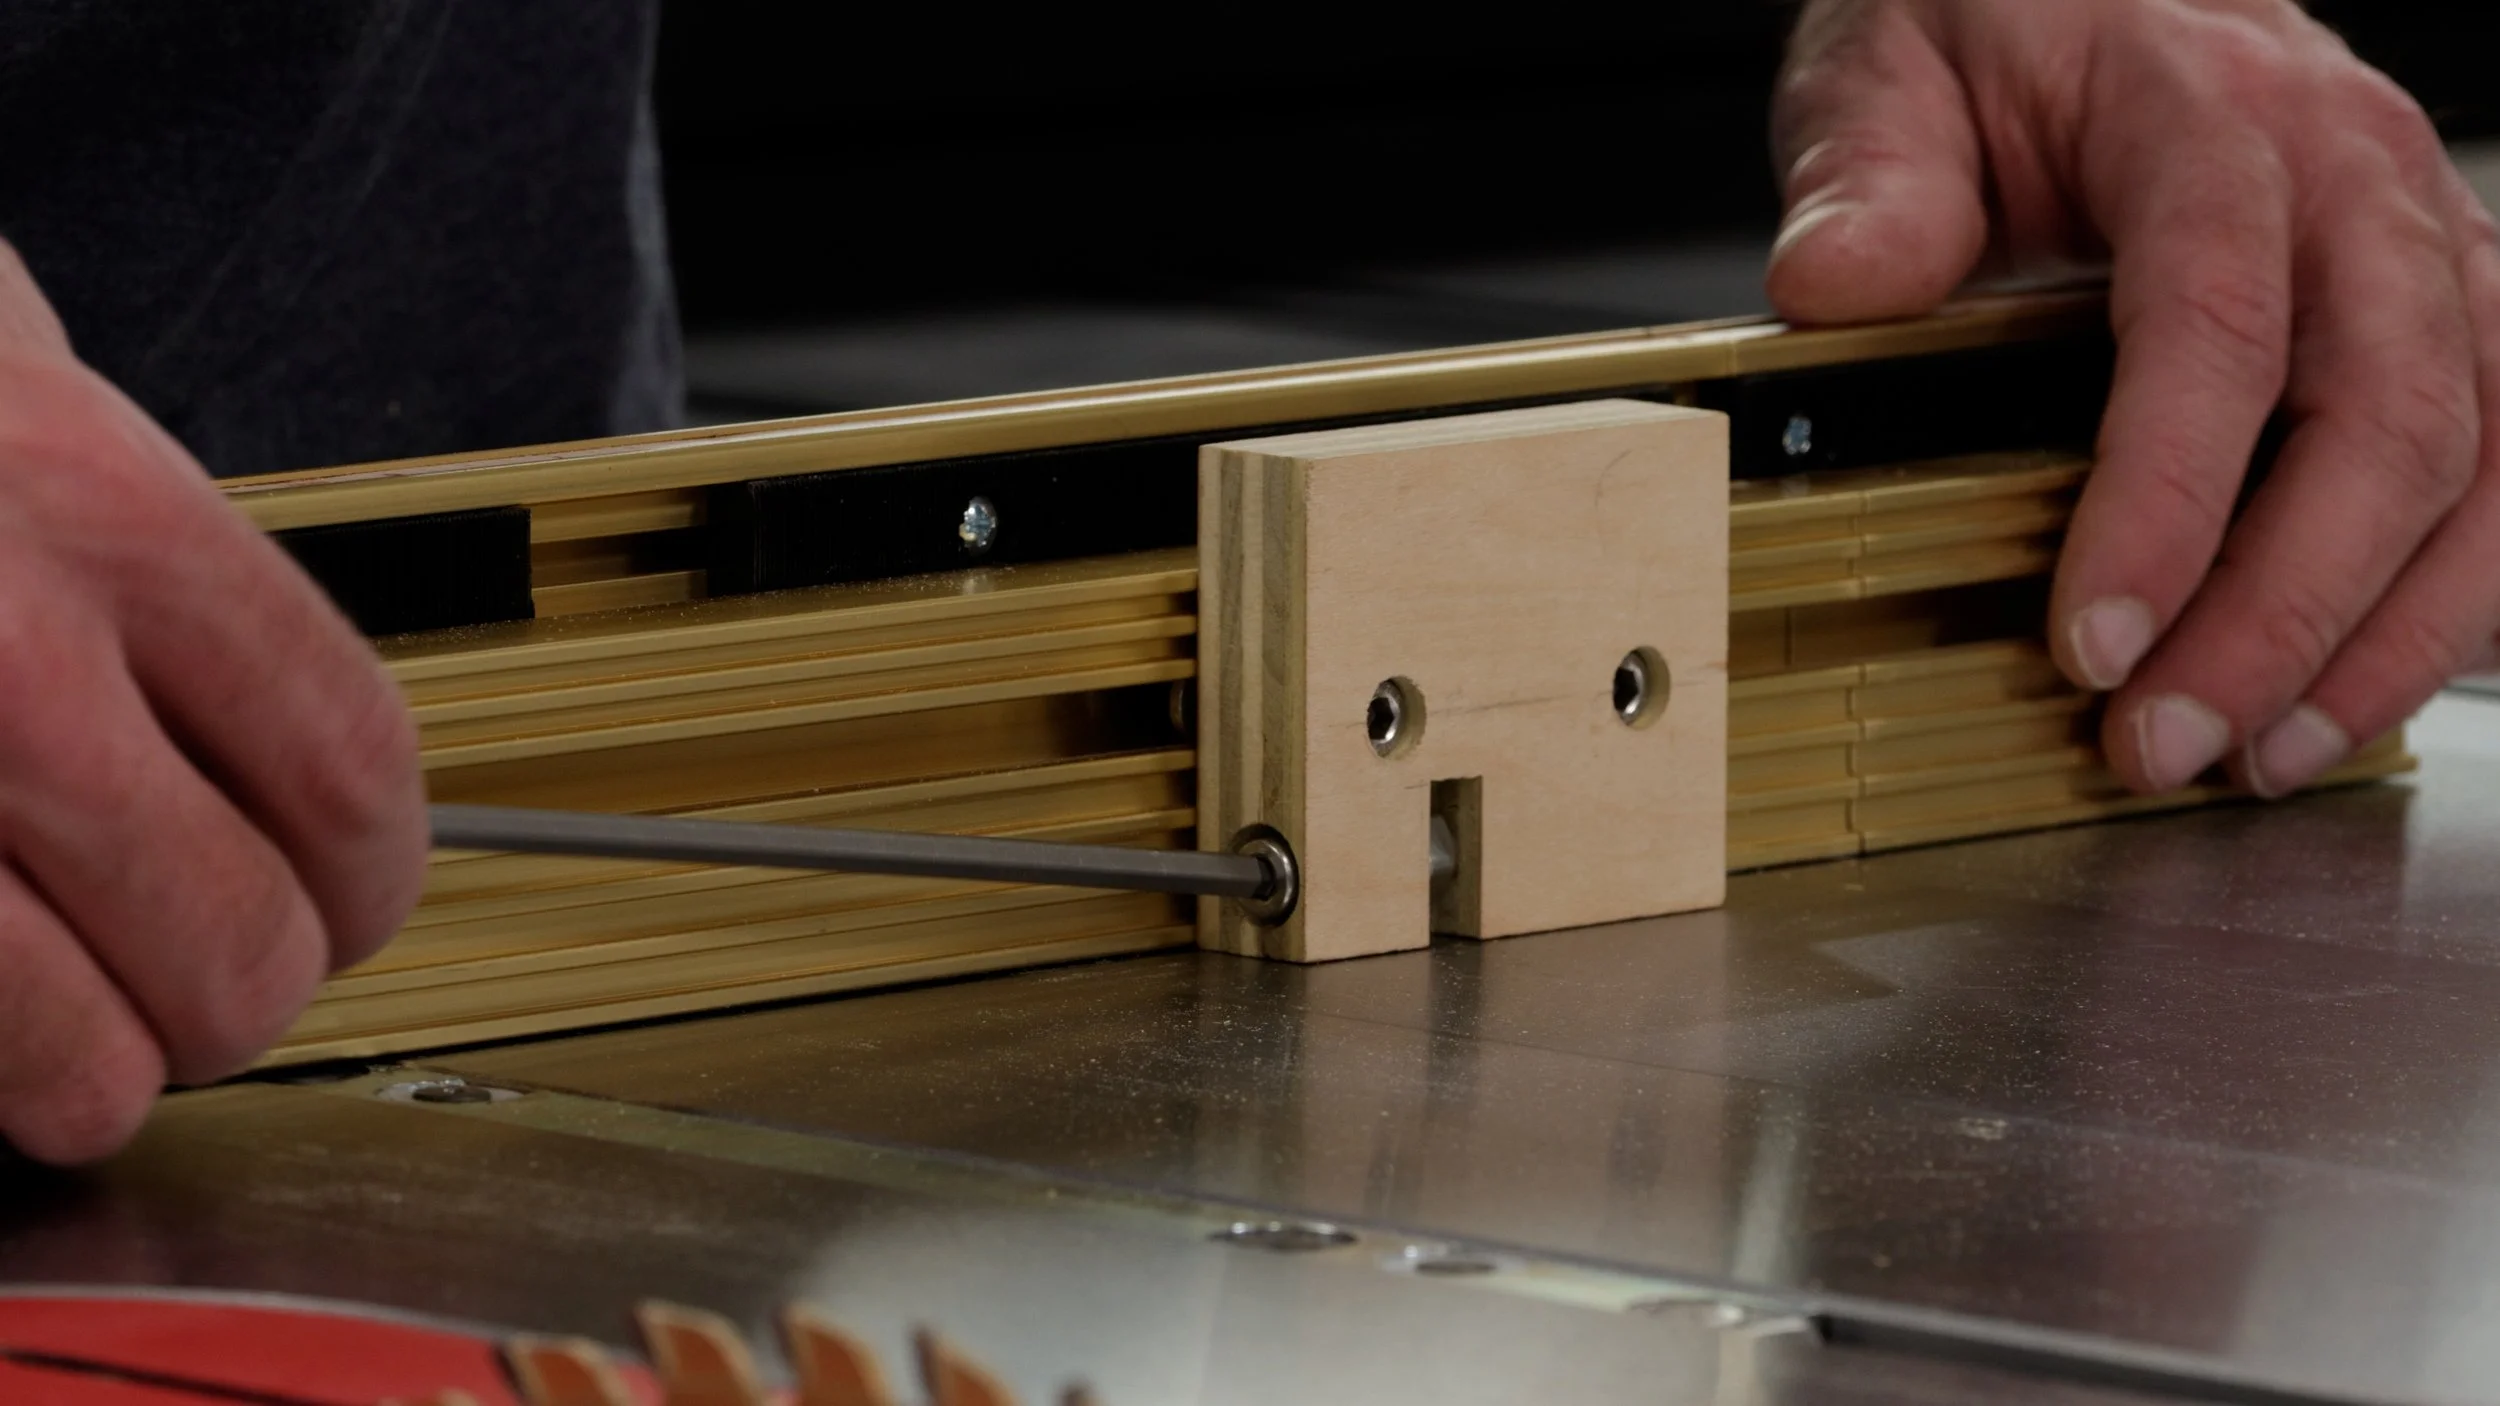
Most miter gauges are made from extruded aluminum and have slots on the back. Drill a hole for a bolt to go through the block and into the slot in the fence. Screw a nut to the bolt and secure the block to the end of the gauge. The type of slot impacts the type of nut you use. My SawStop miter gauge has dovetail slots so I used dovetail nuts. My Incra miter gauge has a traditional T slot so I can use T nuts or regular hex nuts. Once you know the end block fits perfectly on the miter gauge, cut the block to final length. You will likely only need it to be between 2-1/2” - 3” long.

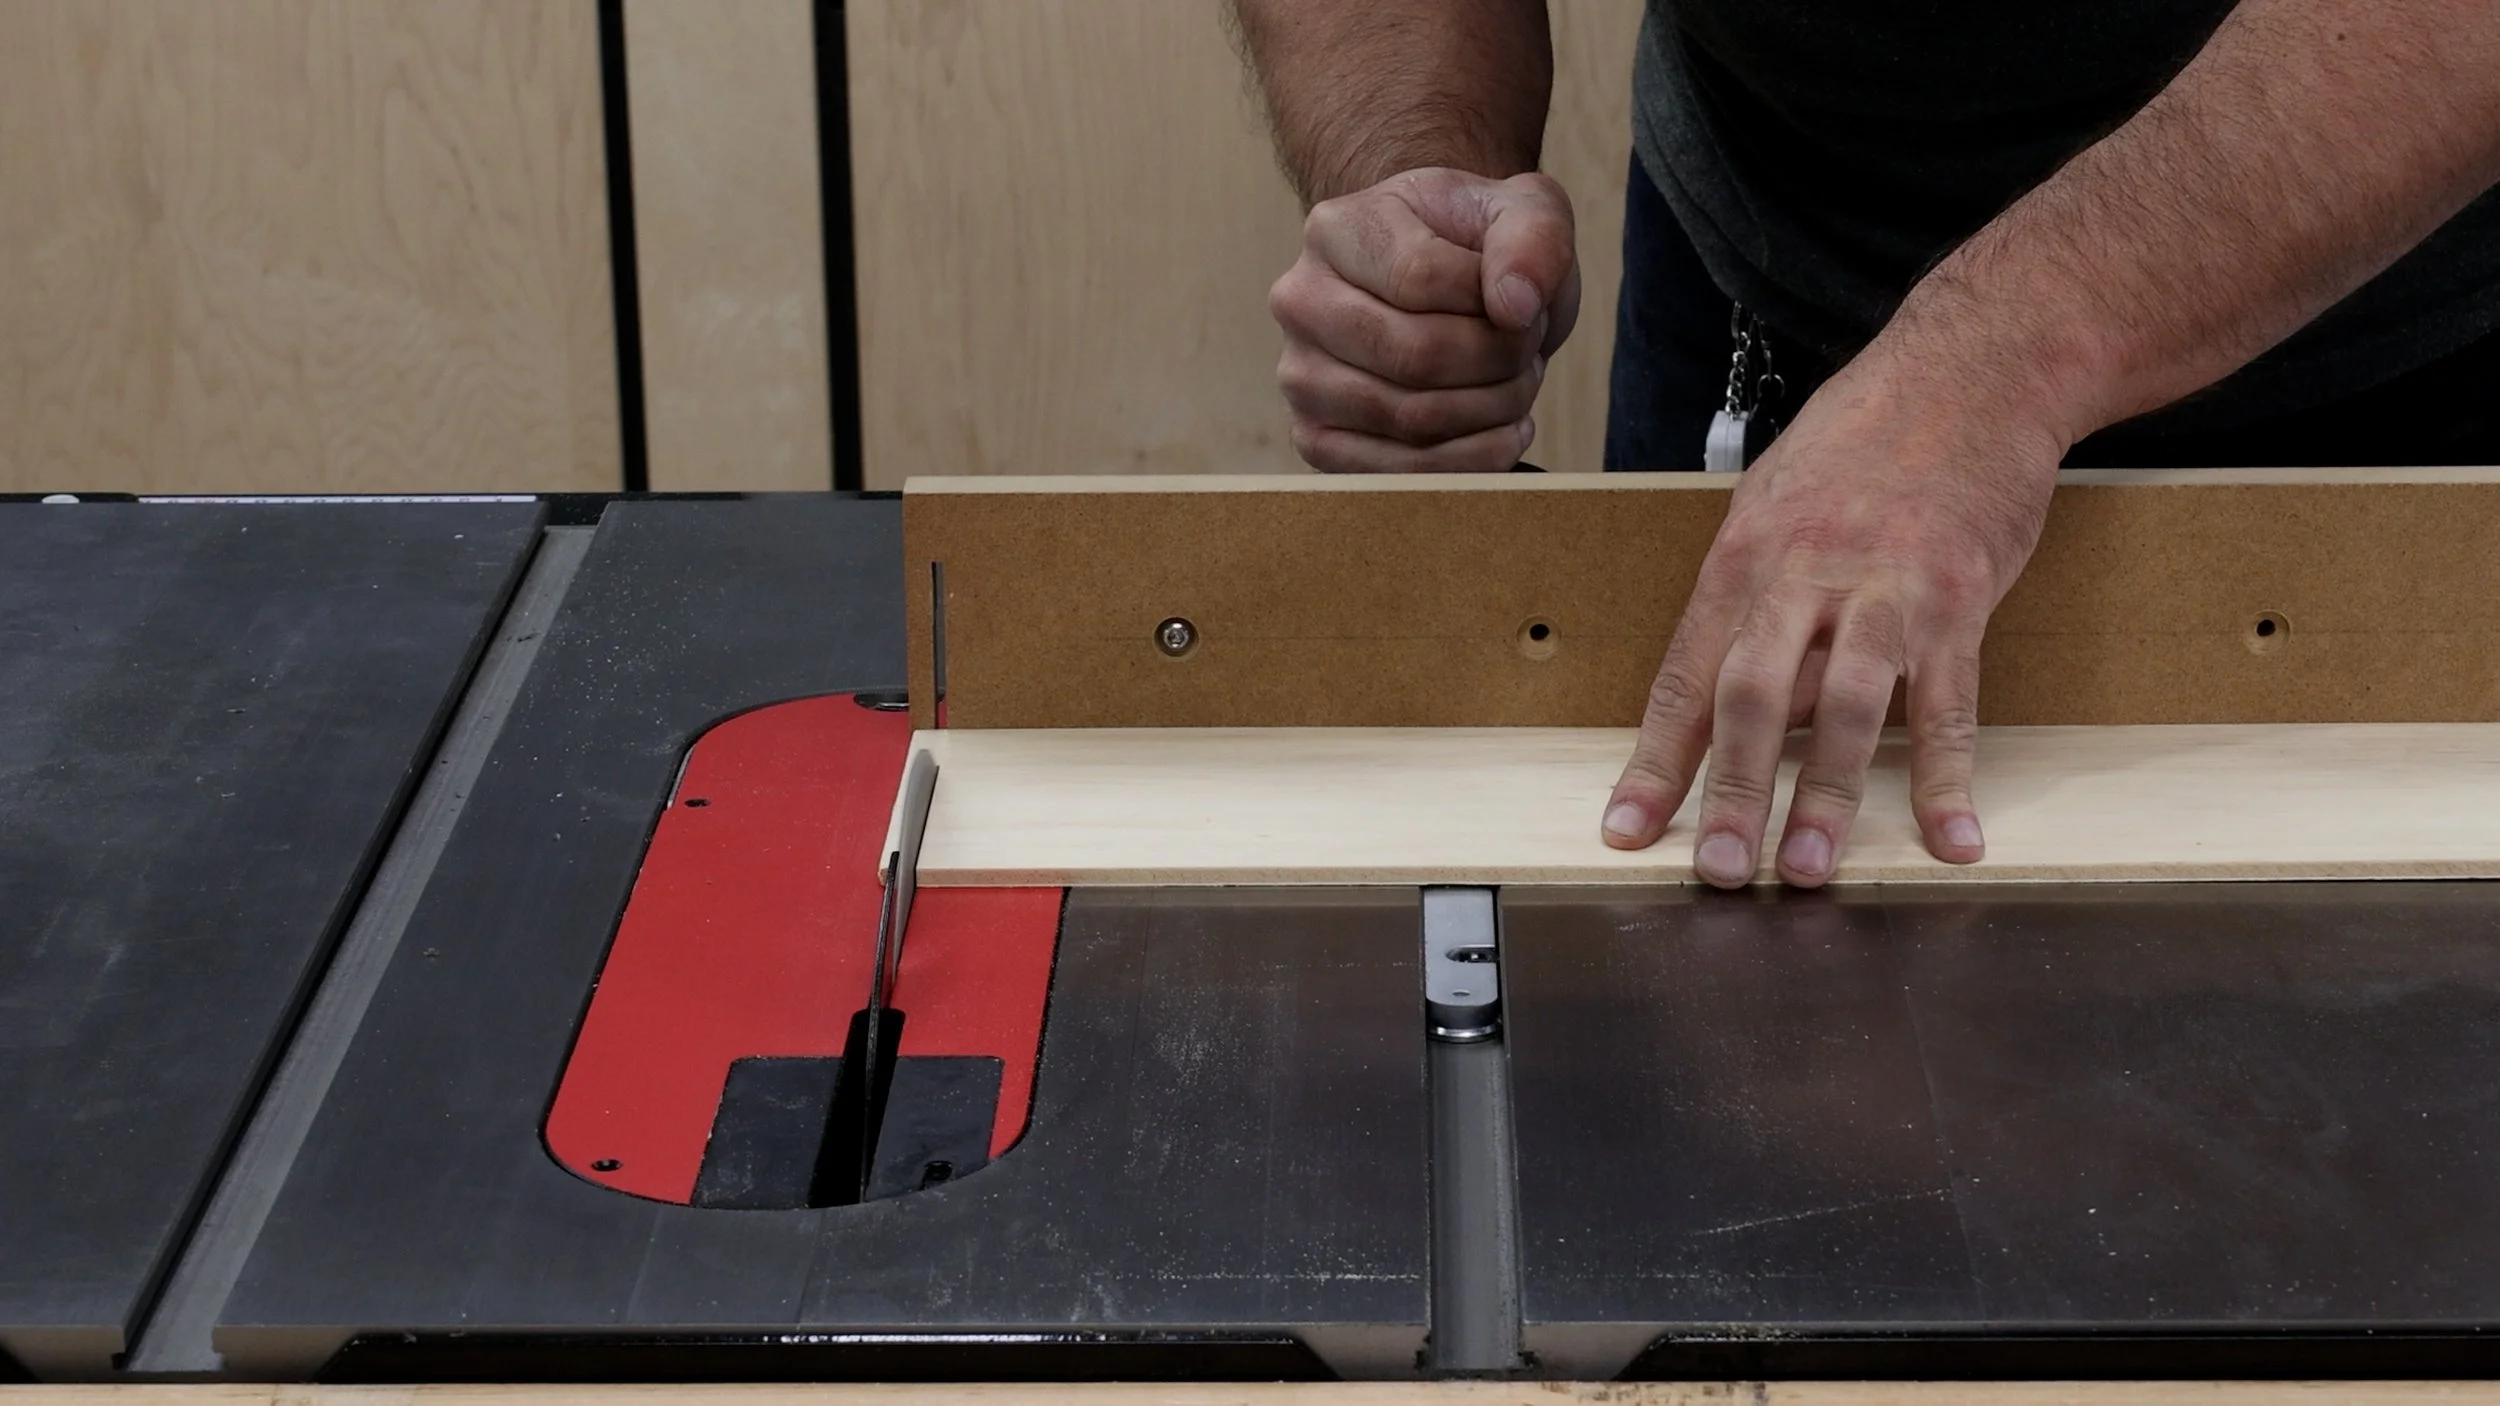
Now, I can use the actual surface of my miter gauge and still reduce tearout. Since I’m not loosening and tightening a board over and over again, I have a consistent surface to butt my workpiece against and a better likelihood of getting perfect cuts with no tearout.
The Problem with Factory Miter Gauge Stop Blocks
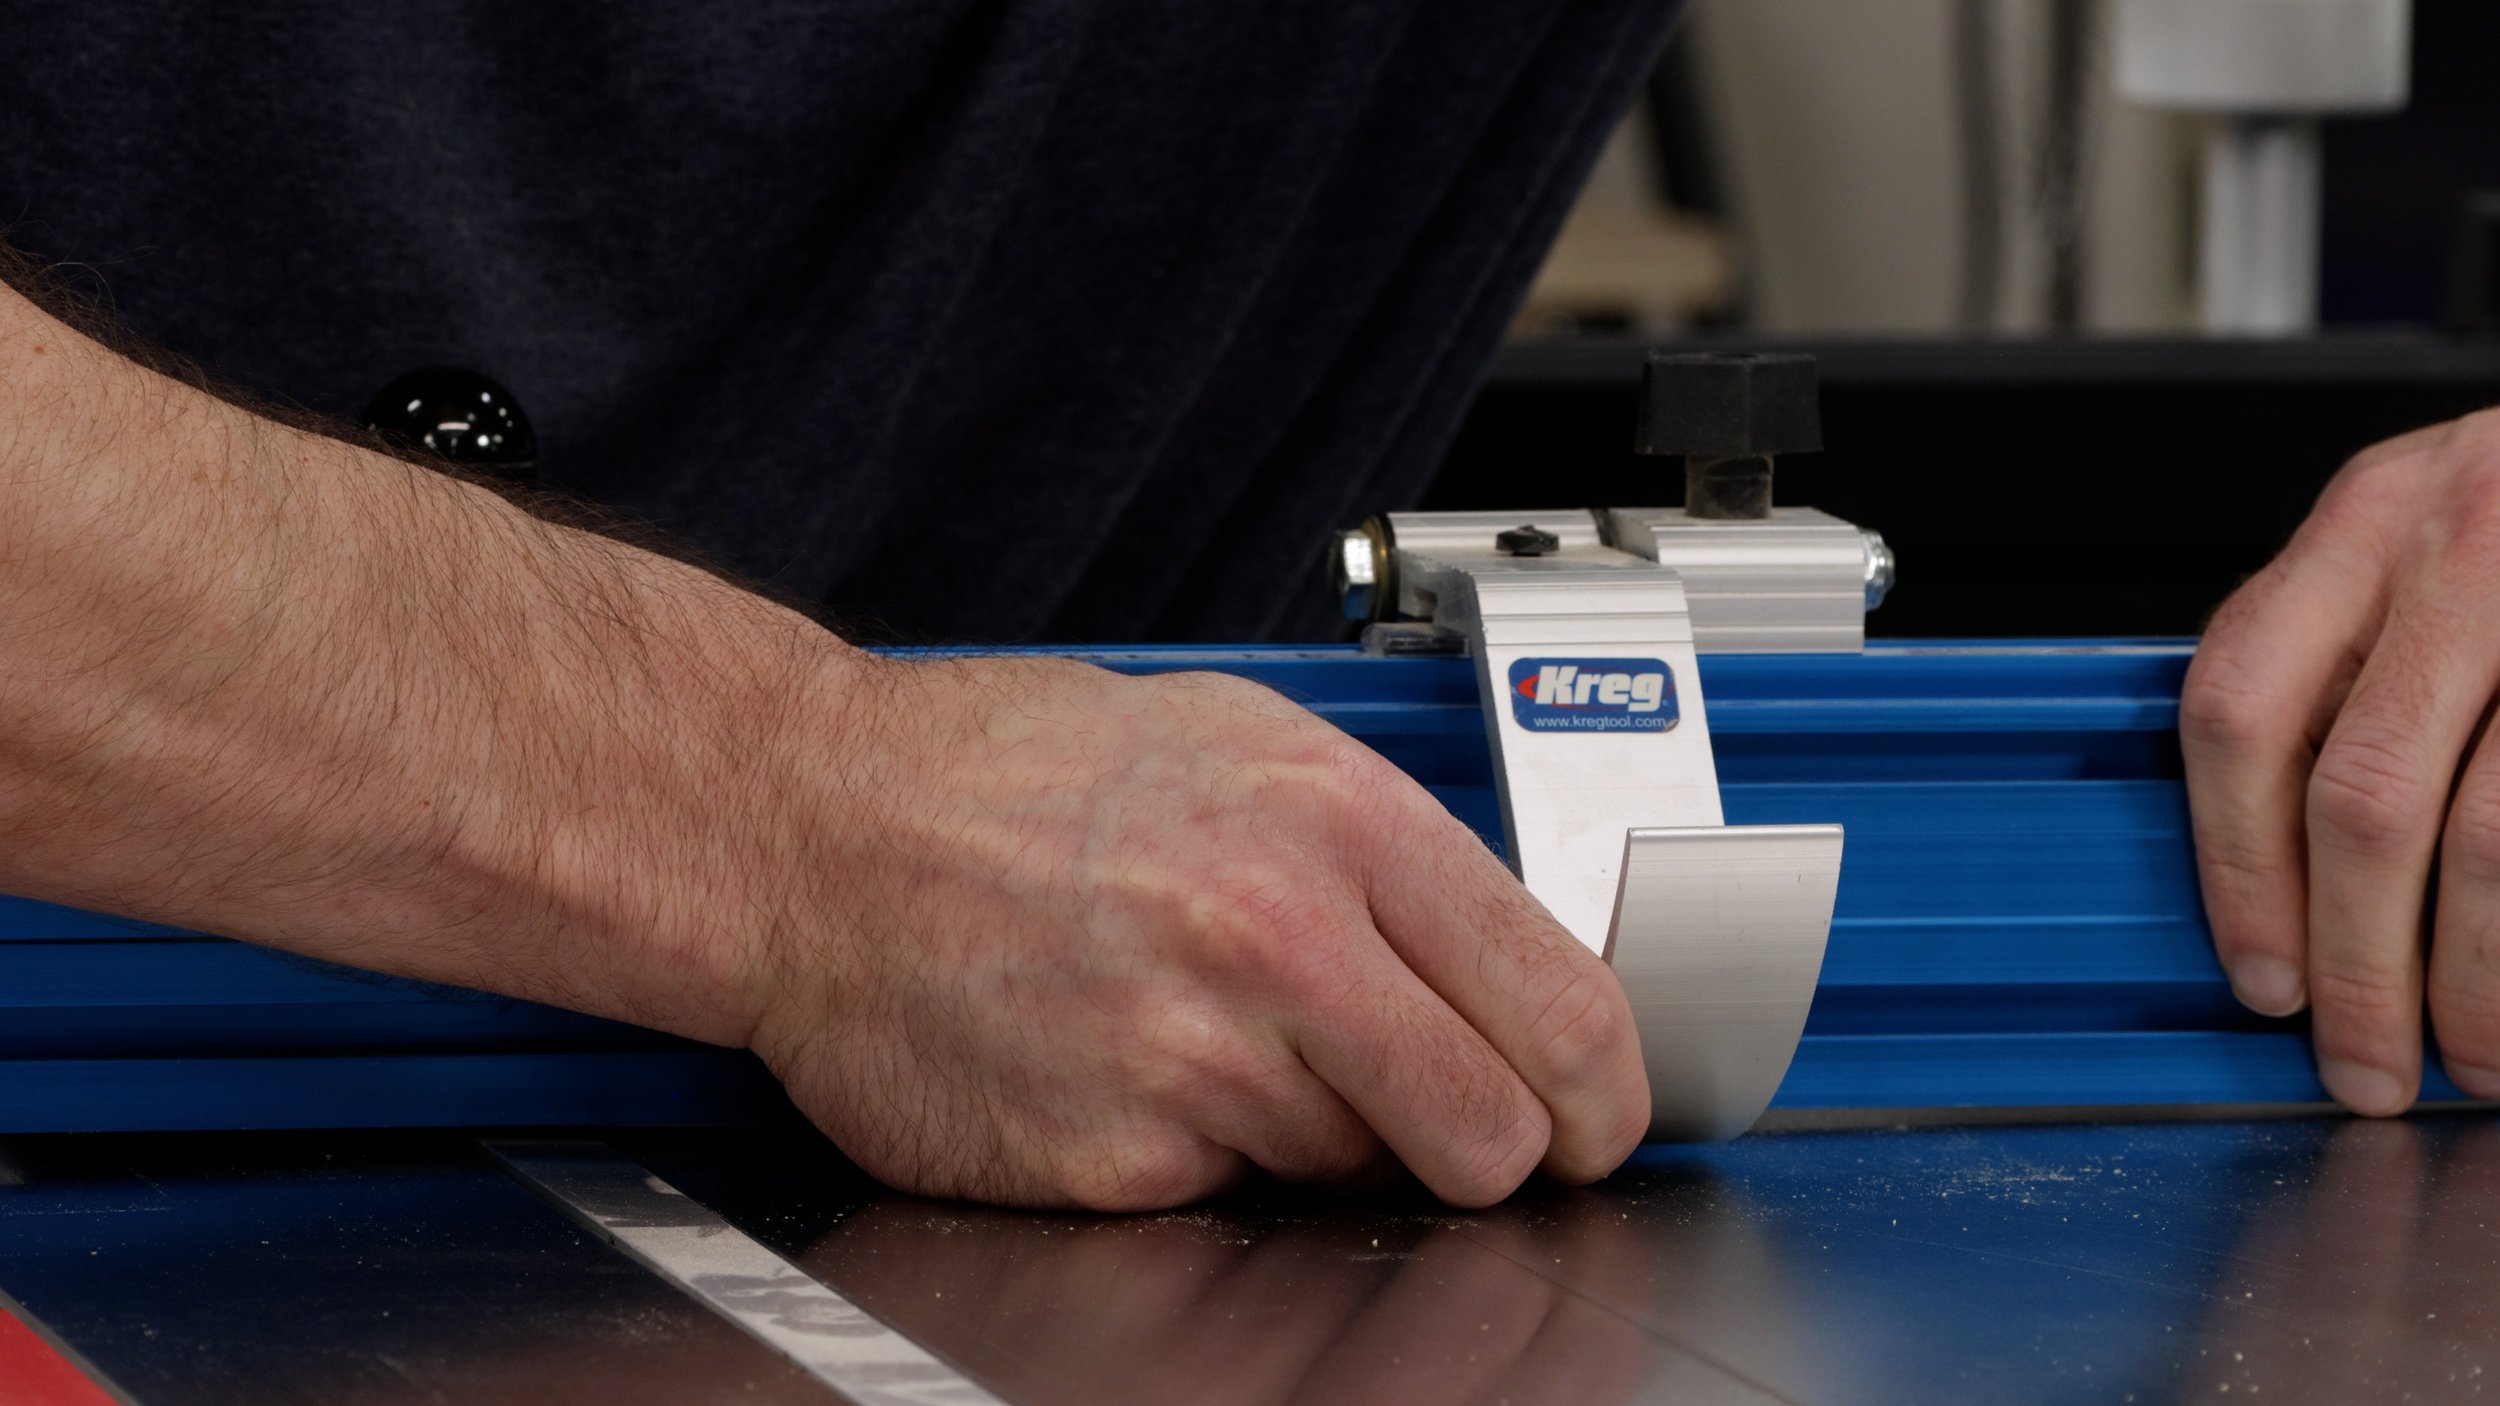
Slight sideways pressure causes deflection
I noticed that most miter gauge stop blocks have a lot of deflection. Push slightly on the side of your stop block and see how much it wiggles side-to-side. We have to butt our workpiece tightly to the stop block because we don’t want the board to slide forward, away from the block, as we’re cutting. We do not want deflection that will result in inaccurate cuts. Luckily, we can easily fix this!
How to Make a Shop-Made Miter Gauge Stop Block
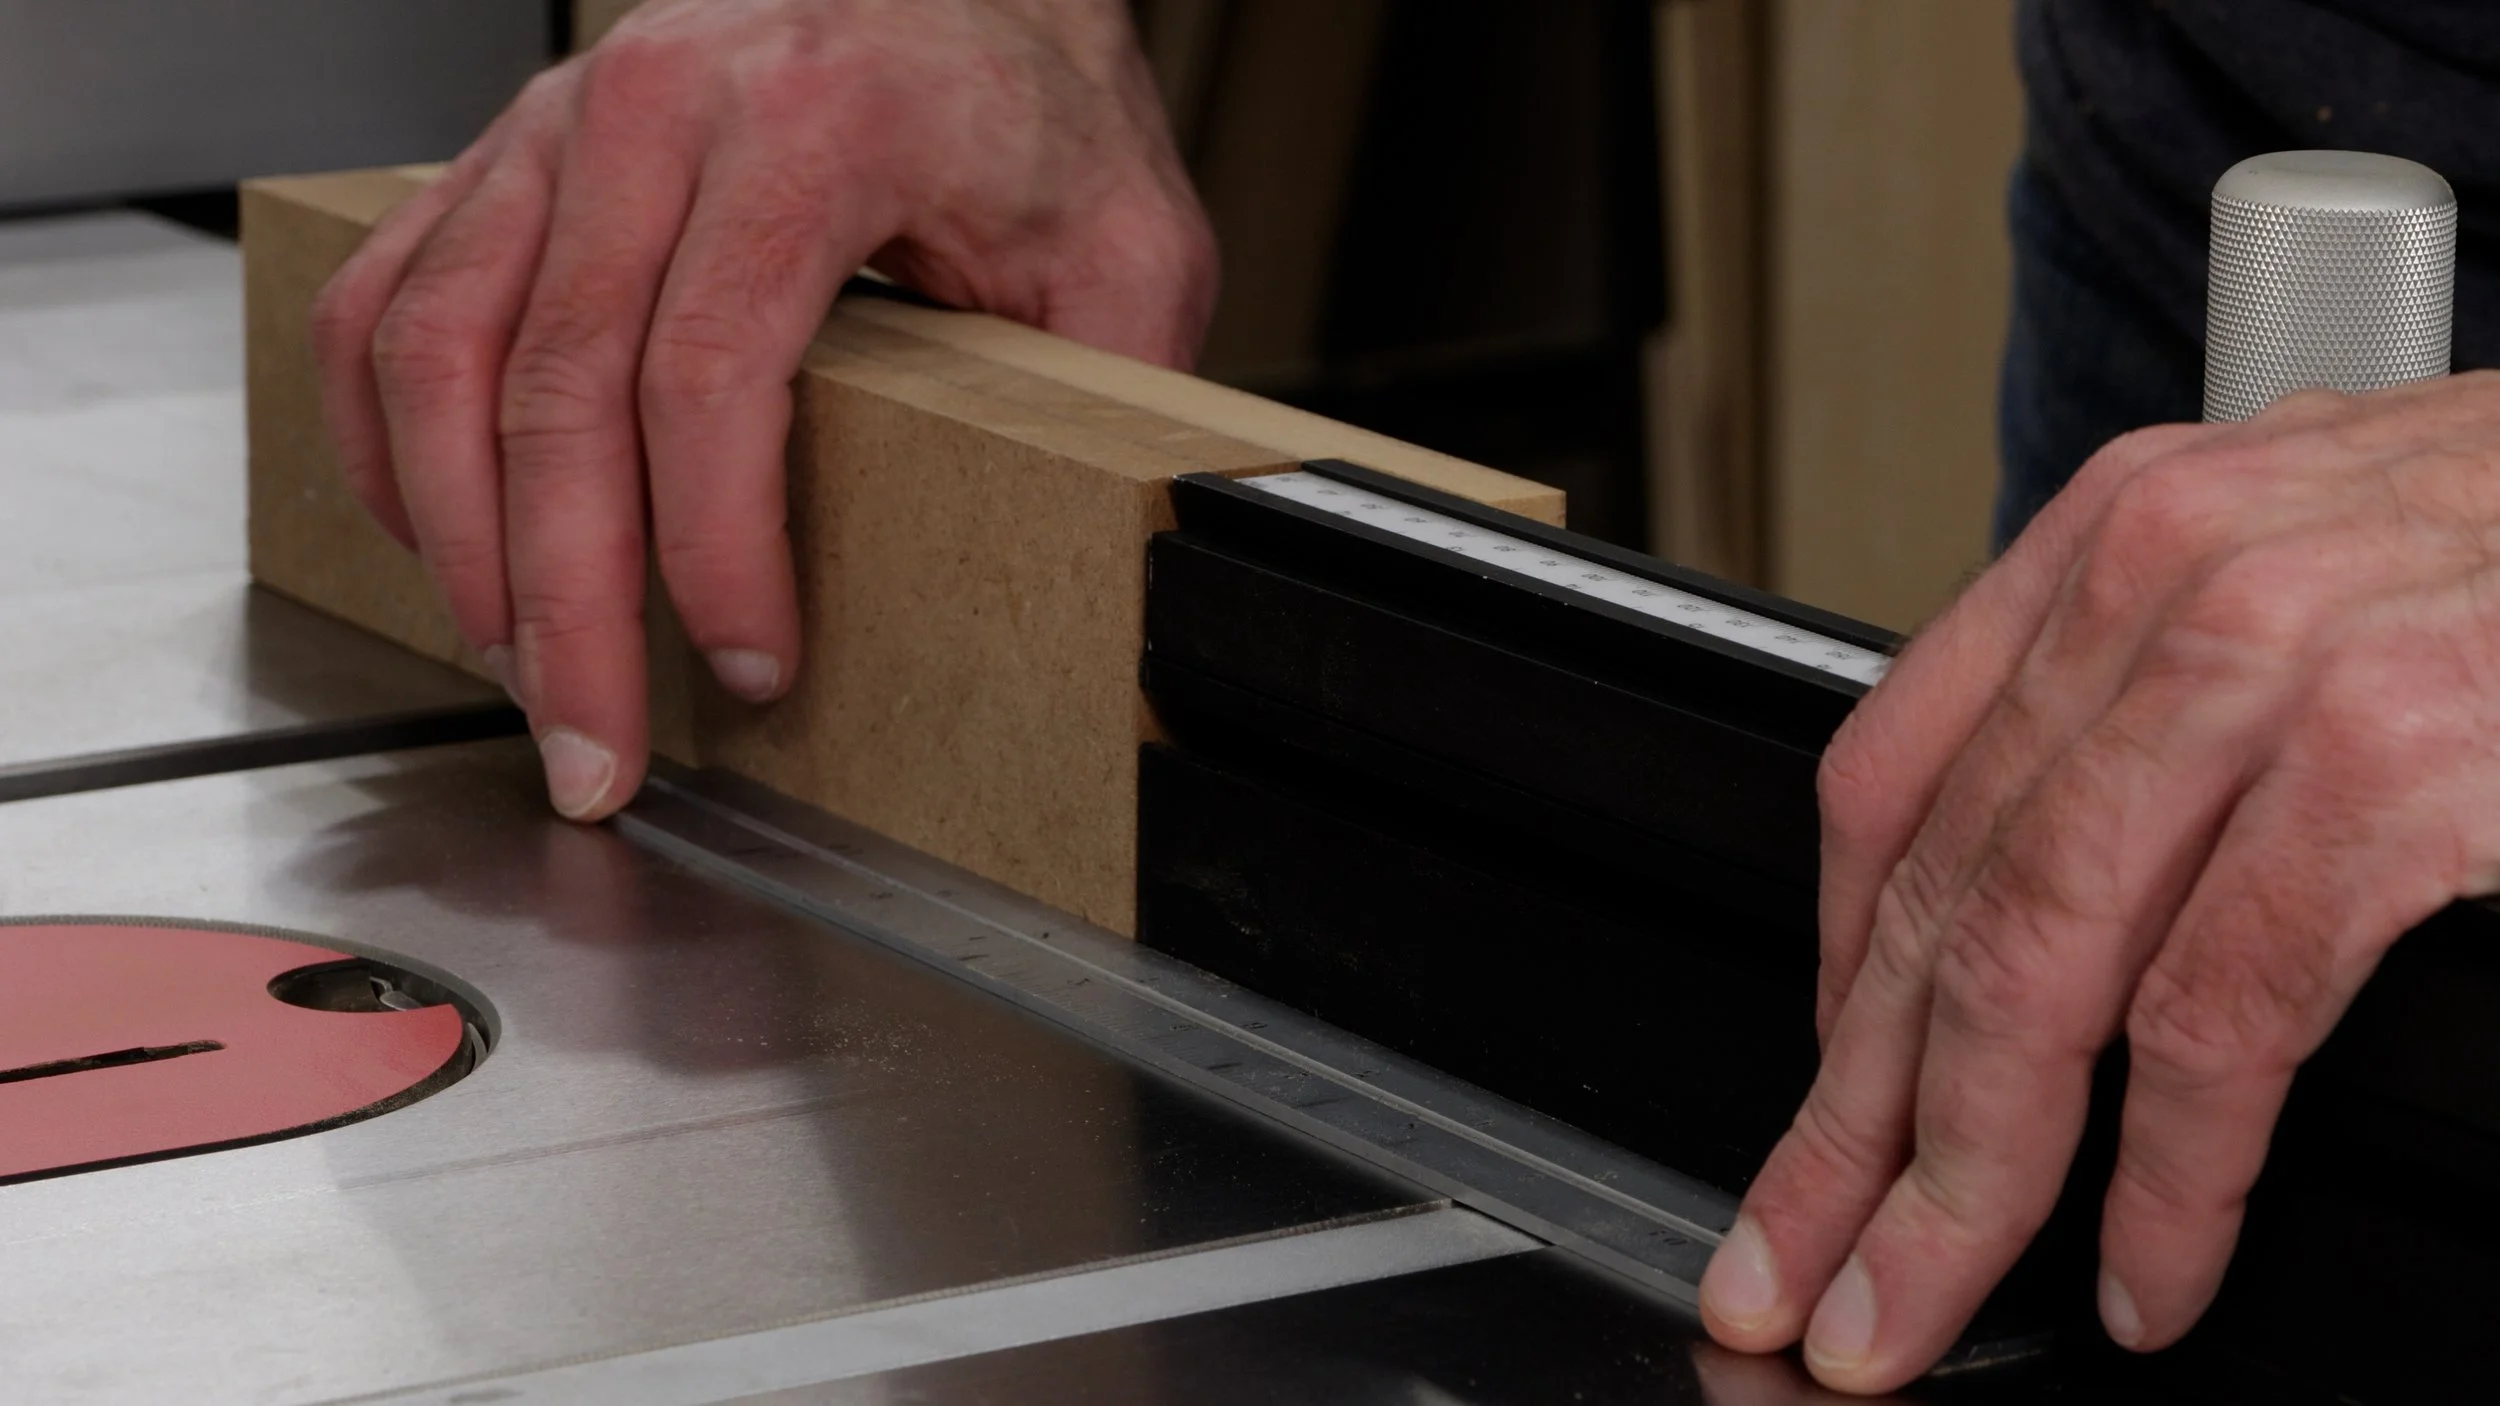
Cut a 2-3/4” long block from a piece of 3/4” thick plywood. The block needs to be at least as tall as your miter gauge fence. Drill two holes through the block so bolts can fit through the block and into the miter gauge slot. You can recess the holes if you’d like. Secure the stop block to the fence with two T nuts or hex nuts. Now, you have a secure stop block with NO deflection!
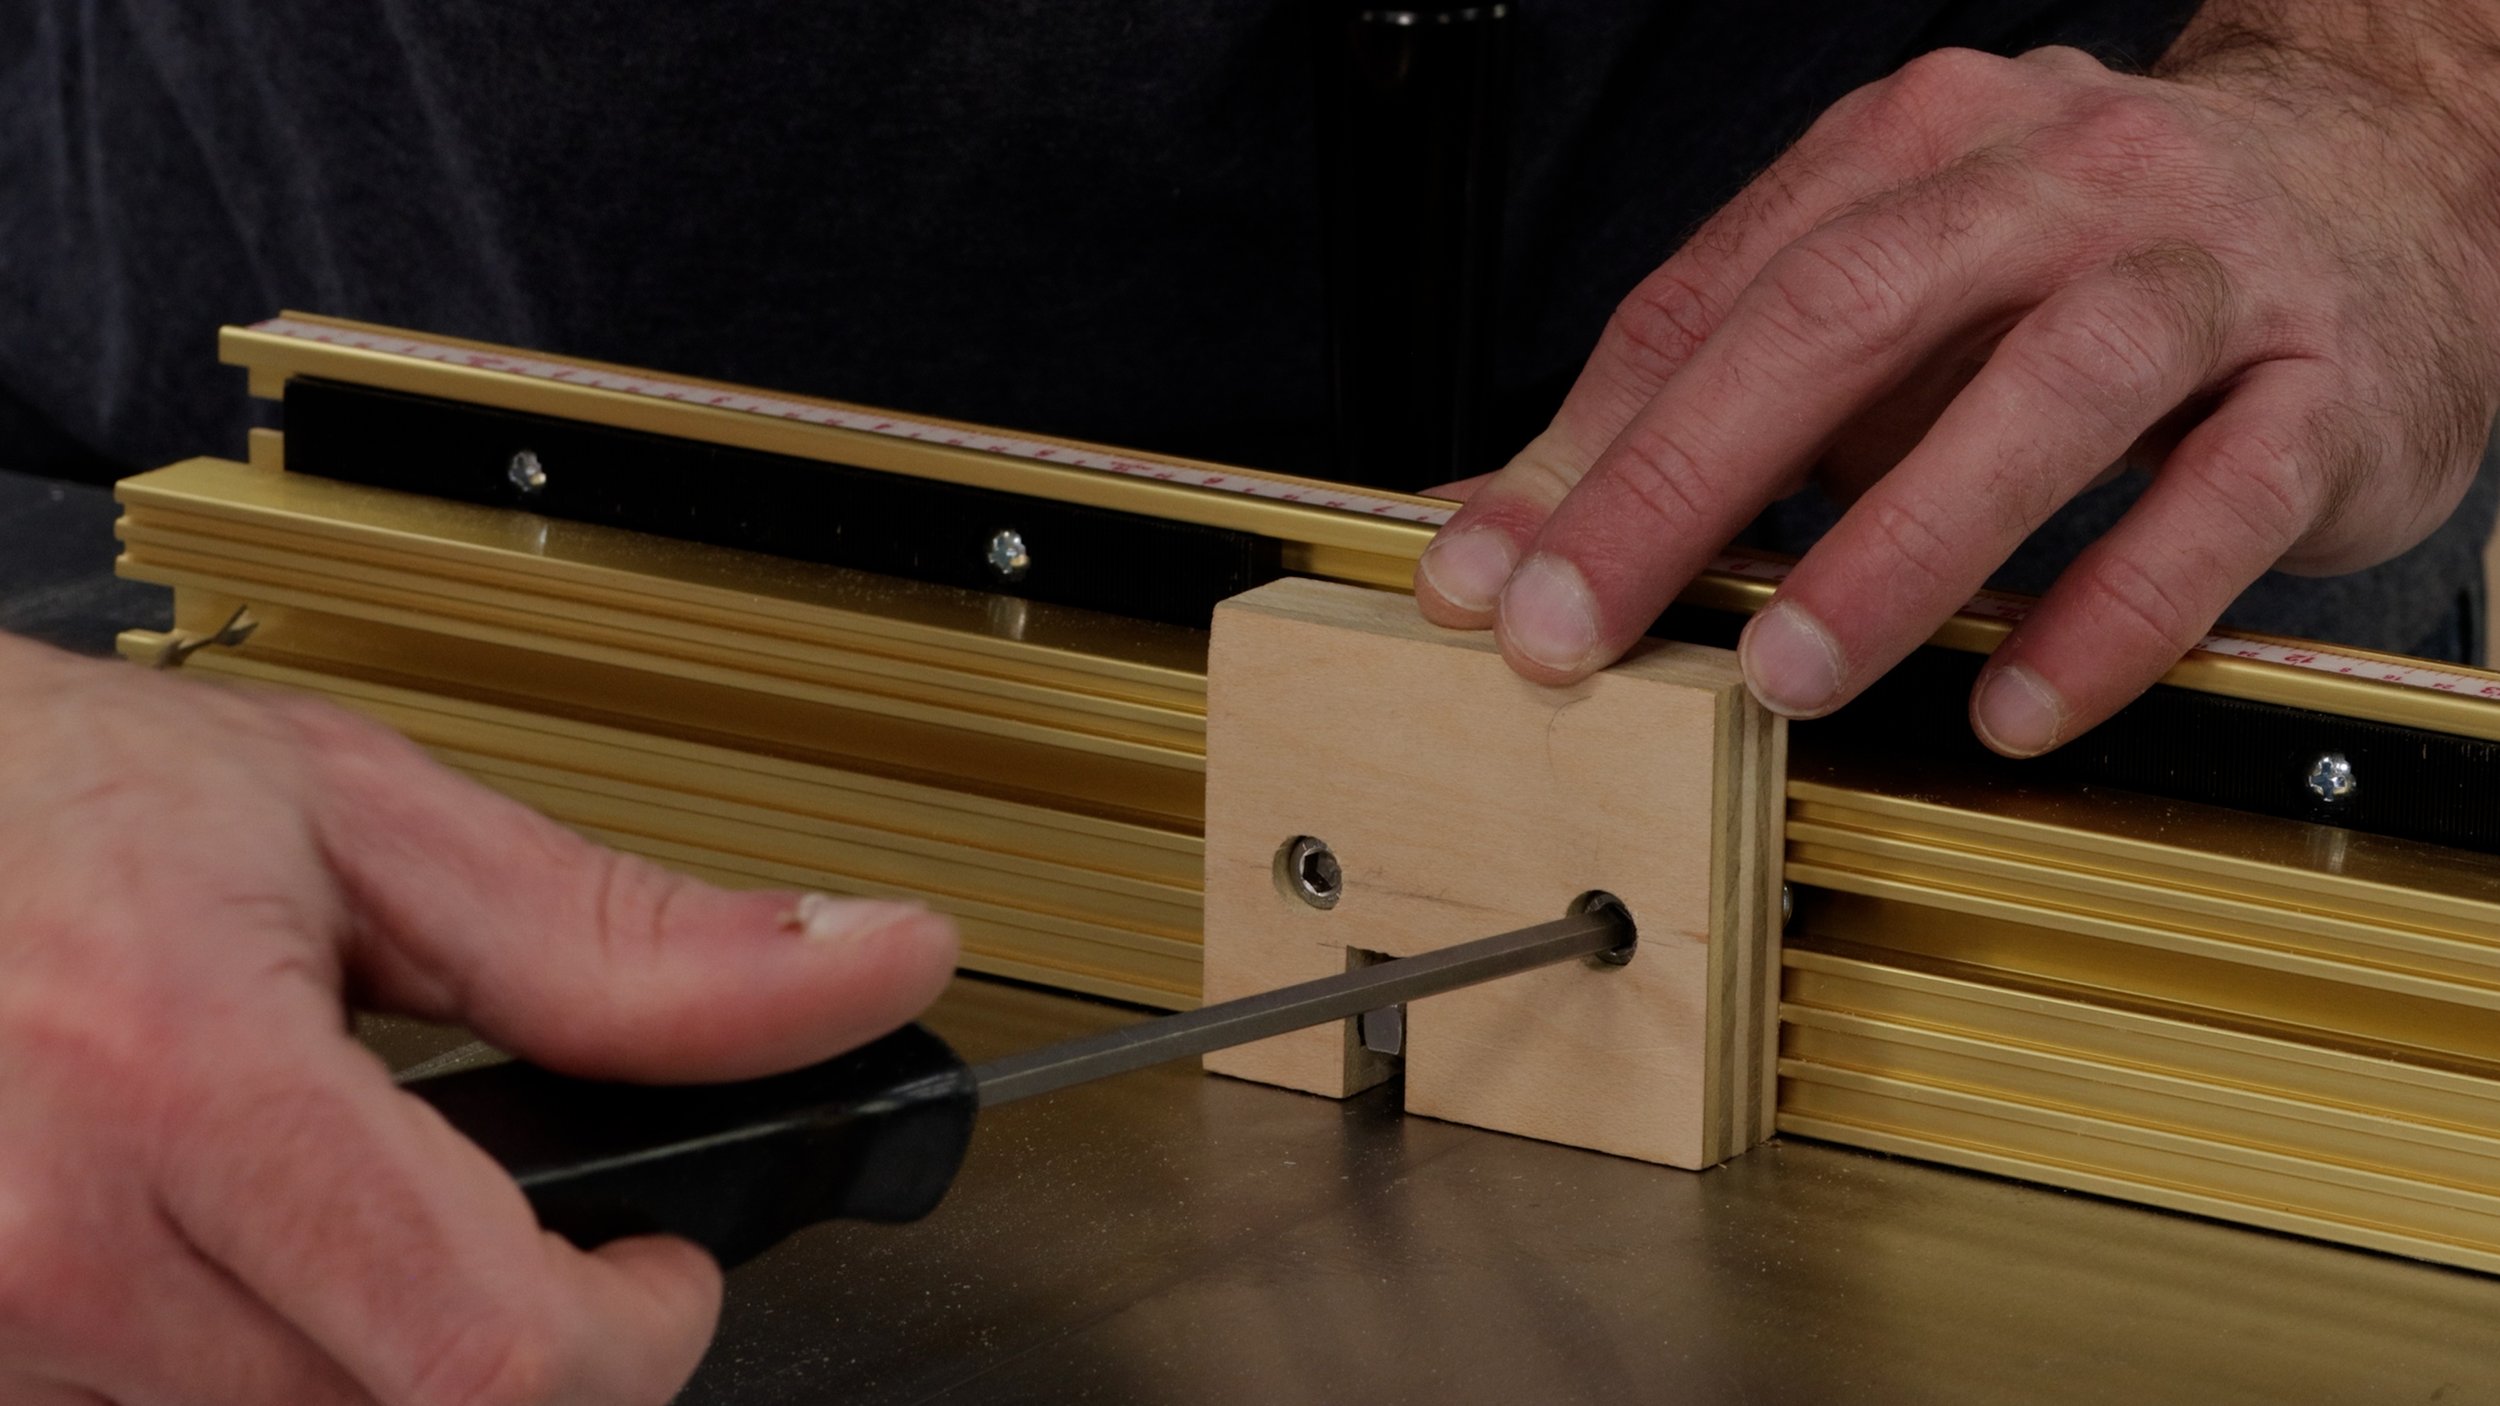
I made my stop block a little fancier by adding a micro adjuster. I drilled a hole in the front end of my stop block. The hole is deep enough to hide the head of the bolt. Then, in the center of the hole, I drilled a smaller hole for a threaded insert. In the center of that hole, I drilled a third hole that matches the diameter of the bolt. I cut a 1/2” wide x 1” tall slot in the block. Assembly is easy. Screw the threaded insert in the hole. Then, screw the bolt through the insert. Align the nut in the slot and thread it onto the bolt.

To use the adjuster, loosen the nut slightly and unscrew the bolt until it protrudes out the front end of the stop block. Tighten the nut to secure the bolt in place. Butt the workpiece against the bolt and make your cut. That easy!
Hopefully, these two modifications will help you to get perfect cuts with your miter gauge!