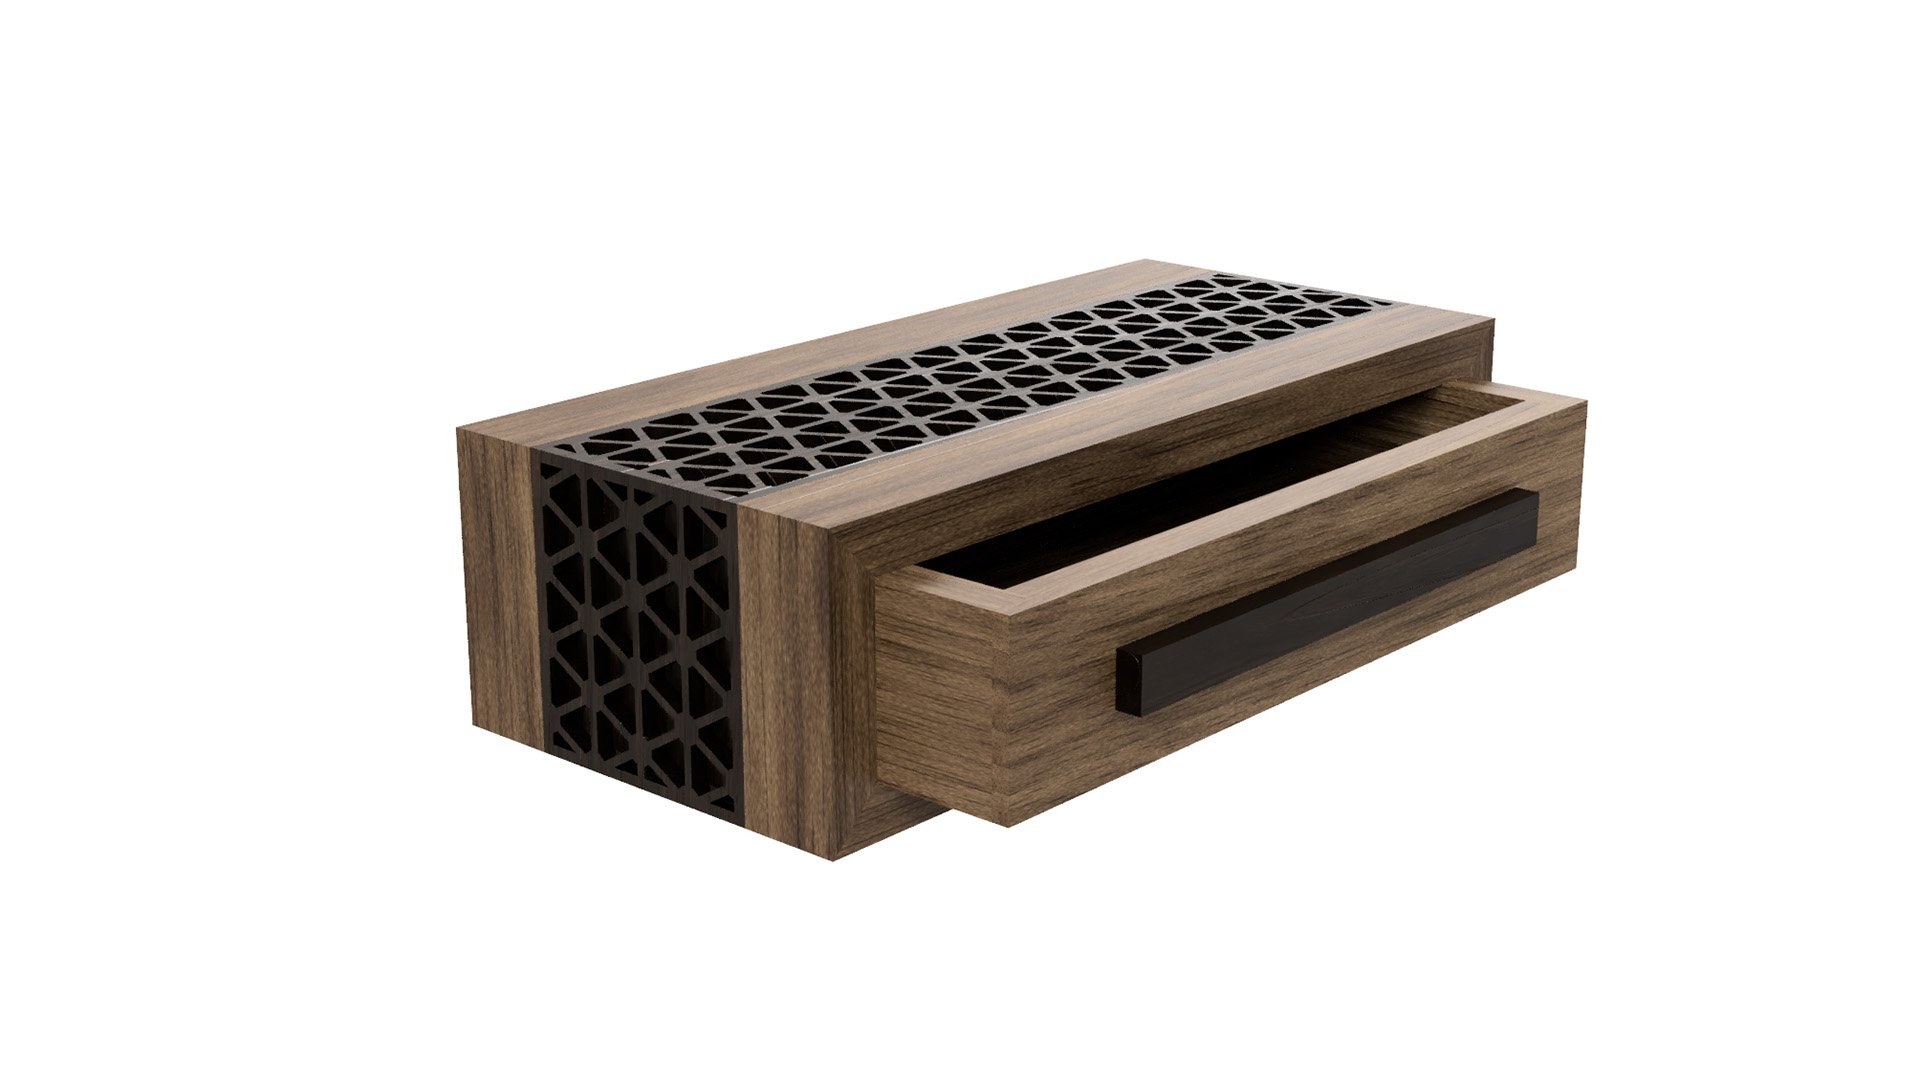
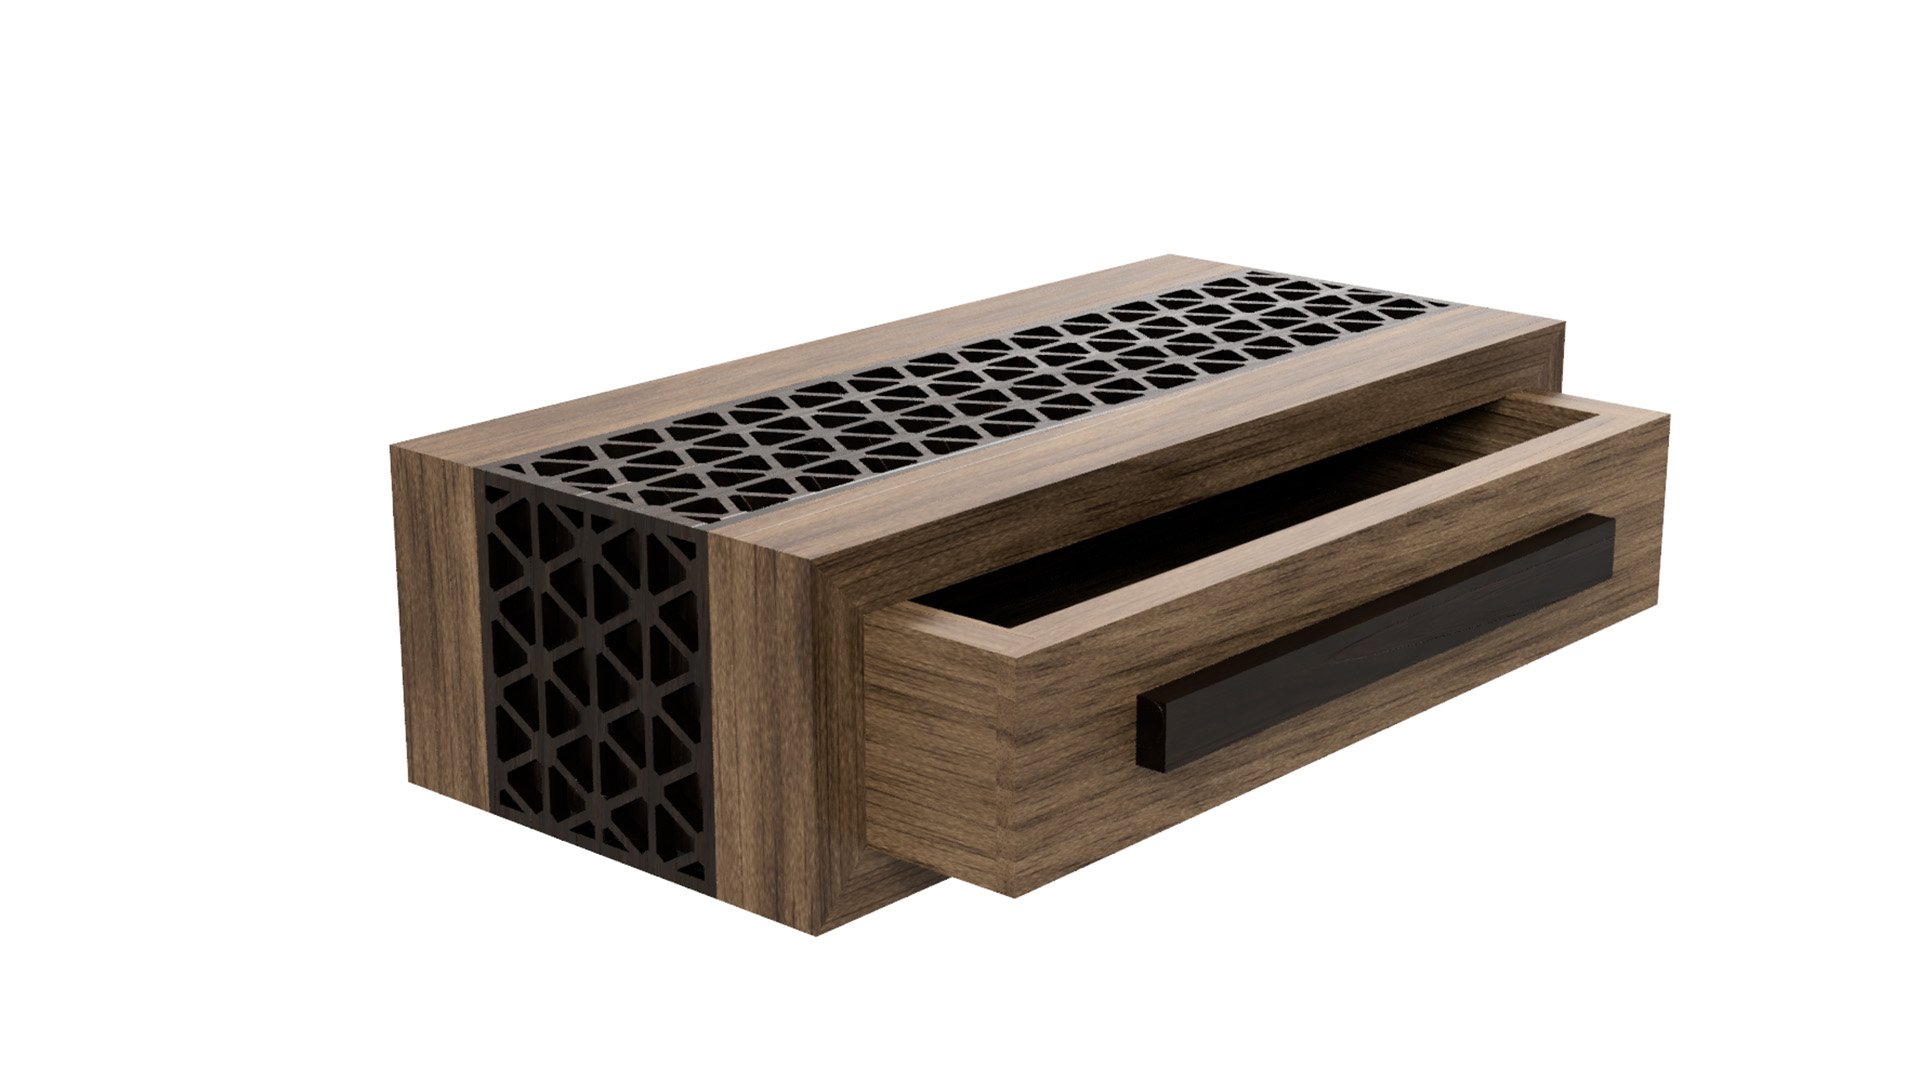
Inlay Box Making Class
This isn’t a random YouTube video showing how a box is made. The class consists of project plans, templates, and 8 self-paced videos specifically designed to help you succeed! We’ll walk you step-by-step through the project, provide guidance, explain techniques, and give recommendations.
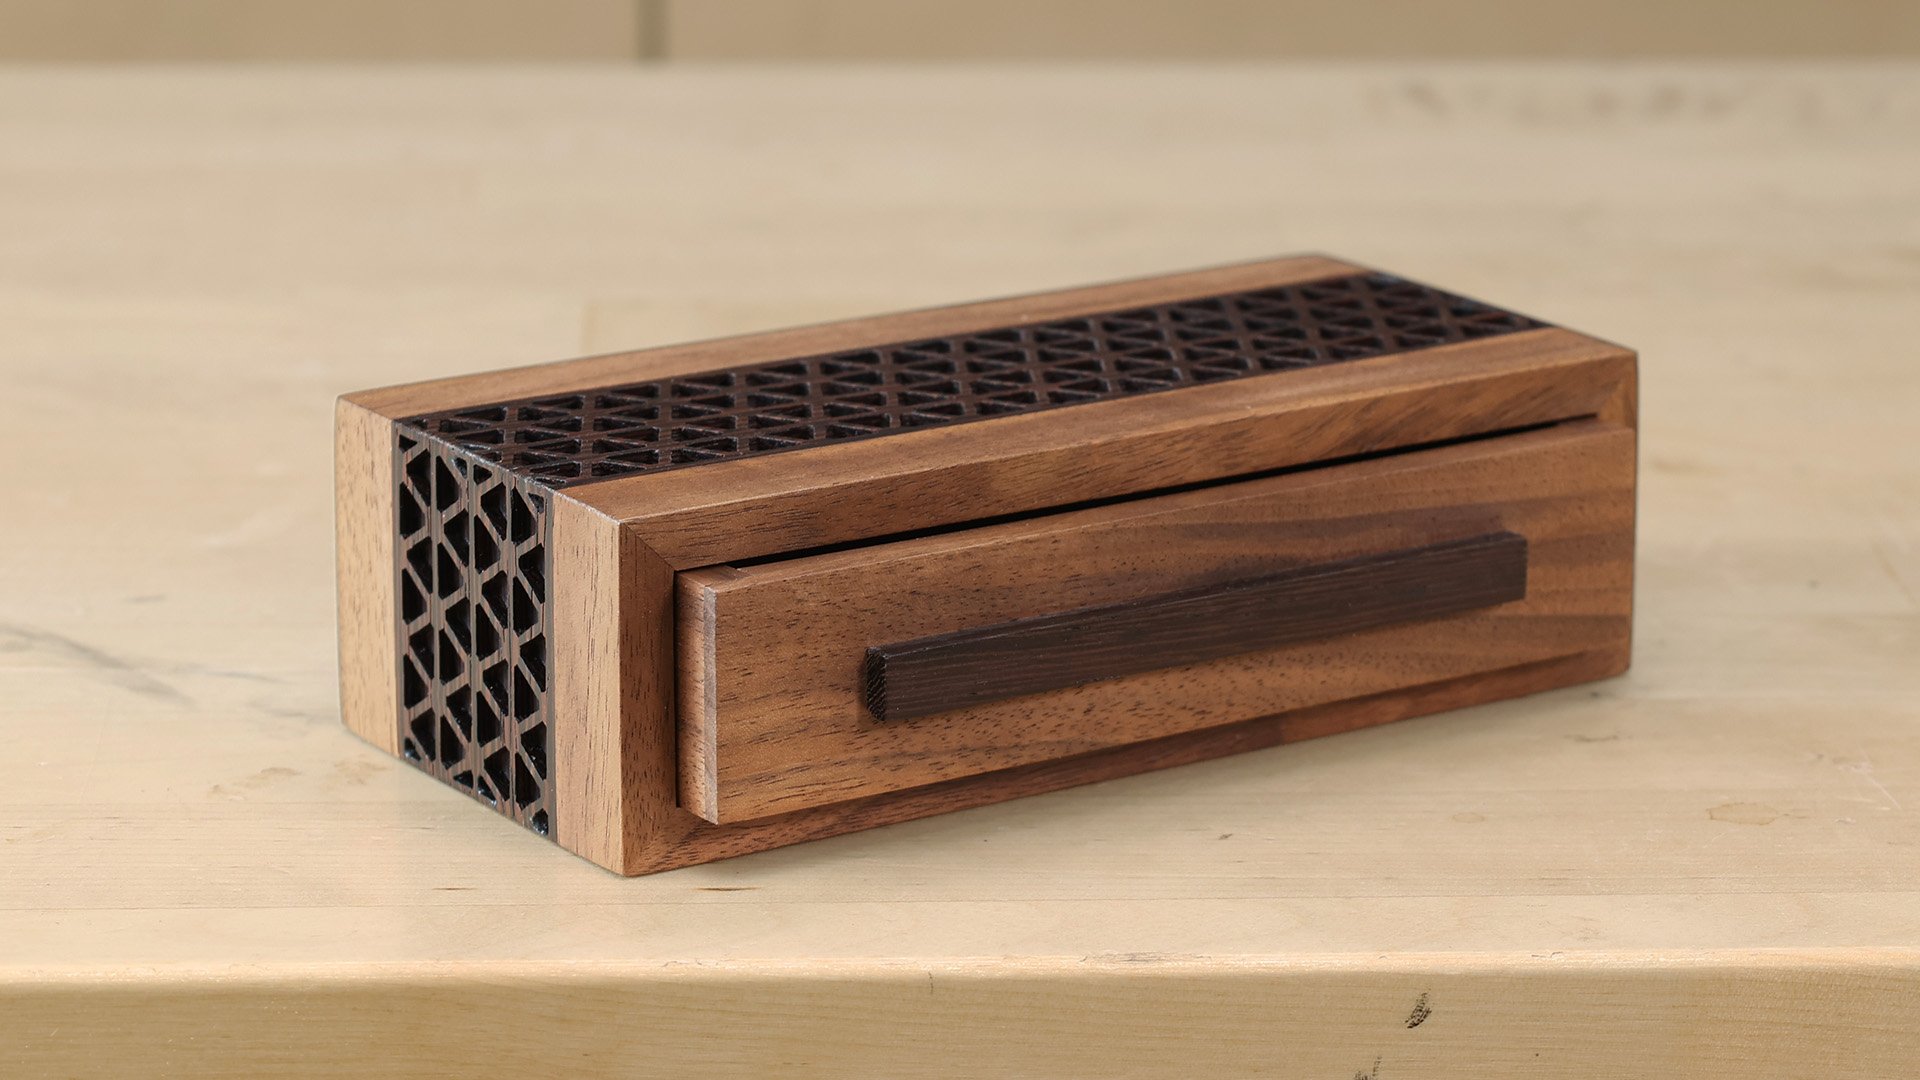
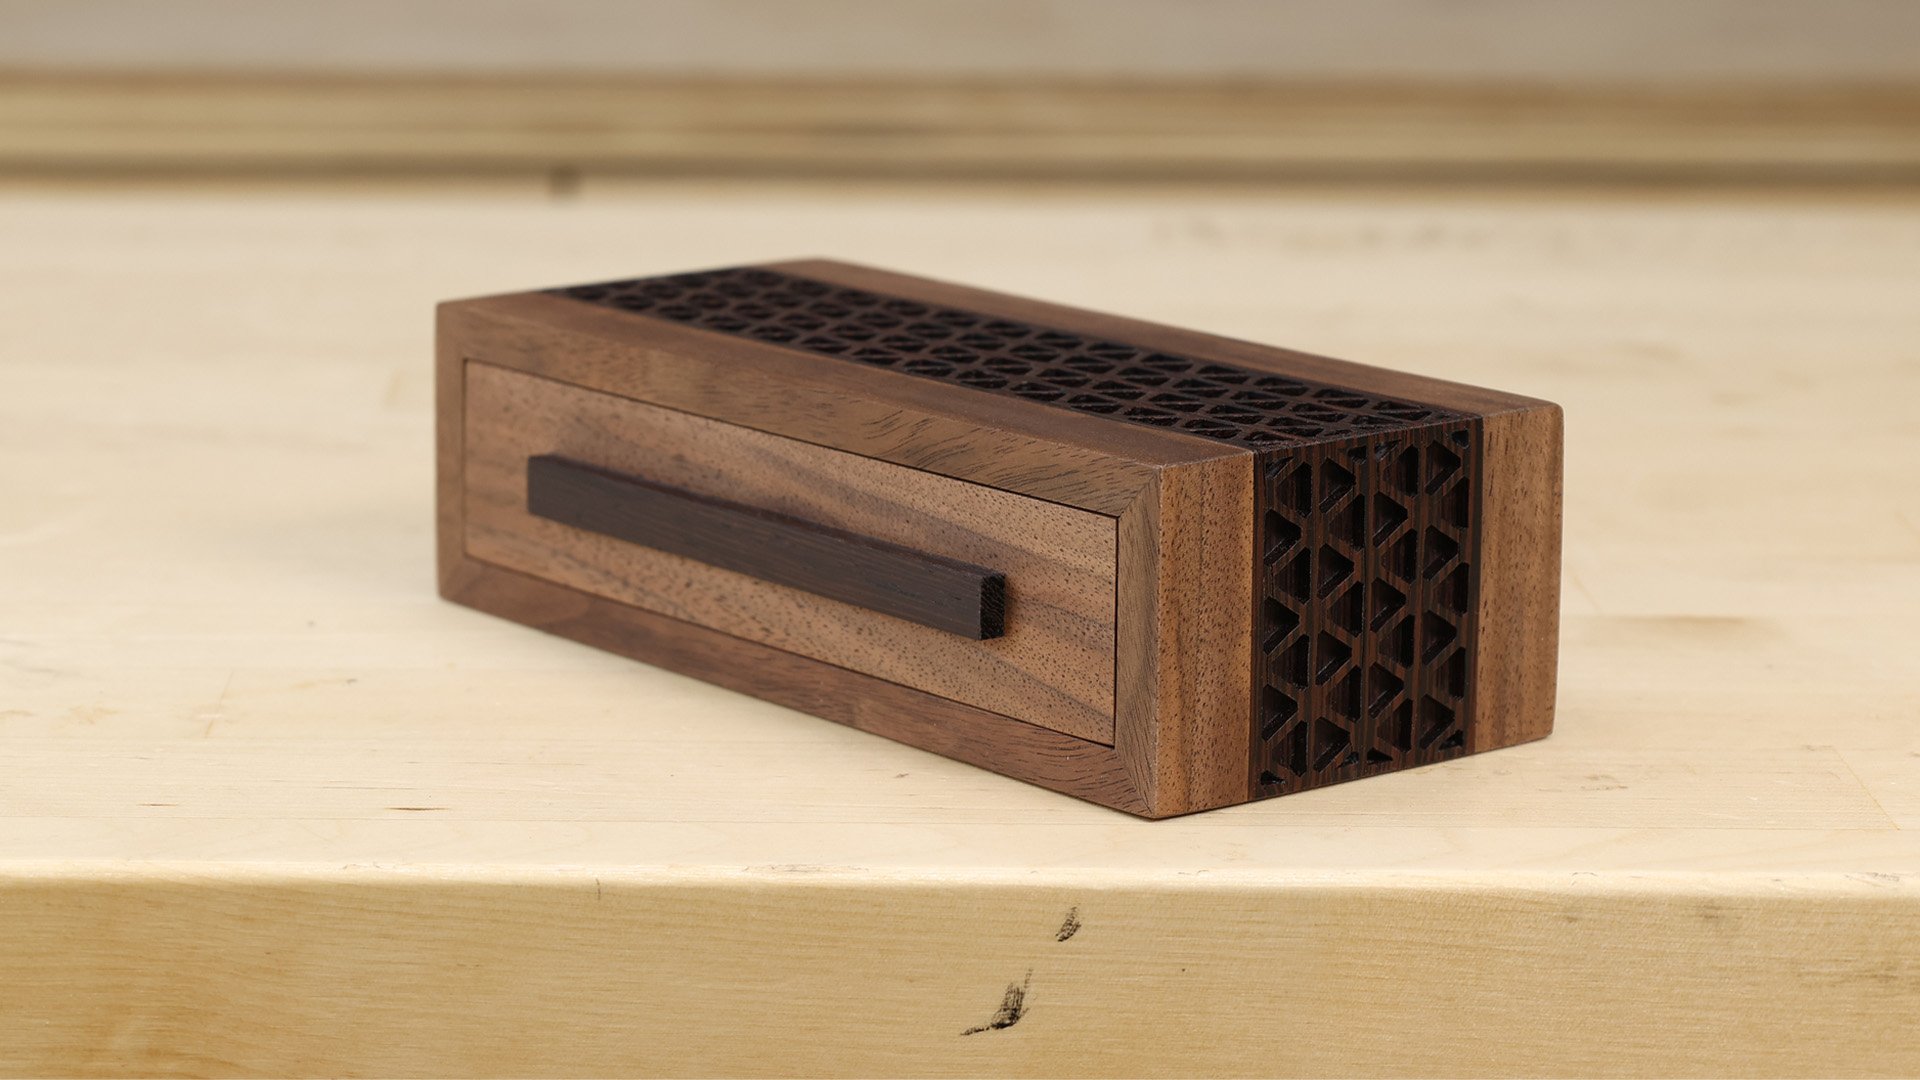
The box is approximately 2” tall x 3-1/2” wide x 7” long. Feel free to customize it to suit your needs!
Class Includes:
8 video lessons providing detailed instructions
3D animation showing components and assembly
Downloadable project plans & templates
Dimensions in both imperial and metric
Progress tracker for helping you to stay on course
Personalized support if you feel stuck or need assistance
Tools & Materials needed:
Two boards approximately 1-1/2” thick x 4” wide x 10” long
Table saw
Miter gauge
Scroll saw or fret saw
Sander & various sandpaper grits
Wood glue & clamps
Wood finish of choice
Decorative Inlay Box Making Class
Make a stunning wood box with wrap around grain and decorative inlay. Build along with the step-by-step videos. You can also download the project plans and inlay templates!
-
-
Inlay Box Project Overview
Gain a foundational understanding of the inlay box by learning the projects details, materials, and tools prior to cutting your first boards.
Gain a foundational understanding of the inlay box by learning the projects details, materials, and tools prior to cutting your first boards.
-
-
-
Create Wrap Around Grain
Few things scream quality craftsmanship like continuous grain that appears to wrap about a box. This video walks you step-by-step through the process.
Few things scream quality craftsmanship like continuous grain that appears to wrap about a box. This video walks you step-by-step through the process.
-
-
-
Cutting Decorative Inlay
You will learn how to make the complex pattern I designed for the project, but also skills that can be applied towards your own custom design. Download the pattern templates and follow along.
You will learn how to make the complex pattern I designed for the project, but also skills that can be applied towards your own custom design. Download the pattern templates and follow along.
-
Inlay the Box Components
Learn how to inlay a decorative pattern into the box components. This lesson shows how to account for important details that could be easily overlooked. At the end, your wood box parts should be beautiful and ready for joinery!
Learn how to inlay a decorative pattern into the box components. This lesson shows how to account for important details that could be easily overlooked. At the end, your wood box parts should be beautiful and ready for joinery!
-
-
-
Box Joinery
You will turn two boards into four box sides. Learn how to tackle project components with miters along multiple ends and edges. We will discuss tricks to protect delicate workpieces. At the end of this lesson, you should have a fully glued-together box!
You will turn two boards into four box sides. Learn how to tackle project components with miters along multiple ends and edges. We will discuss tricks to protect delicate workpieces. At the end of this lesson, you should have a fully glued-together box!
-
-
-
Make a Box Drawer
Follow step-by-step how to make a box drawer. You will learn how to lay out joinery, cut parts to size, and create a proper drawer bottom. The skills learned in this lesson can be applied to many future projects along your woodworking journey.
Follow step-by-step how to make a box drawer. You will learn how to lay out joinery, cut parts to size, and create a proper drawer bottom. The skills learned in this lesson can be applied to many future projects along your woodworking journey.
-
-
-
Drawer Fit & Finish
This lesson is critical, yet satisfying. You will fine tune the fit of the drawer so it fits perfectly in the box. Then, you’ll learn how to add a drawer handle, as well as some helpful tips when you could benefit from having extra hands!
This lesson is critical, yet satisfying. You will fine tune the fit of the drawer so it fits perfectly in the box. Then, you’ll learn how to add a drawer handle, as well as some helpful tips when you could benefit from having extra hands!
-
-
-
Reaching the Finish
In the final lesson, we’ll talk about completing the final touches necessary to prepare the wood box for finish. You will see my preferred choice of finish for the project, how I apply it, and the critical steps afterwards to give the box a buttery smooth feel.
In the final lesson, we’ll talk about completing the final touches necessary to prepare the wood box for finish. You will see my preferred choice of finish for the project, how I apply it, and the critical steps afterwards to give the box a buttery smooth feel.
-
Decorative Inlay Box Project Plans
Want to maximize your success by getting even more project information? Download the project plans in each course lesson.

Beautiful Inlay Template
Customize this project with your own decorative inlay or download the pattern shown in the course. Templates are available in the course lessons.
Frequently Asked Questions
-
Woodworking plans rely on typed words and pictures. There is a lot of room for error. In this class, you’ll get downloadable woodworking plans, plus self-paced instructional videos allowing you to build along with each step.
-
Skill level is subjective. Some people pick certain skills up quickly. This course assumes that you know how to perform basic functions such as safely cutting boards on a table saw. All other steps on how to make the project are explained in the video.
-
When it comes to woodworking, there is always more than one way to do something. In the video, you will see certain tools and techniques used. That does not mean you have to use these. This class uses a planer, jointer, table saw, miter gauge, band saw, scroll saw, and sander. If you have an alternative tool that works best for you then that’s great!
If you do not have a planer or jointer, you will have to find pre-milled material. Sometimes, lumber dealers offer milling services for a fee.
-
The project only takes a couple small pieces of lumber. You’ll need at least one 1-1/2” thick x 10” long board. The rest can be made using scraps and offcuts, if you have them. A list of the exact materials is provided during each step.
-
The goal in this course is to teach you how to make the project so you walk away with a beautiful keepsake box. If you have questions or are confused about certain aspects then contact us via email so we can help get you back on track!
-
Absolutely! You will see us make the box out of walnut and wenge. This project can be made from just about any hard wood species. Don’t want to make the inlay? Skip it! You can use your favorite finishing method, or even paint it if you want to!
Please know, if you choose to make your project a different size we cannot help you to redesign it. You will be responsible for any modifications you want to make.
-
Nope! Once you purchase the course you can access the videos as many times as you want for as long as you want. This allows you to work at your own pace.
-
Unfortunately, no. Once you have access to watch the videos it is impossible to return the amazing knowledge you’ve gained! But we’re confident that you will love the lesson plan and can apply the skills learned to another project in the future.